
Creating a New Reservation
How-To Video:
Instructions:
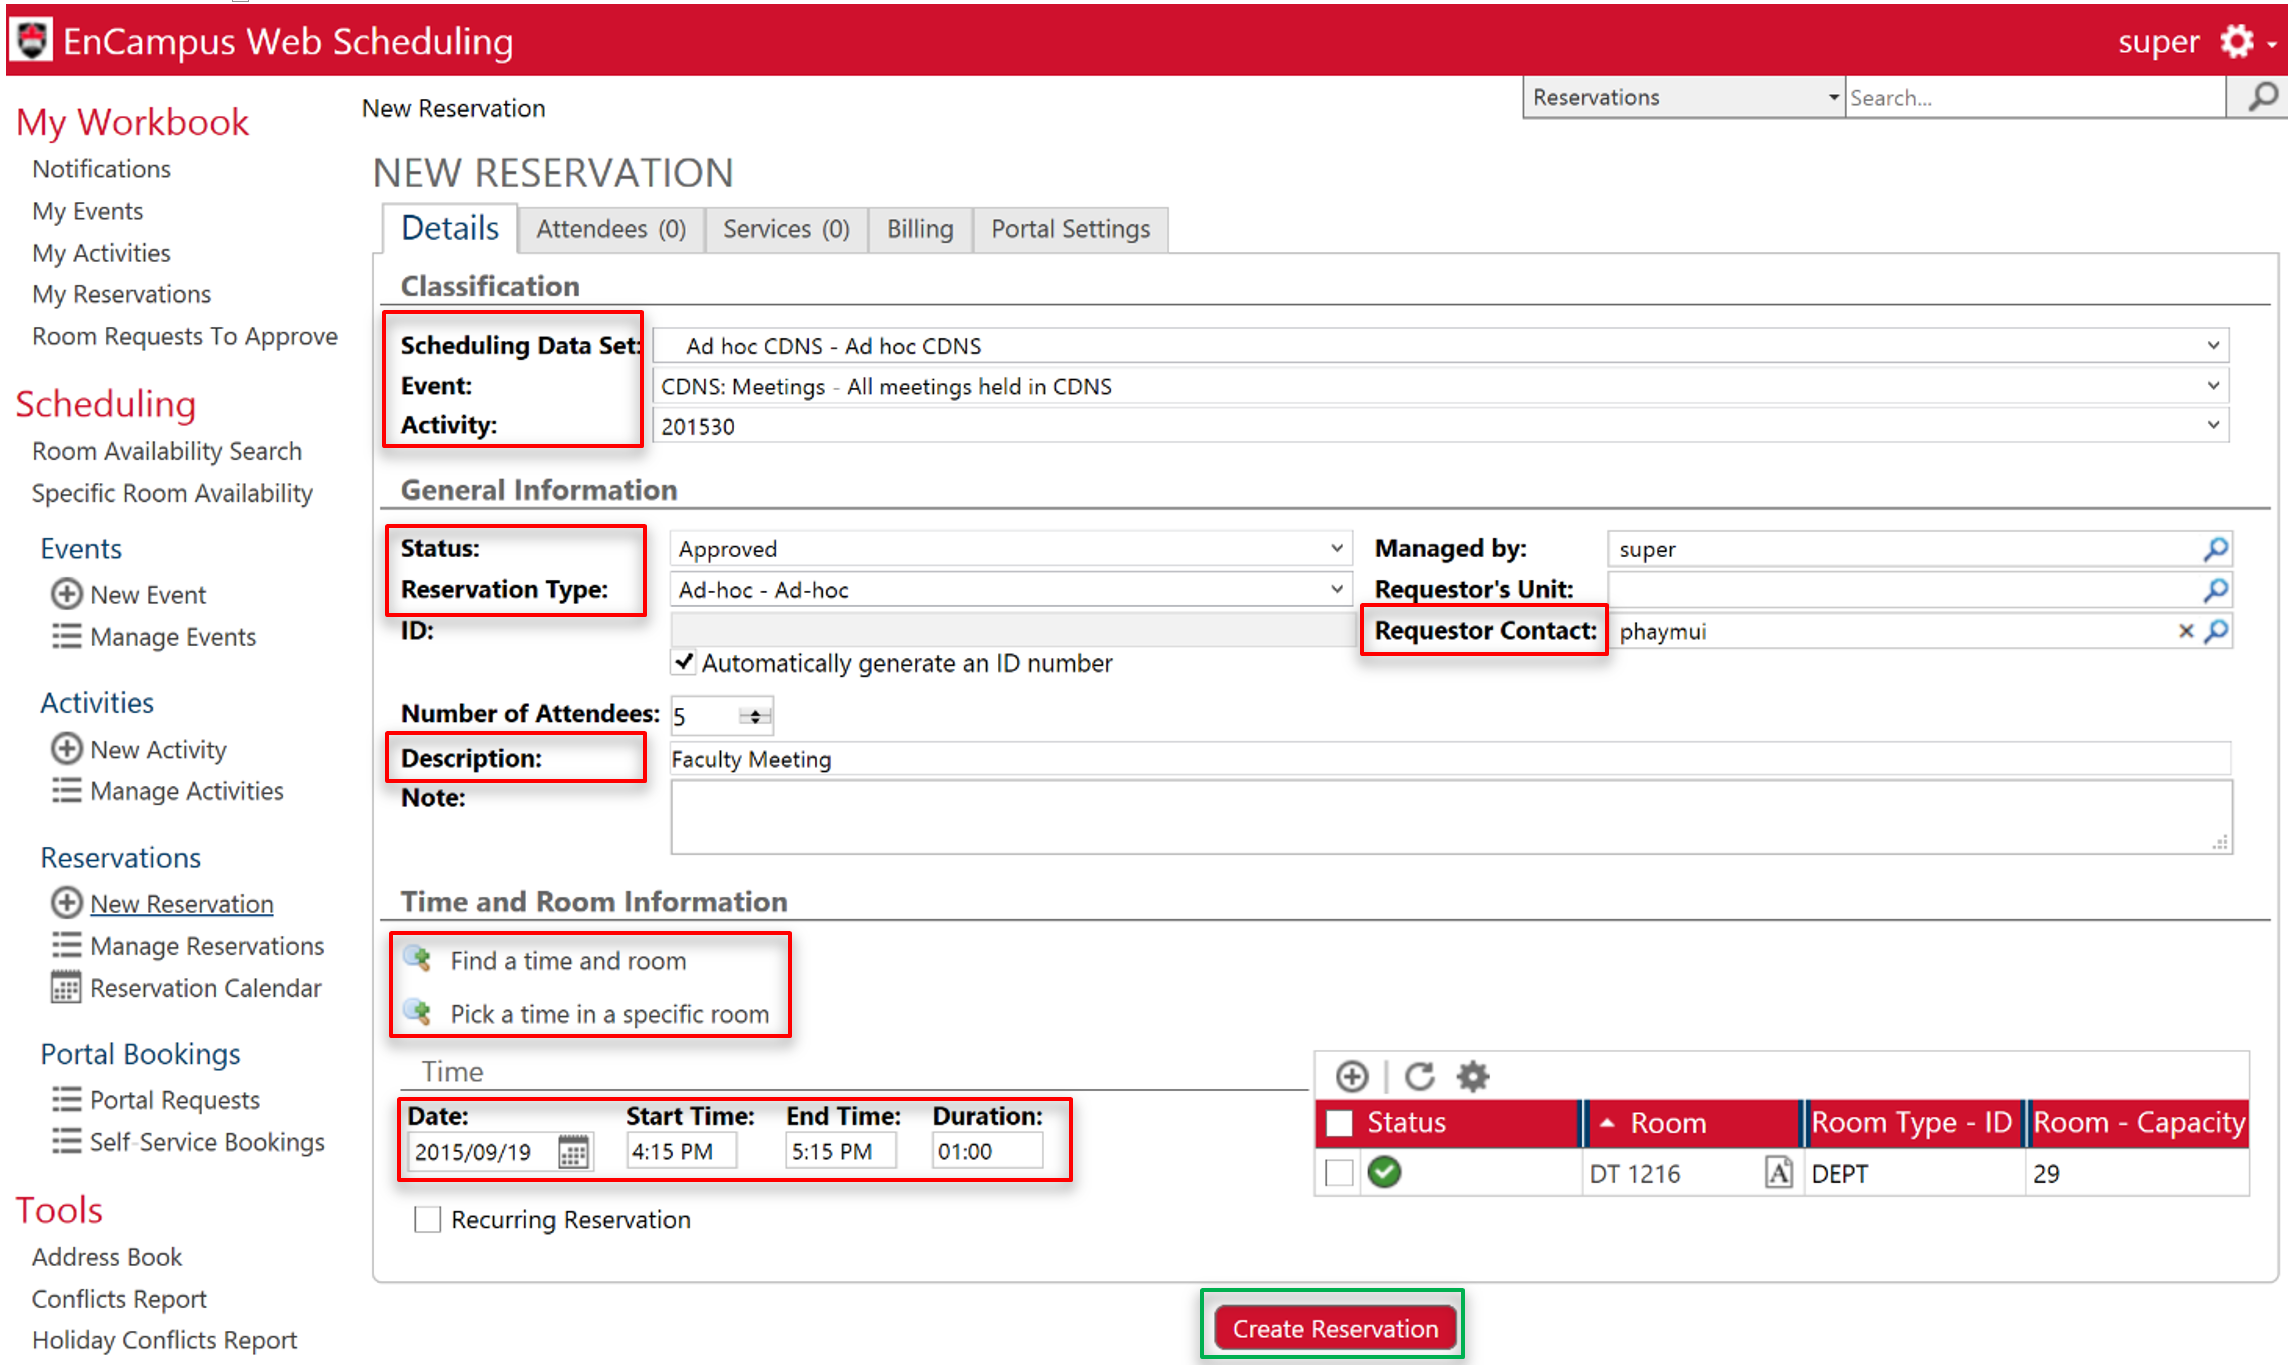
- Under Reservations, click or tap on New Reservation. The reservation page should open.
-
- Scheduling Data Set: Make sure that your department appears [e.g. Ad hoc CDNS – Ad hoc CDNS]
- Event: Choose the event [e.g. CDNS: Meetings]
- Activity: Choose the activity [e.g. 201530]
- Status: You have 3 choices:
- To approve the request, select Approved
- To refuse the request, select Refused
- To cancel the request, select Cancelled
- Reservation Type: Select Ad-hoc – Ad-hoc. Advanced users may select another category.
- Description: Enter the description of the reservation [e.g. Faculty Meeting]
- Requestor Contact: Click on the
 , then search for the requestor Lastname.
- Note: “Address Book – Academic” generally contains all students, and “Address Book – Ancillary” generally contains all the staff.
- Under Time and Room Information as shown in the figure above, click on “Find a time and room” or “Pick a time in a specific room”
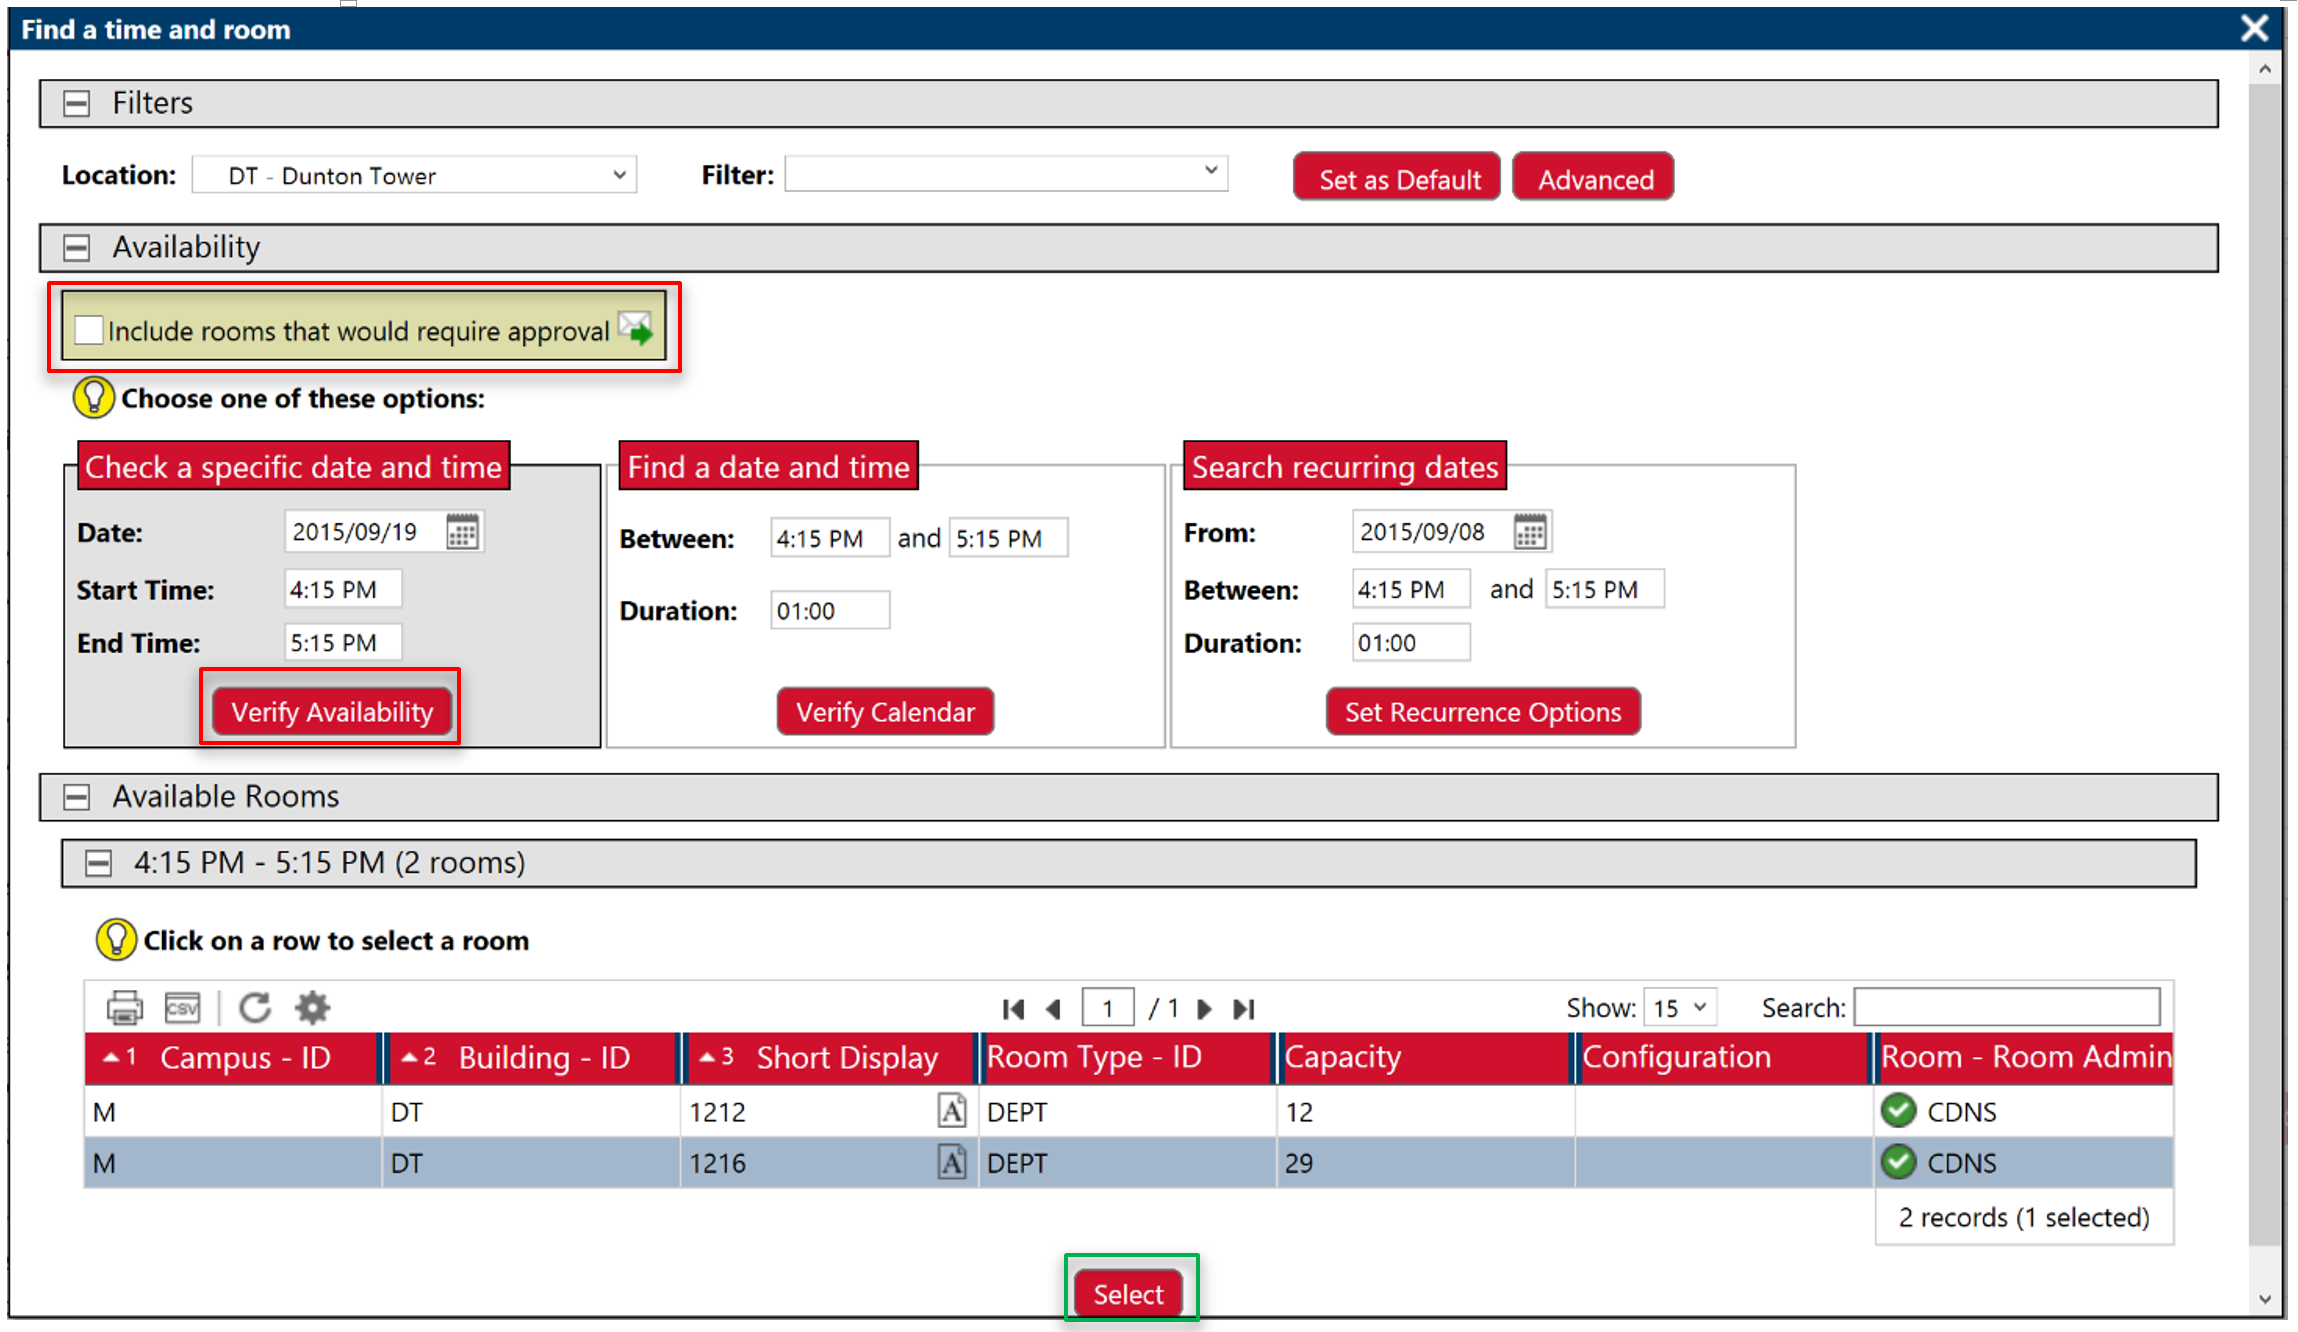
- You see only space you administer by default. If you wish to request space in another department’s room, put a checkmark in “Include rooms that would require approval”.
- Click on Verify Availability to find rooms.
- Click on your selected room and click on Select
The selected room details will automatically be added to the reservation. Click or tap Create Reservation and the reservation is confirmed.