Approving Portal Requests
How-To Video:
5-Approving Portal Requests
Instructions:
- On the left side menu, Under Portal Bookings, click or tap Portal Requests
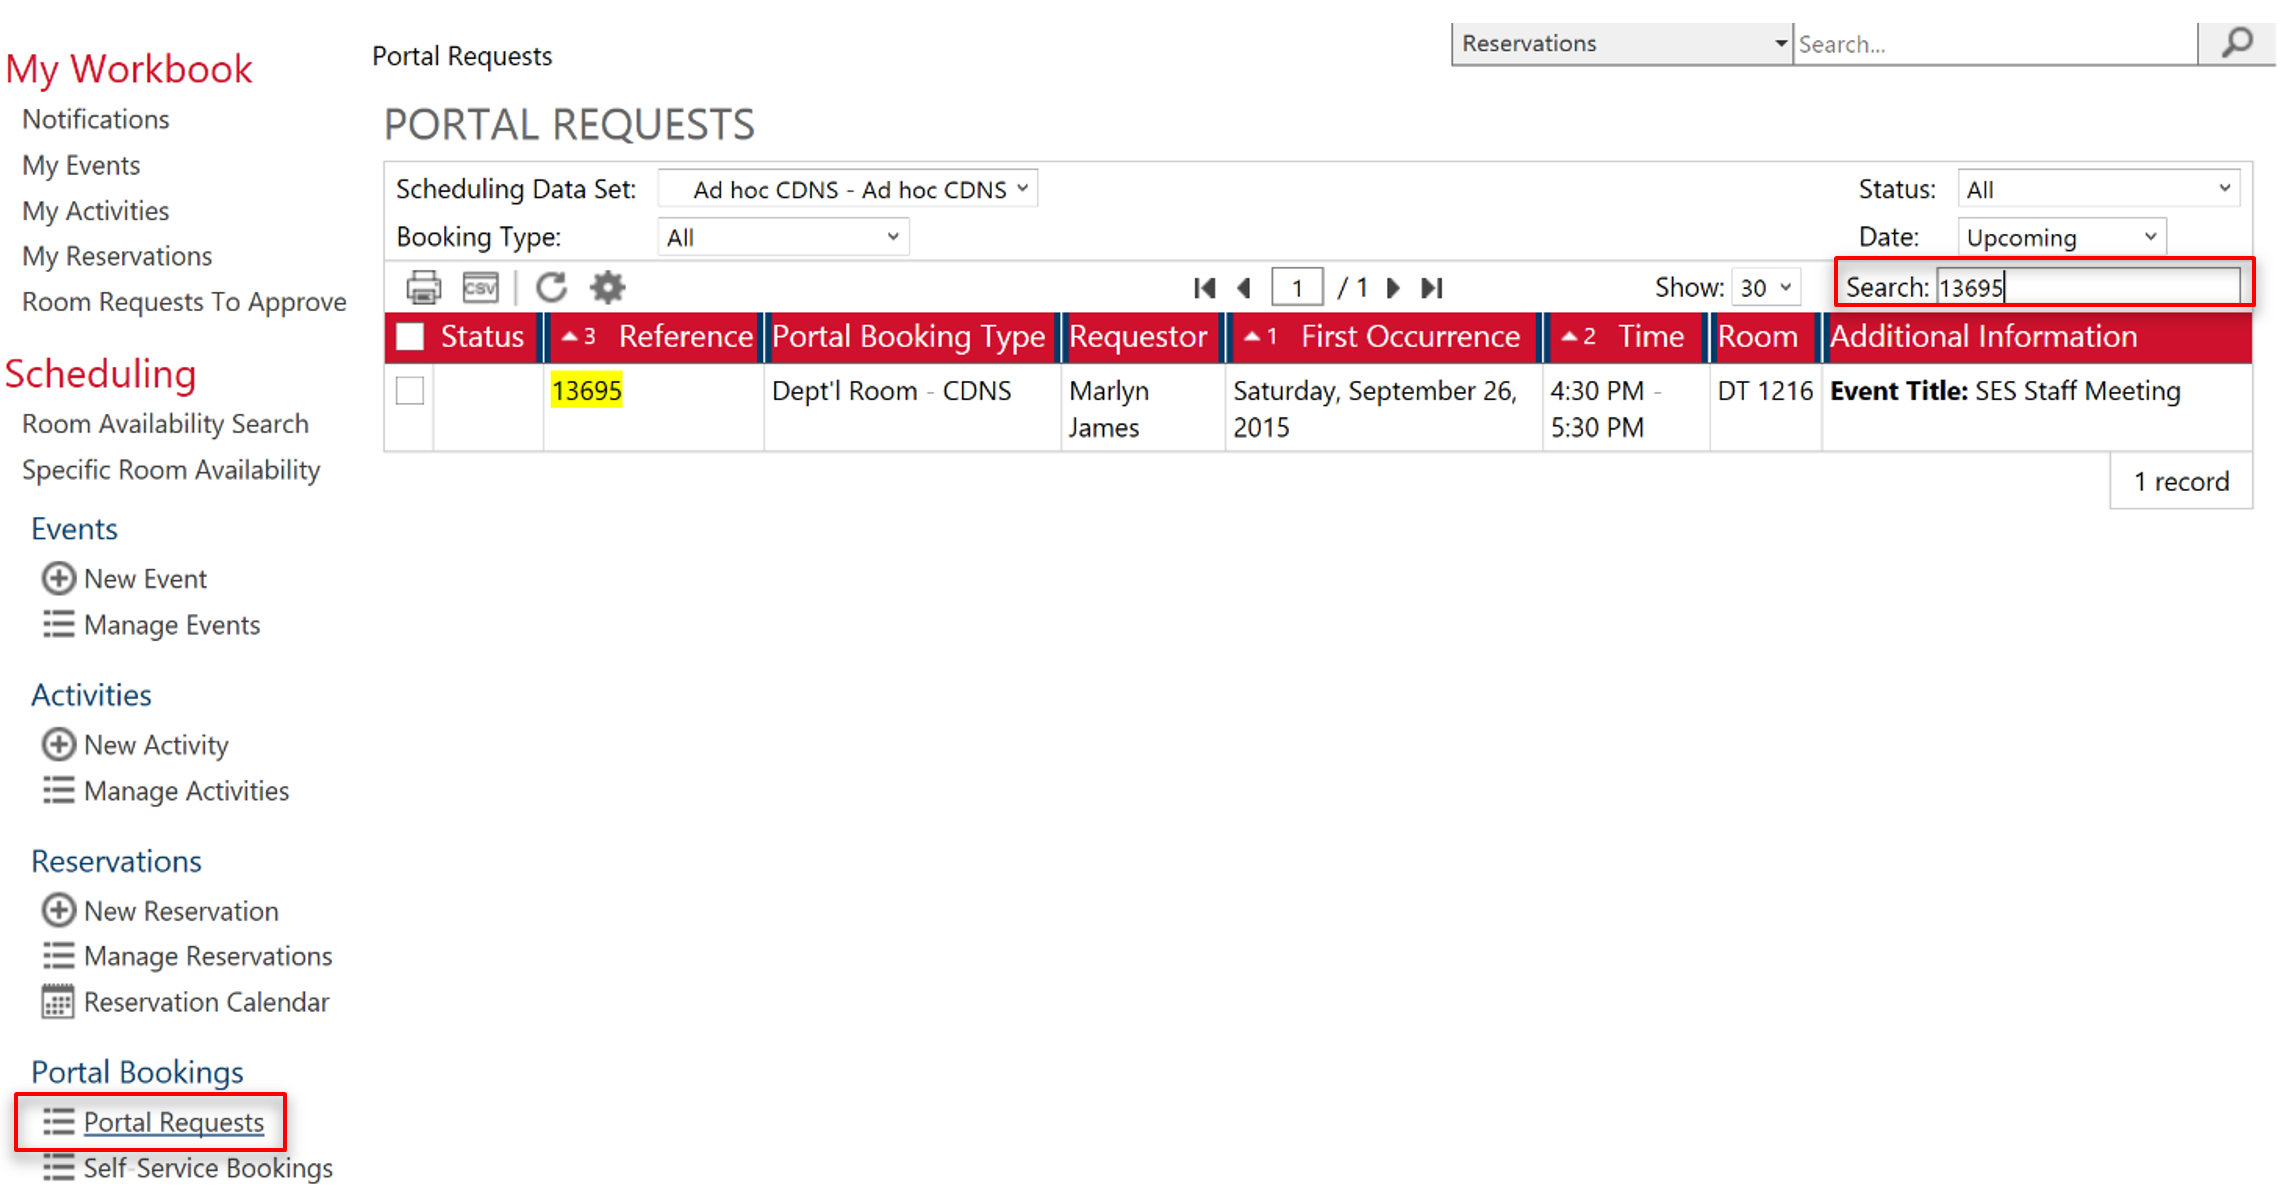
- The Portal Requests page will appear.
- To find a specific Portal Request enter the reference number in the search box, then press Enter or in the list of requests, you can look for a specific request.
- Click on the request and the Portal Request screen will open.
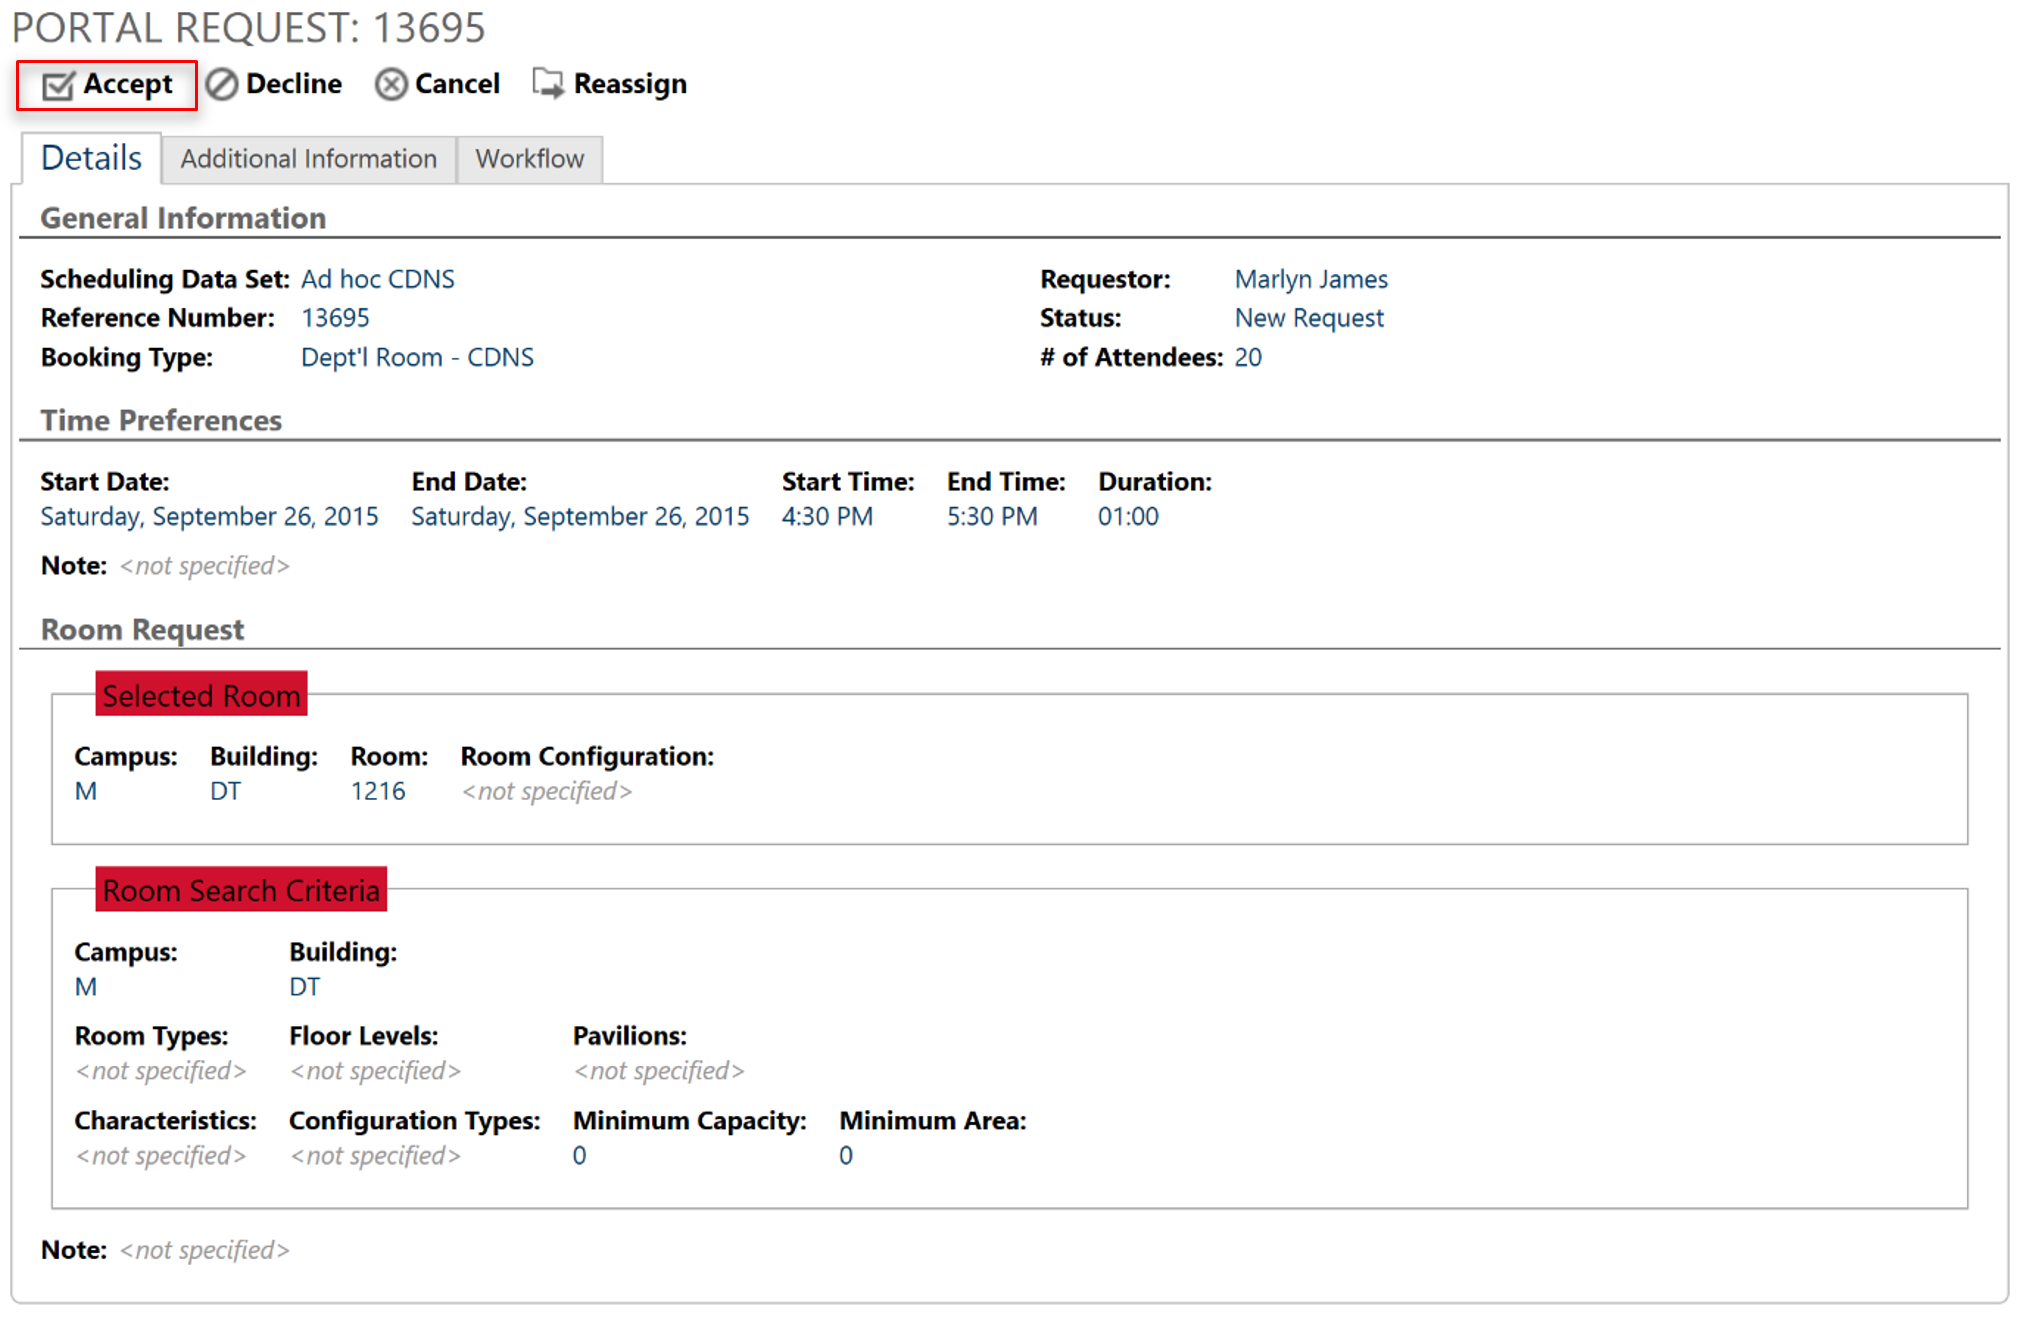
- Click on Accept. Note, this is NOT approving the request, but accepting the request to view or configure details.
- Confirm the reservation details.
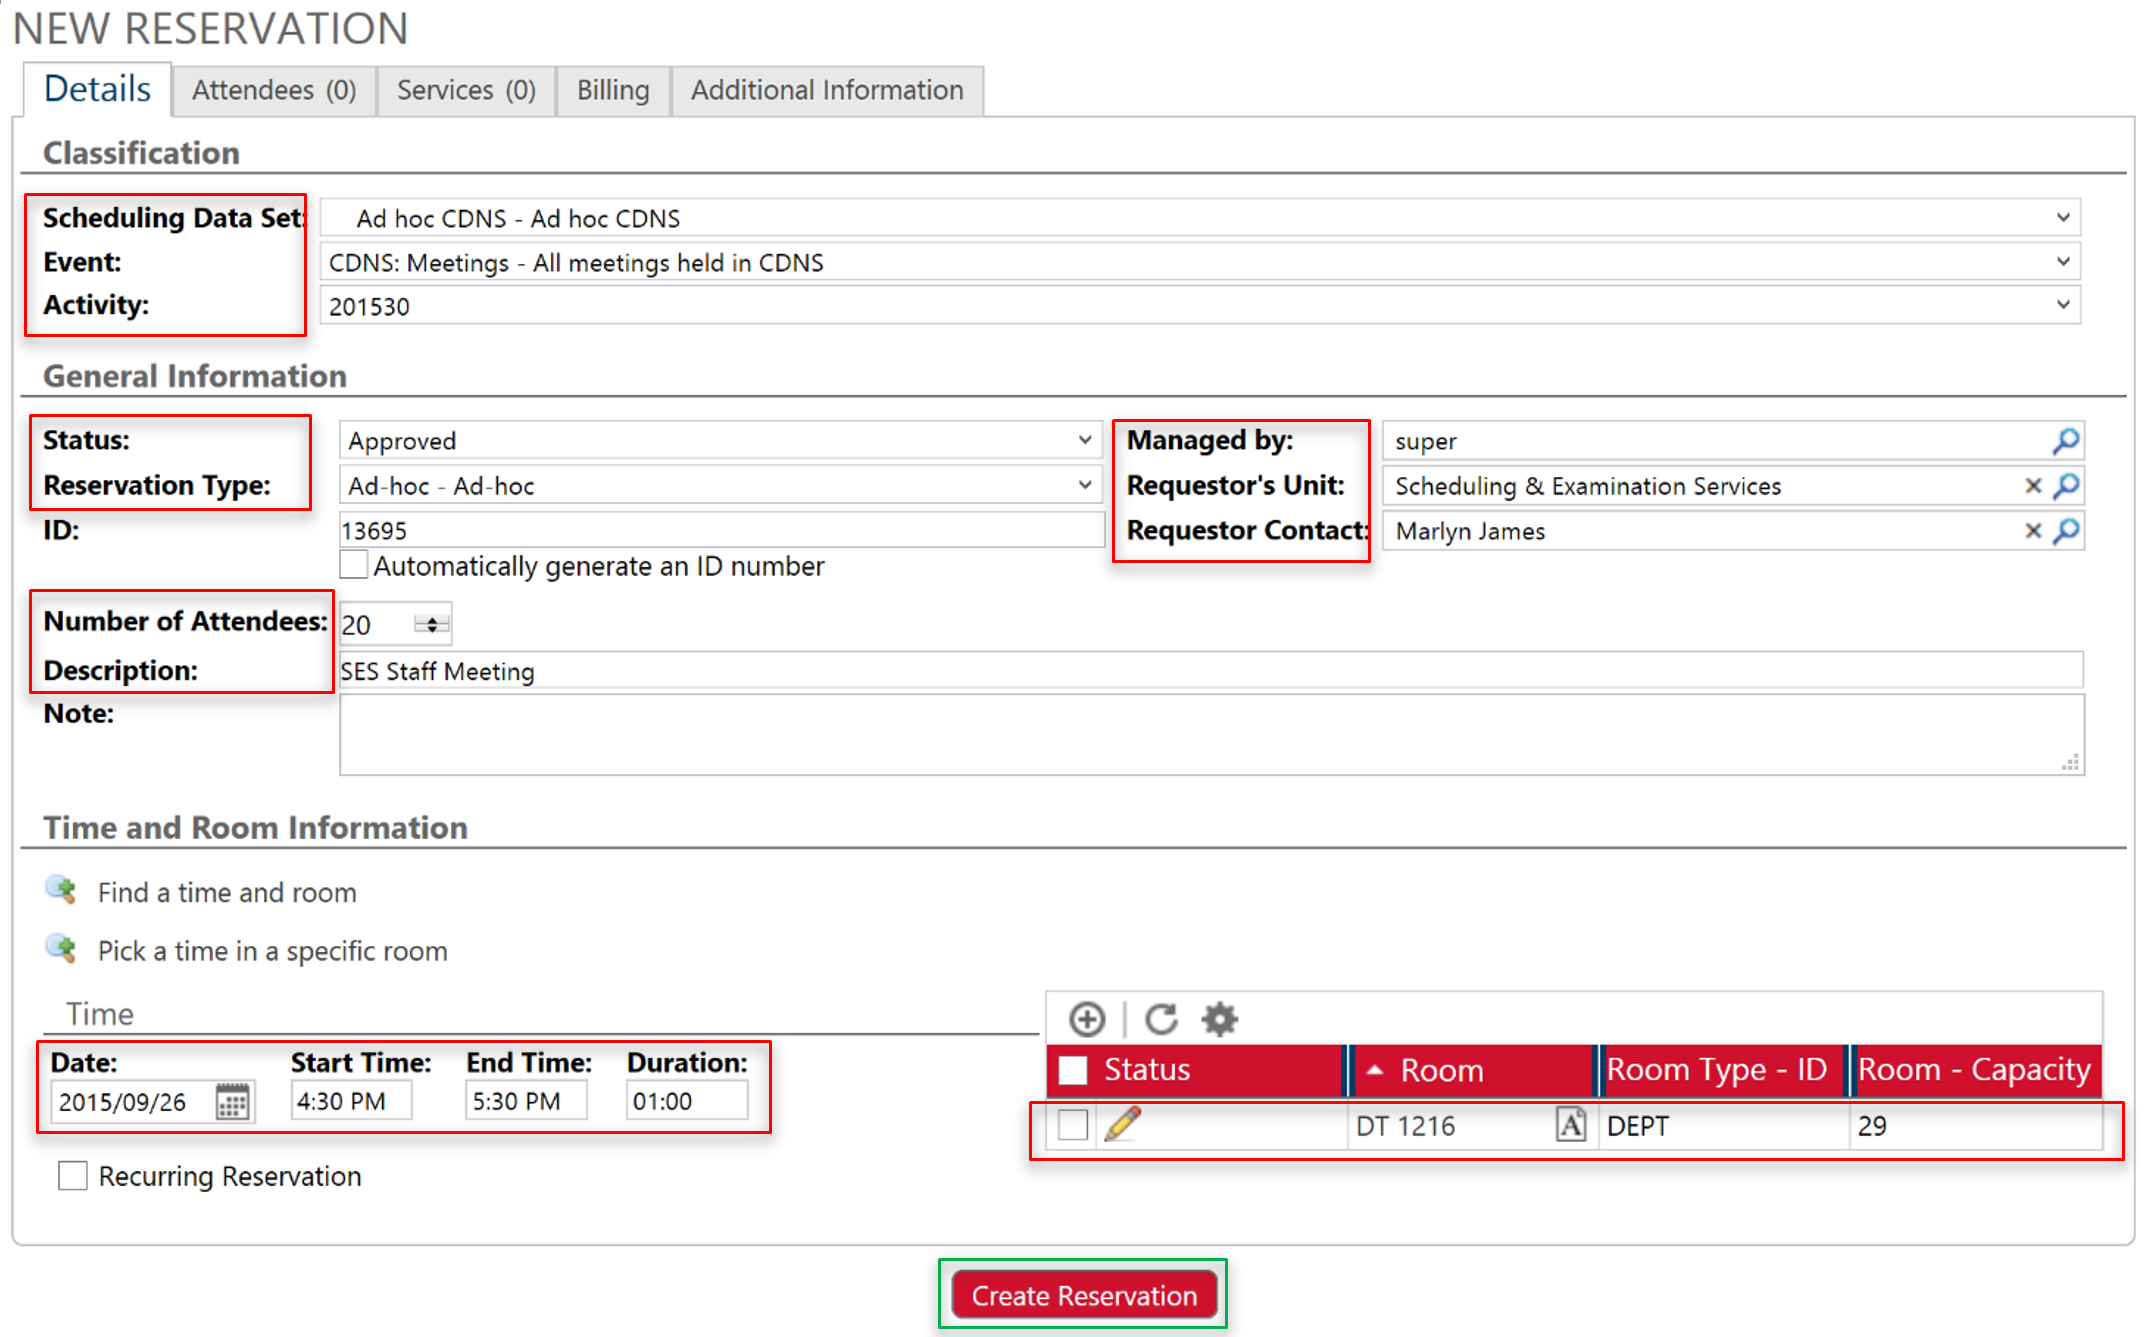
- Scheduling Data Set: Make sure that your department shows
- Event: Choose the corresponding Event for the request [e.g. CDNS: Meetings – All meetings held in CDNS]
- Activity: Choose the corresponding term the request falls under [e.g. 201530]
- Status: You have 3 choices (mandatory):
- To approve the request, select Approved
- To refuse the request, select Refused
- To cancel the request, select Cancelled
- Managed by: You don’t need to do anything here – it should already be filled out
- Reservation Type: Choose Ad-hoc – Ad-hoc. Advanced users my choose something else from the list
- Requestor’s Unit: You don’t need to do anything here – it should already be filled out
- ID: It should already be filled out
- Requestor Contact: Make sure that the requestor Contact is filled out
- Number of Attendees: Enter the number of Attendees
- Description: Enter the description of the Reservation e.g Guest Speaker
Note: You can create the description of the event from the information details provided by the requestor:
- Click or tap the “Additional Information” tab to see the title of the event entered by the requestor.
- Left click or tap and drag to select the text, then right click (or long tap) and copy the text
- Click into the “Details” tab, then click back into the Description field, right click, and paste the title.
- Time and Room Information: Make sure that the date, time, and duration and room number for the reservation is entered correctly.
- Click on Create Reservation, and the reservation is confirmed.
- A Comment box will now display, where you can type any message for the requestor to see.
Share: Twitter, Facebook
Short URL:
https://carleton.ca/ses/?p=1739
