- The Application Window
- Recording Info
- To start recording
- Cancelling your recording
- Saving and uploading your recording
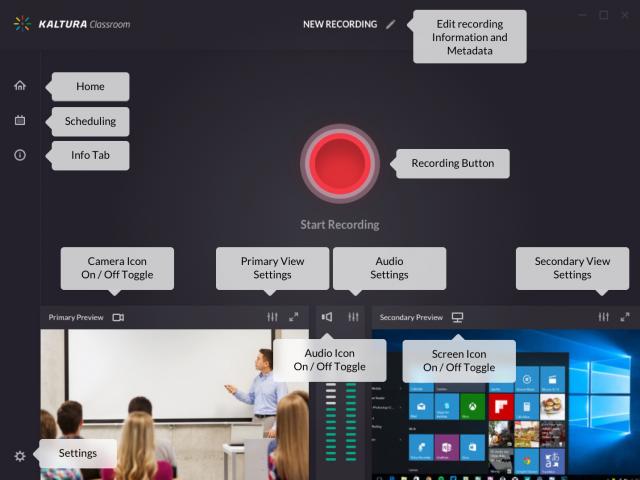
The Application Window
NOTE: You must log into the Classroom recording application for the system to associate your recording with you and to start recording. Log in using your MyCarletonOne computing credentials. If you require assistance with your username or password contact ITS.
Kaltura Classroom can record your computer screen and a camera, represented in the Primary Video and Secondary Video windows. If you want to turn either of these feeds on or off, click the camera or screen on/off toggle icons shown in the screenshot below. Each source (Primary Video, Secondary Video, Audio, and System Audio) has its own settings button shown in the screenshot below. Clicking any of these will allow you to change settings for that device, such as switching to a different microphone or camera.
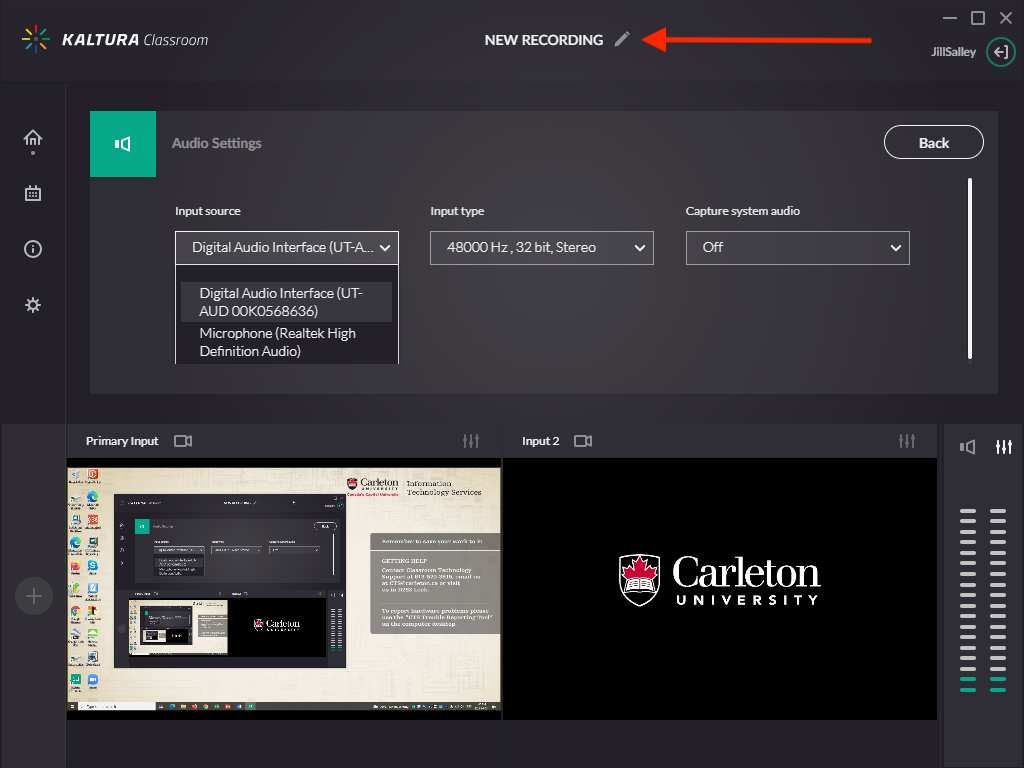
Recording Info
You can set the recording details at any time: before, during or after the recording.
To access the Recording Info screen:
- Click on the Pencil icon near the recording name on the top of your main recording screen.
You can add the following information:
- Title of the recording – A default title will be used otherwise.
- Description – A description of your recording.
- Tags – Tags are searchable after the recording is uploaded to Kaltura. Press Enter after each tag you add.
- User Name – The User Name is the owner of the recording and will be able to view it in My Media within MediaSpace.
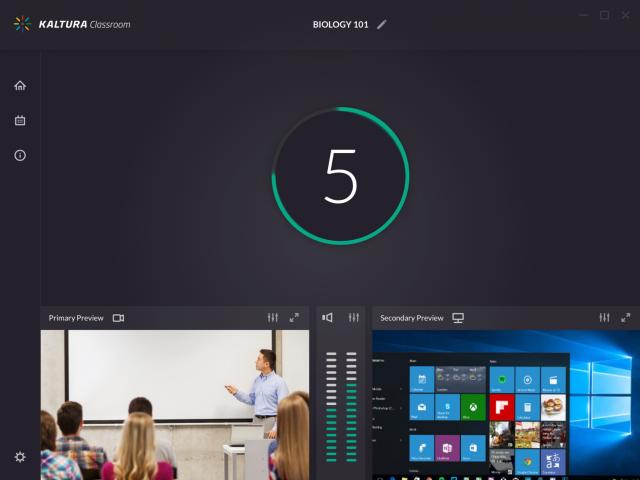
To start recording
Press the “Start Recording” button in the middle of the recording screen to start recording.
A 5 second countdown timer appears before the recording starts.
When the recording begins, the duration of your recording is displayed under the Recording button as well as the Stop Recording button and Cancel indicator.
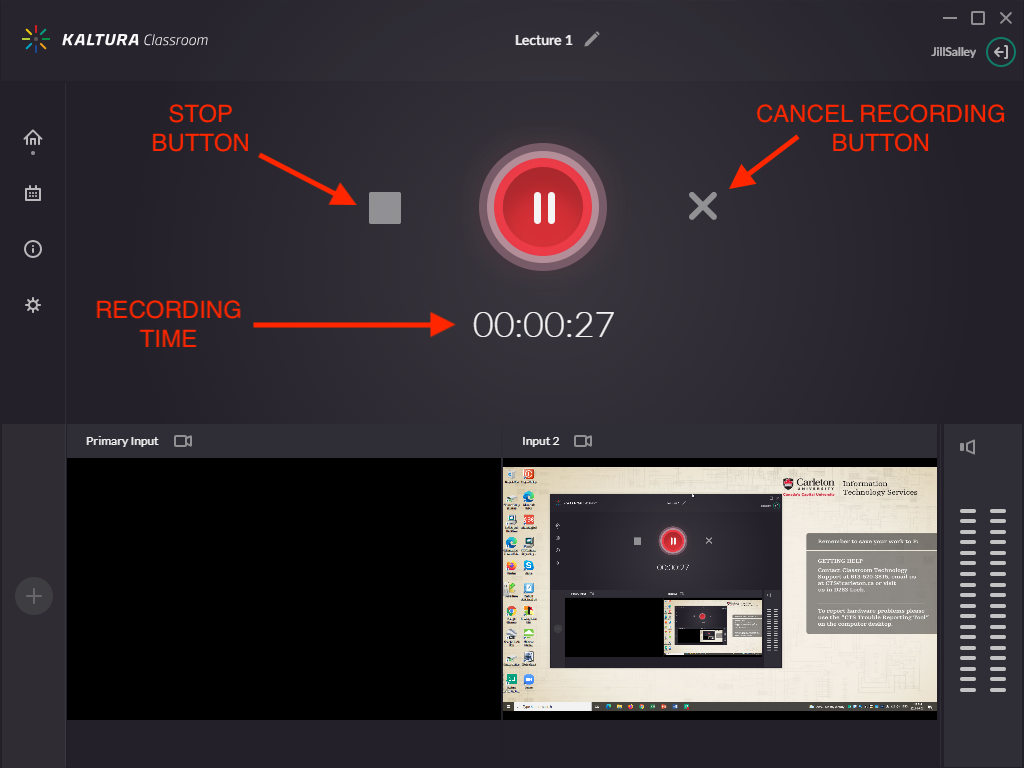
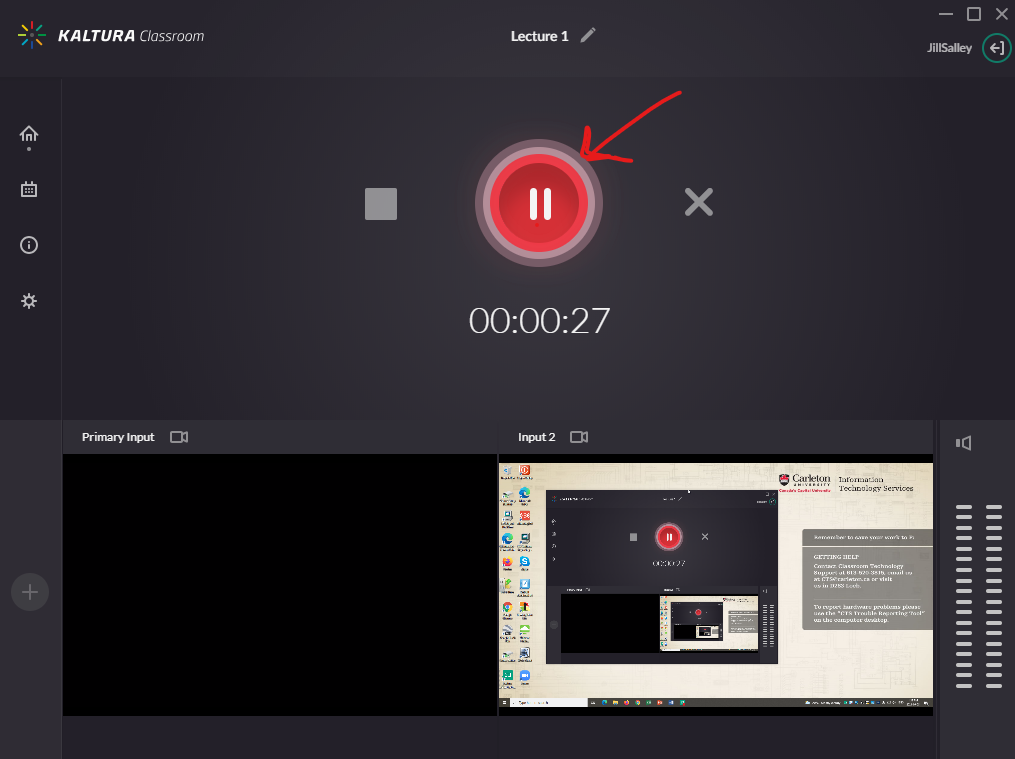
You can pause and resume your recording at any time. Click the pause button to pause your recording and record button to resume.
Click on the “Stop” square to stop recording.
Cancelling your recording
You can cancel your recording at any time. Cancelling a recording will discard it and the recording will not be saved.
To cancel the recording and remove the video:
Click on the “X” sign on the right of the Recording button.
A cancellation confirmation is displayed to allow you to either cancel or continue with the recording, or click No to go back to your recording.
Saving and uploading your recording
After you “Stop” recording you will be directed to the Recording Complete screen.
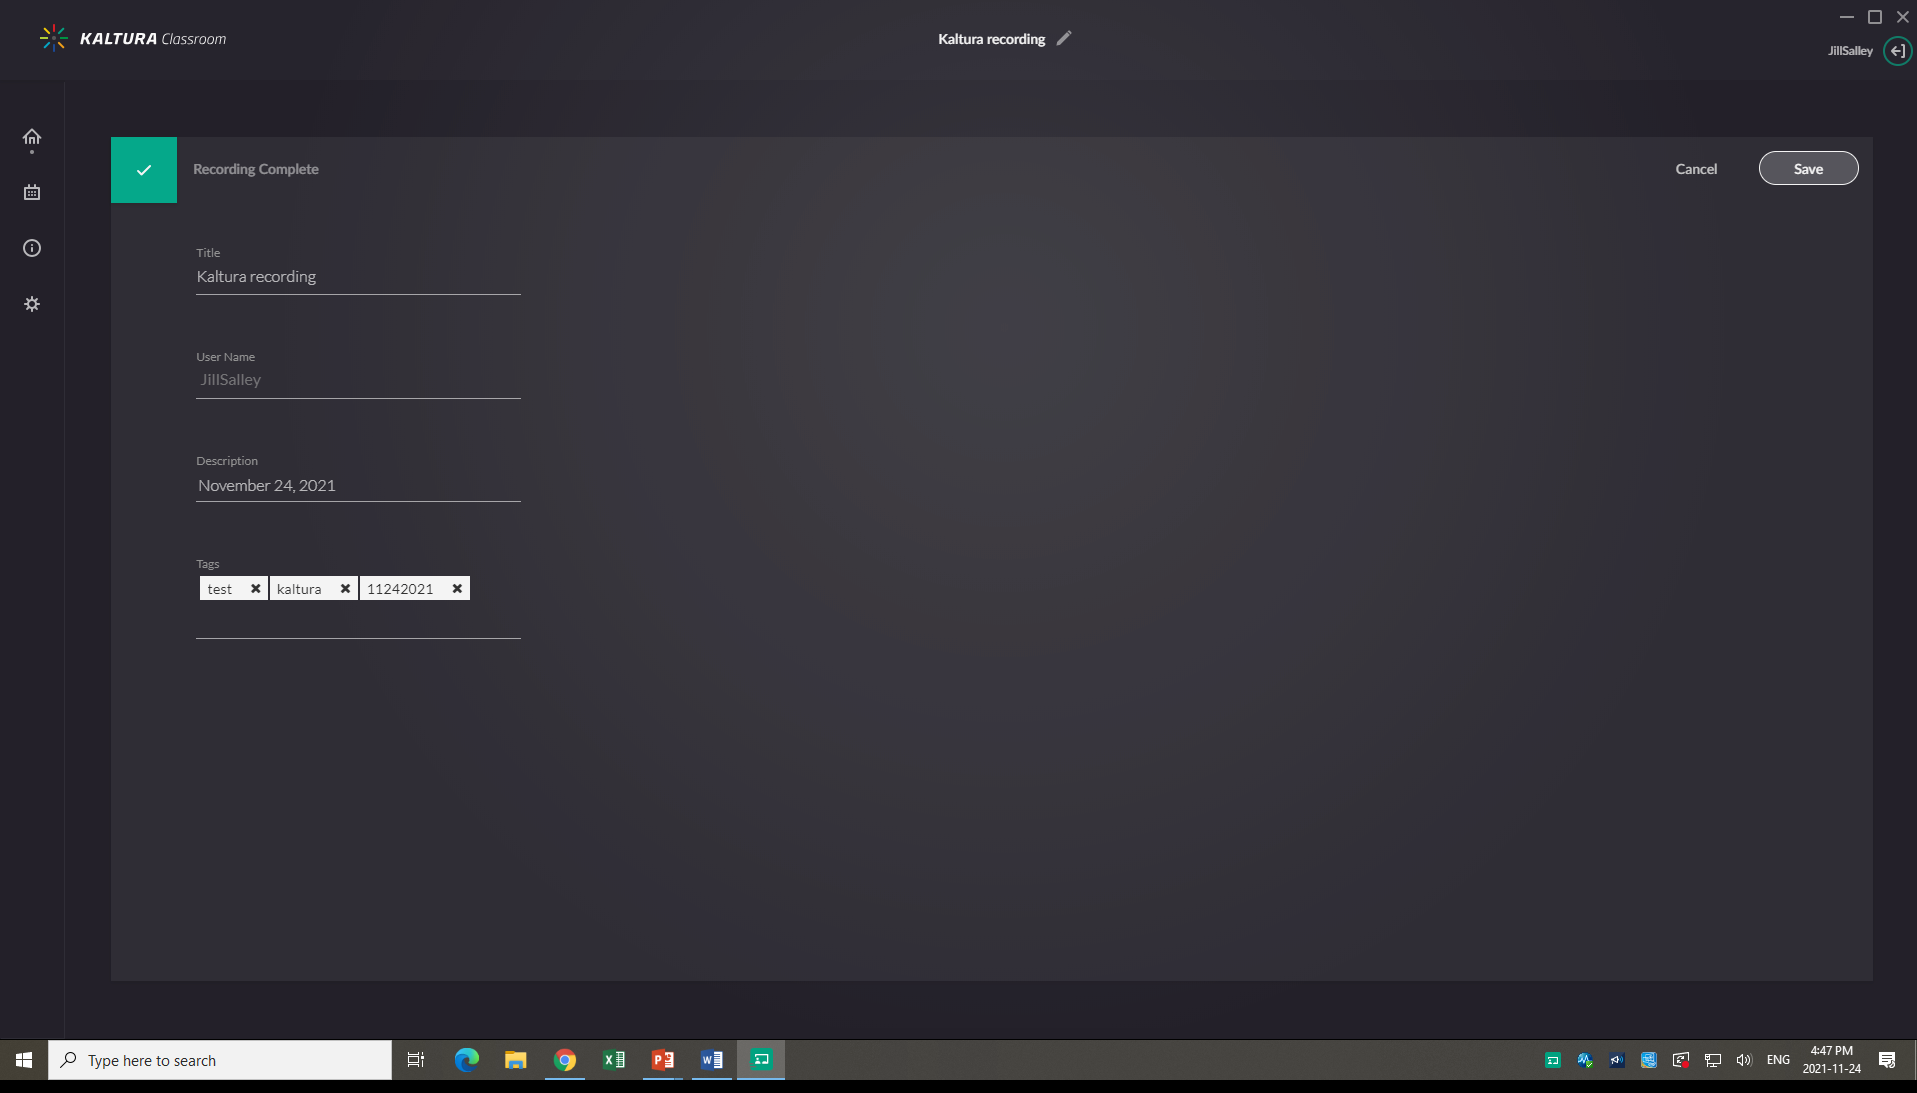
If you clicked stop by mistake, you can always click Cancel and you will be returned to your recording in a paused state. If you want to complete the recording and you have not entered the details yet, or you want to change them, enter the following information and click save.
- Title of the recording
- User Name
- Description
- Tags
All the recorded videos will be uploaded to My Media in MediaSpace.
“More Info about with be provided soon regarding Recordings directory and where to find missing recordings”
Tip: Do a test recording a few days in advance of when you need it. This ensures you have sufficient time for troubleshooting in the event that your computer, Internet, or technical skills require extra attention.