SSH Connection with x2go Remote Desktop Client
NOTE: This example uses x2go, but the connection settings are the same for other compatible remote desktop tools.
Download x2go: here
You can find a video demo of these instructions here: Connect to Remote Desktop via x2go (Video)
Use the following settings to make the connection – Some of your settings will be different
- host: 134.117.216.10 – Replace this with your own instance’s floating IP address
- username: student – default for most of our openstack images; Sometimes called Login
- password: student – default for most of our openstack images
Install x2go, following the application’s instructions
Open x2go
- On Windows you may get a warning to allow x2go to access the network (firewall rule change); approve the request. This may also pop-up each time you create a new session (described below), so you may have to approve the request more than once.
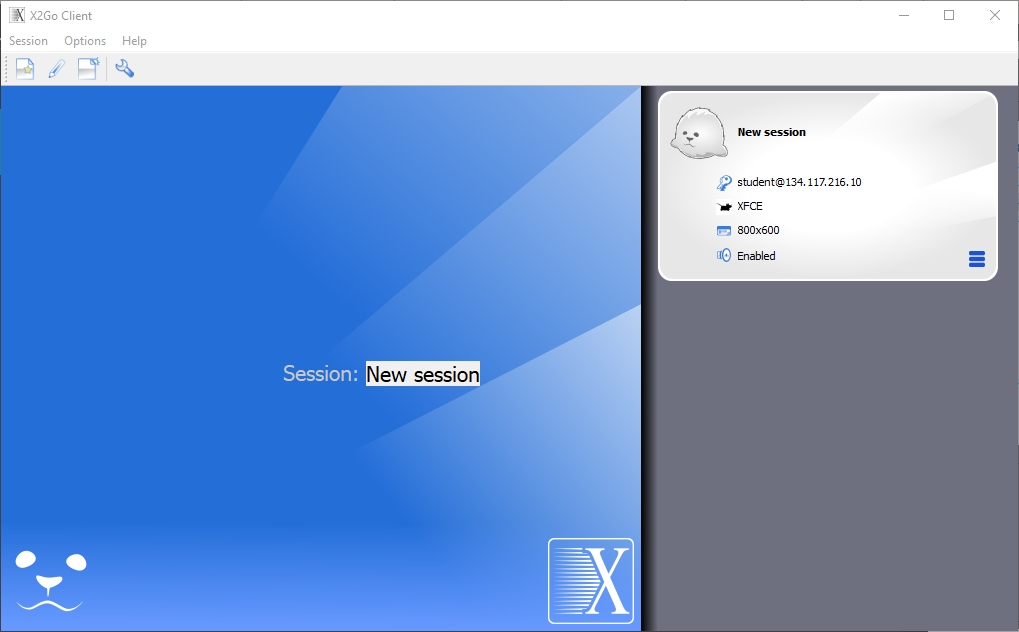
Create a new session in x2go by clicking Session -> New Session
The key settings that must be entered in the x2go session settings window that pops up are:
- Host: 134.117.216.10
- Login: student
- Session Type: XFCE – This is used for many of our course images, but your course may have a different preferred desktop. Another common one we use is LXDE
Once the settings are entered, click OK

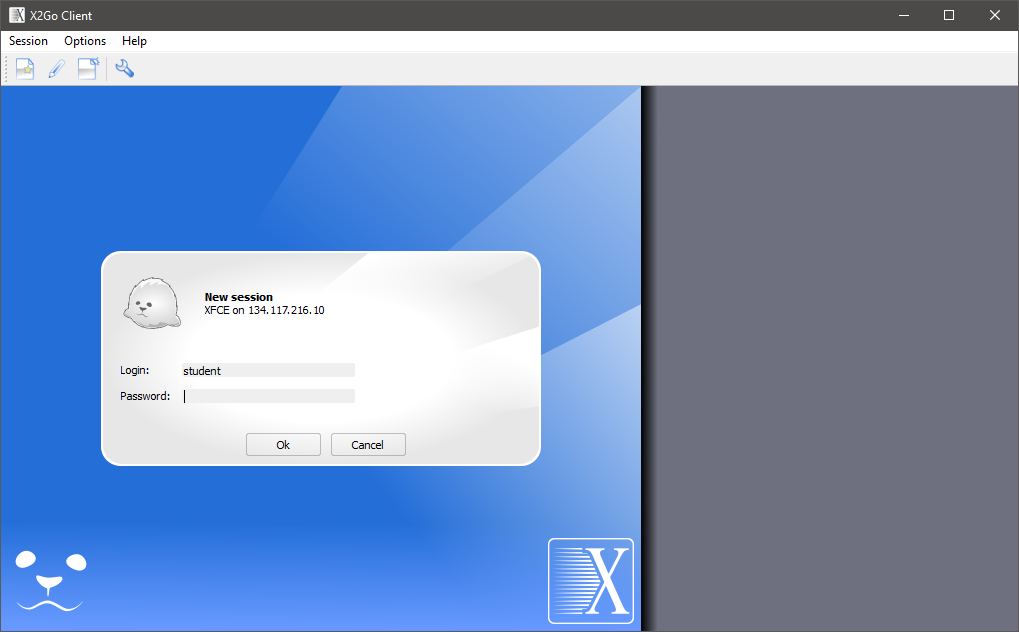
In x2go you will see a new session connection:
Click on the session to initiate the connection:
- You will be asked to enter the instance’s password
- If it is the first time you are connecting to the instance with x2go, you will be asked if you trust and approve connecting to the host. Again, approve the connection
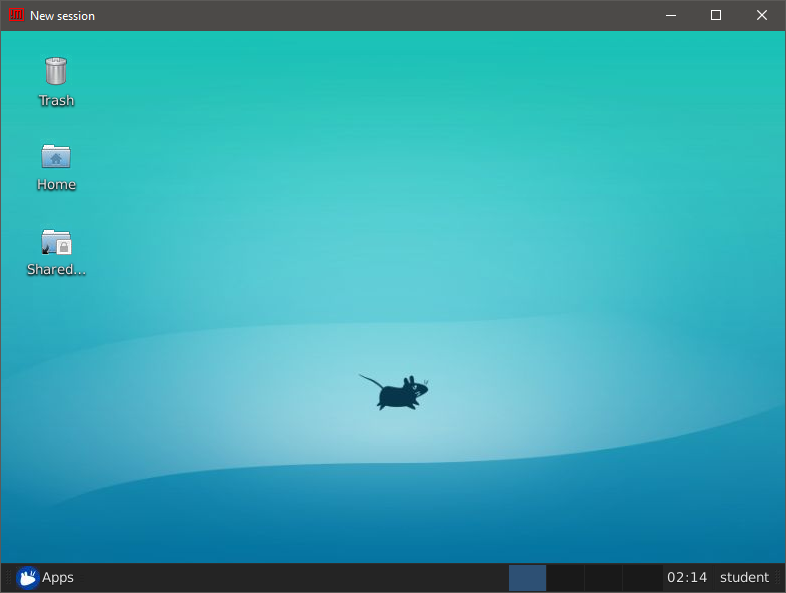
Finally, a window should pop-up connected to the desktop: