Hosted Images are banner and thumbnail images that you can easily use on any Carleton CMS site, without having to upload them to your website’s Media Library. These images are generally ones that feature university-related subjects, such as the Carleton campus, students, and different subjects of study.
Step-by-Step
Banners
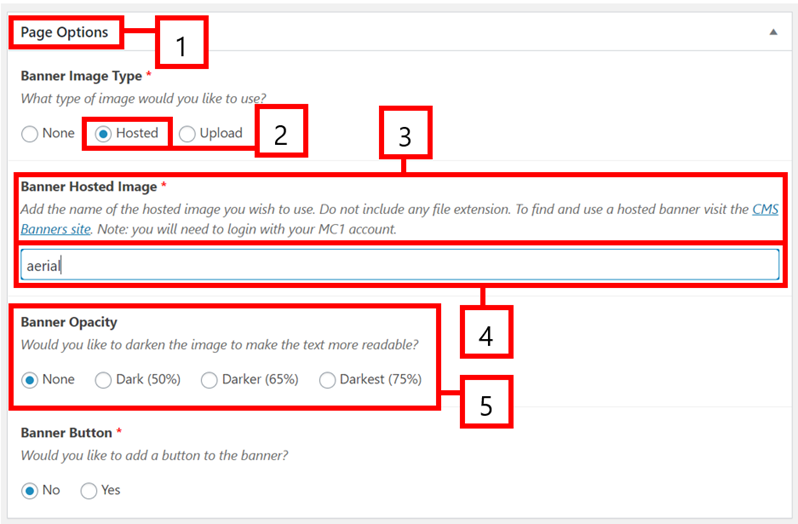
- To add a banner to your page, scroll down to the Page Options dropdown menu under the page editor.
- From this menu, select Hosted under Banner Image Type.
- To view all hosted images for banners, you can browse the CMS Hosted Banners website, which is also linked to in the text under Banner Hosted Image.
- Each of these images will have a title in its caption. Copy this title to your clipboard
- In the field under Banner Hosted Image, paste the image title of the image you’d like to use.
- Most hosted banners are already darkened to be able to display under white text, so changing the Banner Opacity will likely not be necessary when using a hosted image.
- Publish or Update your page.
Thumbnails
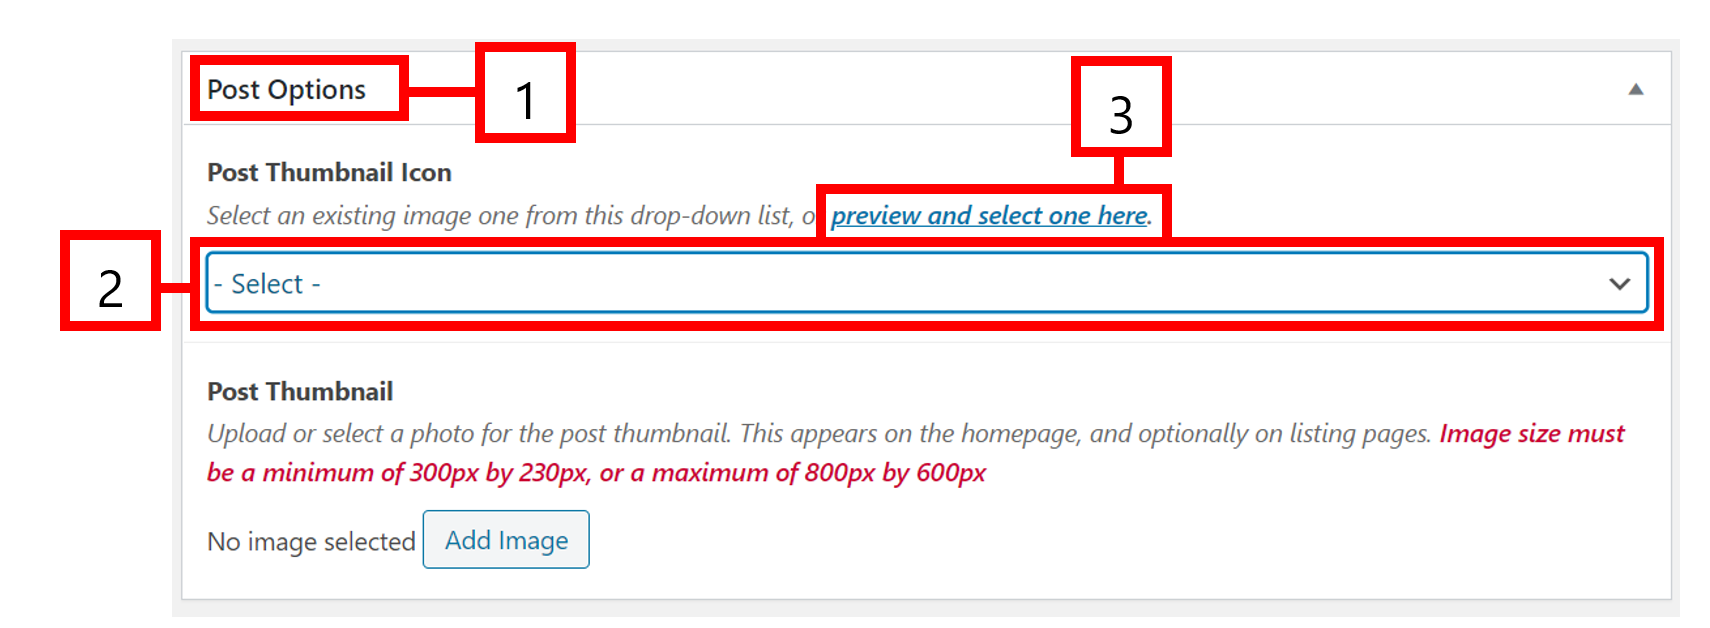
- To add a thumbnail to your post, scroll down to the Post Options dropdown menu under the post editor.
- Click the – Select – dropdown menu under Post Thumbnail Icon and select the image you would like to use from the listed titles.
- You can also preview and select your image by clicking the linked text that reads “preview and select one here”.
- Publish or Update your post
Video Tutorial
Transcript
Try It Out!
Test your Hosted Images skills by choosing a hosted banner for your page, and a hosted thumbnail for your post.
- Open your test page.
- Change the banner to a hosted banner of your choice.
- Save your page and preview it to see the banner.
- Create a test post.
- Change the thumbnail of your post to a hosted one.
- Categorize and publish your post.
- List your post on your test page using Add Post Element and List News.
- Check Display Thumbnails and then click Insert into Page.
- Save your page and preview it to see the post thumbnail
- Note: the thumbnail will only display if ALL posts in the listing have a custom thumbnail.