Tables are useful for displaying data. However, there are some guidelines you should follow when creating tables to ensure that they are accessible (for example, able to be coherently read by a screen reader). These are, in brief:
- Do not use tables to format text, only to display data
- Include column headings, and make sure they are formatted as such
- Do not try to include any other complex features inside a table, such as putting a table inside another table
- Avoid blank cells – use “n/a” or “none” instead
For further explanation of why these guidelines are important as well as examples and practice exercises, please see module 4 of our web accessibility training.
For an example of a table in CMS, see our sample table.
Step-by-Step
Add a Table
- Open the page or post you would like to add a table to.
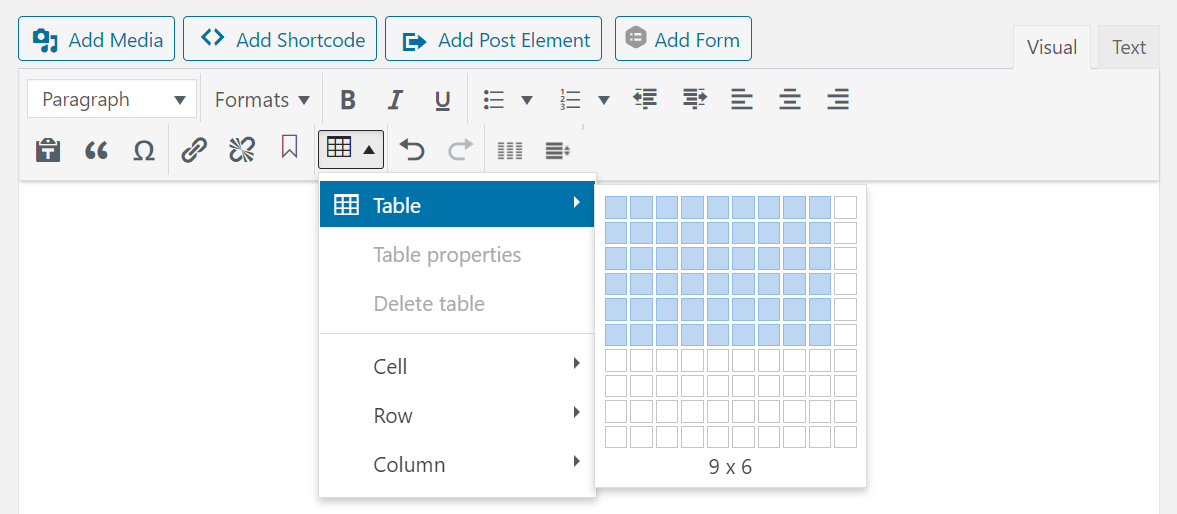
- Click the Table icon. There will be a drop-down menu, under which you can hover over Insert Table and specify the dimensions of your table.
- Choose the number of columns and the number of rows by hovering over the amount of amount of cells you would like to make up your table. When the proper values are showing, click once.
- You can adjust the size of the table by dragging the handles at the corners and edges
Edit a Table
Add a heading:
- Click in the cell or highlight the cells you would like to make into headings
- Click the table icon and hover over Cell then click Table cell properties
- In the General tab, click the dropdown next to Cell type
- Select Header cell from the dropdown
- Click Ok
Add a row or column:
- Click within one of the cells of your table.
- Click the Table icon.
- You can add a row by selecting Row then Insert row before or Insert row after. If you wish to add a column, select Column then Insert column before or Insert column after.
Merge cells or columns:
- Highlight the cells you want to merge by clicking and dragging your cursor across the cells.
- Click the Table icon.
- You can merge cells by selecting Cell then Merge table cells.
Delete a table
- Click within one of the cells of your table.
- Click the Table icon.
- Click Delete Table.
Video Tutorial
Transcript
Try It Out!
To test your table knowledge and expand upon it, here are some tasks for you to try
- Add a table to your test page.
- Change the proportions, by dragging the table’s corners.
- Add extra rows and columns.
- Delete extra rows and columns.
- Merge table cells.
- Explore other options under the table menu, such as Table properties and copy and pasting table rows.
- Delete your table.