Step-by-Step
Inserting an image to a page or post

- From your page/post, select Add Media
- You have the options to:
- Upload from your own device under the Upload Files tab
- Select an image from the media library under the Media Library tab
- Click Insert to Page
Image Settings
To change the image settings, open the Image Details window by clicking on the image, then clicking Edit. From the Image Details window, you can edit:
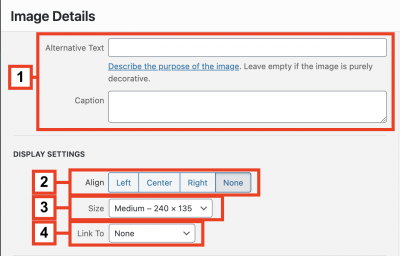
- Alternative Text and Caption
- Align – Left, Centre, Right or None
- Size – Thumbnail, Medium, Large, Full Size or Custom
- Link to – Media File, Attachment Page, Custom URL or None
When you are done editing, click Update.
Editing Image
From the Image Details window, click Edit Original to open the Edit Image window. The Edit Image window allows you to:
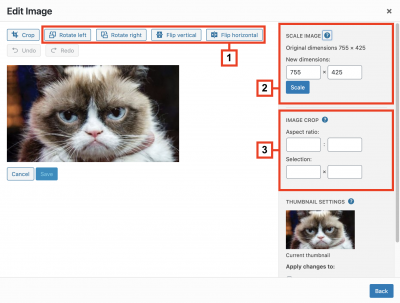
- Rotate and flip image
- Scale image
- Crop image
When you are done editing, click Save.
Video Tutorial
Transcript
Try It Out!
Now that you have learned how to add and edit images, time to try it out!
- Upload an image and add it to your page/post
- Align the image left, and resize it to large
- Add a custom link to the image
- Crop and rotate the image