People posts can be used to display the profiles of members in your Department.
Here are examples of a people post and a people listing on a page.
Step-by-Step
Add a new profile
- Add a new people post using the side or top menu.
- Enter the person’s name into the Title field.
 In the People Profiles field, fill in the person’s details (first and last name, job title, degree, email address, phone number, etc.)
- You can upload a photo of the person using the Add Image button under Profile Photo.
- In the blank text editor field, add additional information about the person (e.g., biography, research interests, publications, etc.)
- Categorize your people post.
- Save, schedule, or publish the profile.
Pull a people listing onto a page
 Add/Edit the page on which you would like to put a people listing.
- Click Insert Post Element.
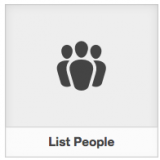
- Click the List People icon.
- Choose the category or categories of people you would like to list, or leave all the boxed unchecked to list all people.
- Click Insert Element.
- Update the page.

Video Tutorial
Transcript
Try-It-Out!
Now that you have learned how to create a People post, time to try it out!
- Add a new profile. You can make one for yourself, invent someone, or make one for a fictional character.
- Fill in the profile fields, including uploading an image.
- Publish the people post.
- Create a new category and add your post to it.
- Add the profile to your test page.