For users to be able to fill out your form, you will need to add it to a page.
Gravity Forms – Original Version
Step-by-Step
- Edit or create the page you would like your form to appear on.
- Click Add Form above the content editor
- Choose your form from the Select a Form dropdown menu.
- You can also choose to turn off Display form title and/or Display form description by unchecking the boxes next to these options.
- Click Insert Form
- Publish or update your page.
Video Tutorial
Transcript
Try It Out!
This series of trainings will follow a single form from creation to downloading responses. This practice activity requires you to have already created a form. If you do not know how to do that, you can return to a previous training exercise.
- Open a page that would would like to add your form to.
- Add your form to this page.
- Save the page and click View Page
- Try filling out your form! You can hit the submit button to see your confirmations and notifications in action, as well.
New Version of Gravity Forms
Our forms plug-in has been updated on some sites recently. If the back end of your forms looks like this (below), then you will need to embed your form on the page as follows.

Step-by-Step
- Open the form that you wish to insert onto a page.
- Click Embed at the top right

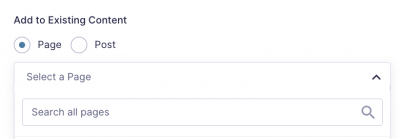
- There are two ways to add a form to a page.3.1 Select the Page.
Under Add Existing Content, click Page. Choose your form from the Select a Form dropdown menu. Use the search bar to find your page. 3.2 Copy the Shortcode
Click the Copy Shortcode button.

Navigate to the page where you would like to add the form.
Paste in the shortcode. - Update your page.