Layout
Creating a layout for waterjet cutting is similar to printing on a sheet of paper. Objects need space between them and there needs to be a margin around the sheet. How much depends on variables such as sheet thickness, part size, weight etc. A general guideline is 1/4″ between parts and a 1″ margin around the sheet for clamping. We can discuss this with you to make specific recommendations for your job. We also have nesting software to help automate this process.
Tabbing
Water jet cutting is done over a deep bath of water. If a part falls into this bath, it sometimes cannot be recovered. To prevent the parts from falling into the water, tabs are added to the parts. These tabs are kept to a minimum size so that the parts can easily be broken off the sheet after cutting. Just a quick light sanding afterwards removes them. Many clients choose to do this themselves to save costs.
Removing Burrs
The waterjet process also creates slight burrs on metals. Once again, some clients prefer to do the de-burring themselves. The choice is yours, just let us know.

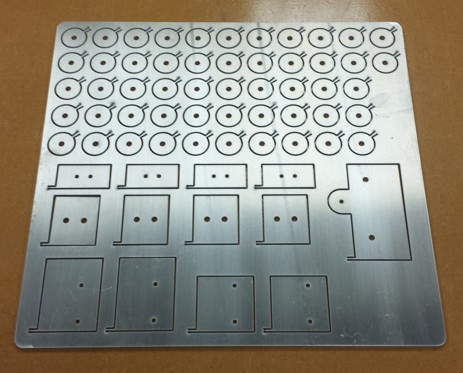
Tabbed Aluminum Sheet of Parts
The picture above demonstrates the break away tabbing process. You can see the lead-in and lead-out used to create the tabs. A twist of the part will easily separate it from the sheet.
There has also been space left between parts and along the edges to allow for clamping.