How to Set Up your Document Bleed Settings
Do you keep getting an unintended white border around all your print jobs? There is a quick and easy fix – setting up the document bleed settings.
What is Bleed?
Bleed is the area that extends outside the document size. It allows images or background colours to reach the edge of the page when being cut without leaving white space. The amount required is 0.125” or 1/8” on each side of the page. When using programs such as Adobe Illustrator or Adobe InDesign, there is an option to set up a bleed area when creating a new document. When using a program such as Microsoft Word you will need to create your document page as a larger size. For example if your final design is 8.5 x 11 you will need to create your document size to be 8.75 x 11.25.
Setting Up Your Document Bleed
We will explain how to set up your documents bleed in Adobe, Microsoft Word, and Canva.
Adobe
When creating a new document with Adobe Illustrator or Adobe InDesign, you can add the amount of bleed you need prior to creating your document.
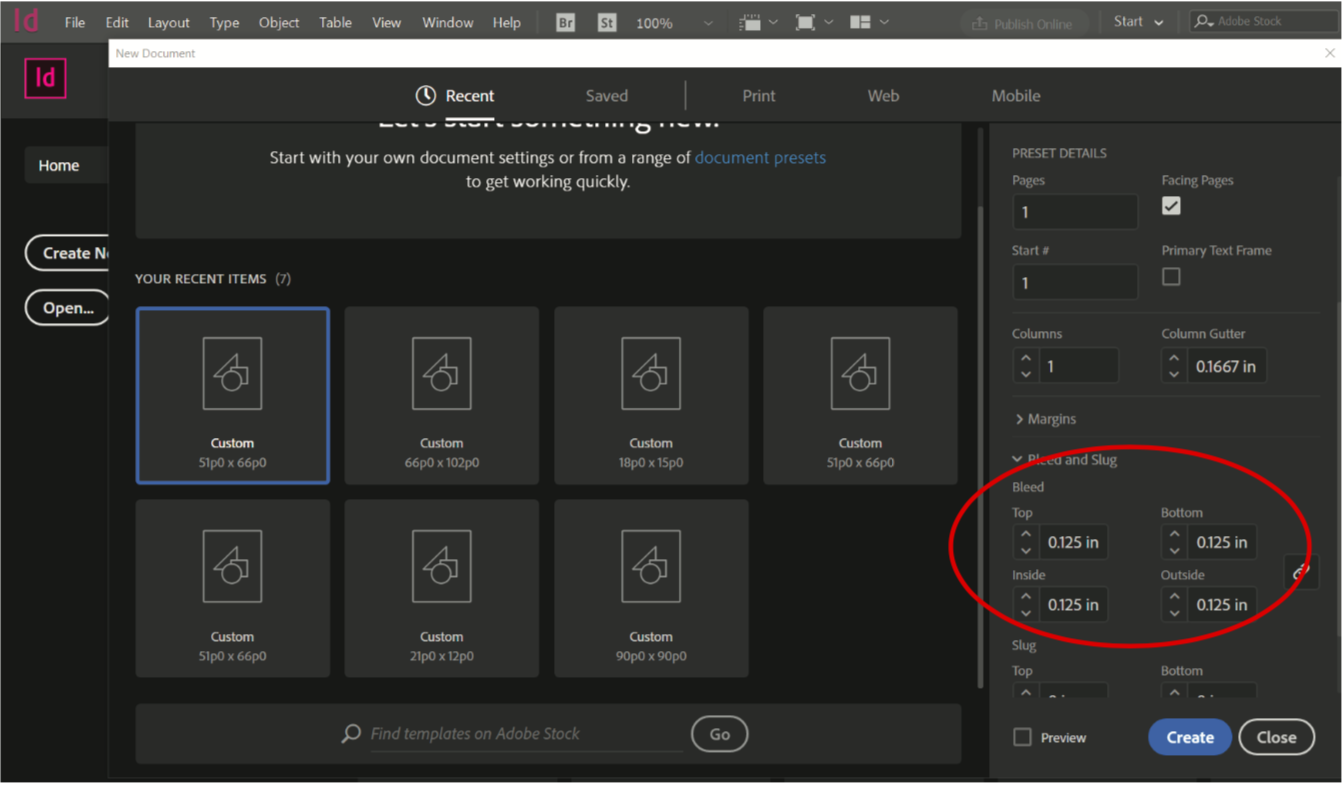
In Adobe Illustrator you will find the bleed settings under the ‘Bleed’ heading when creating a new document. In Adobe InDesign, you will find the bleed settings in the ‘Bleed and Slug’ drop down menu. Set all four sides of the pages bleed to 0.125in. Then click ‘create’ to start working on your document.
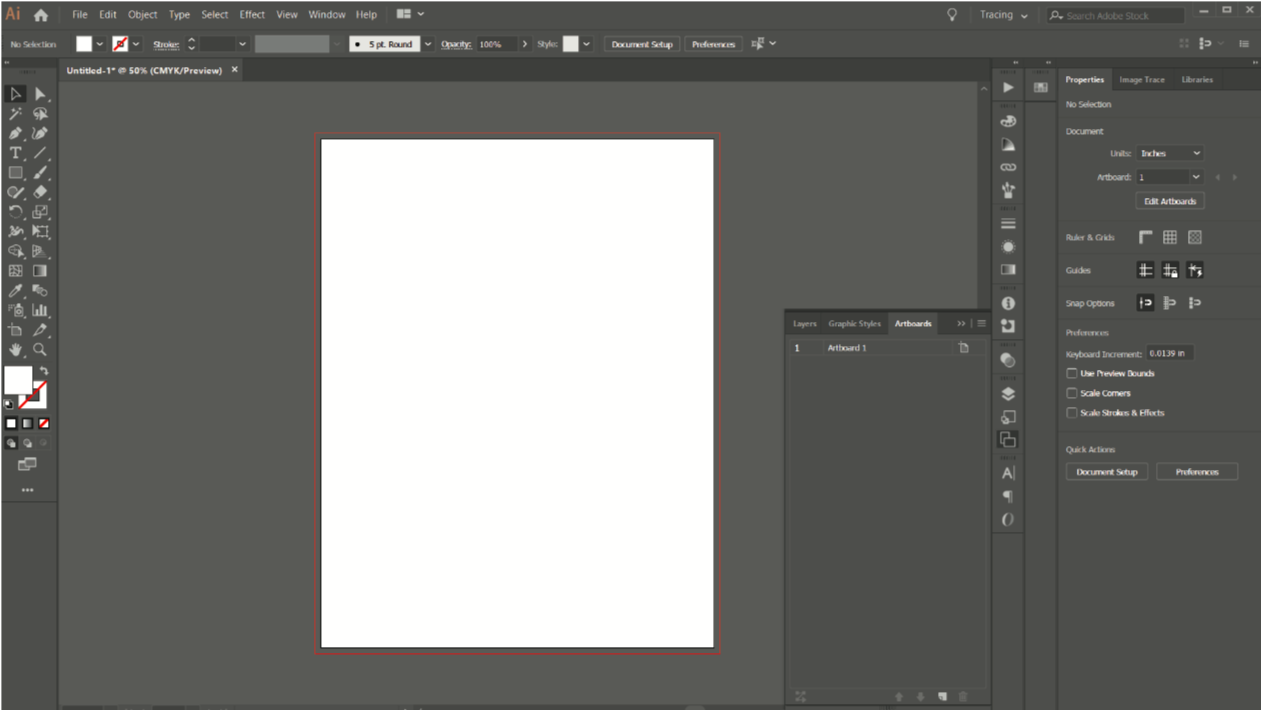
Once your document opens you will see a red box around the outside of the page. The red line shows where the bleed is in Adobe software.
Margins
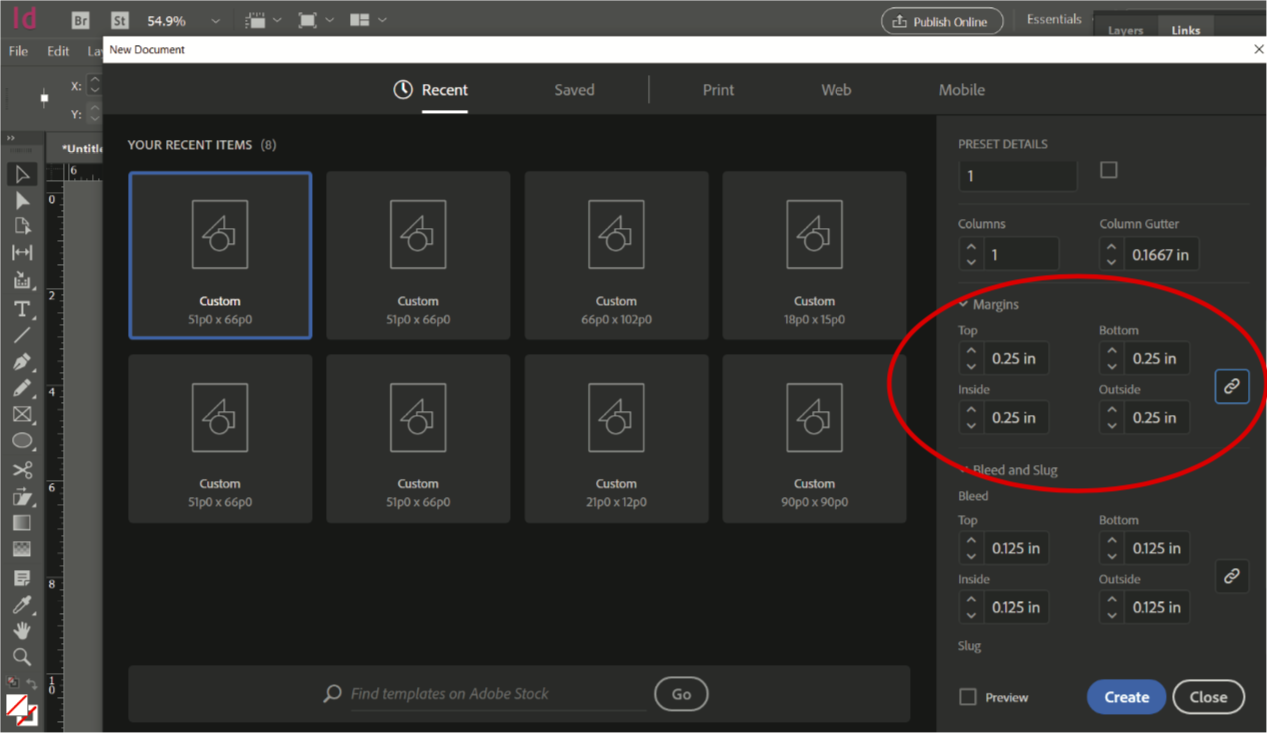
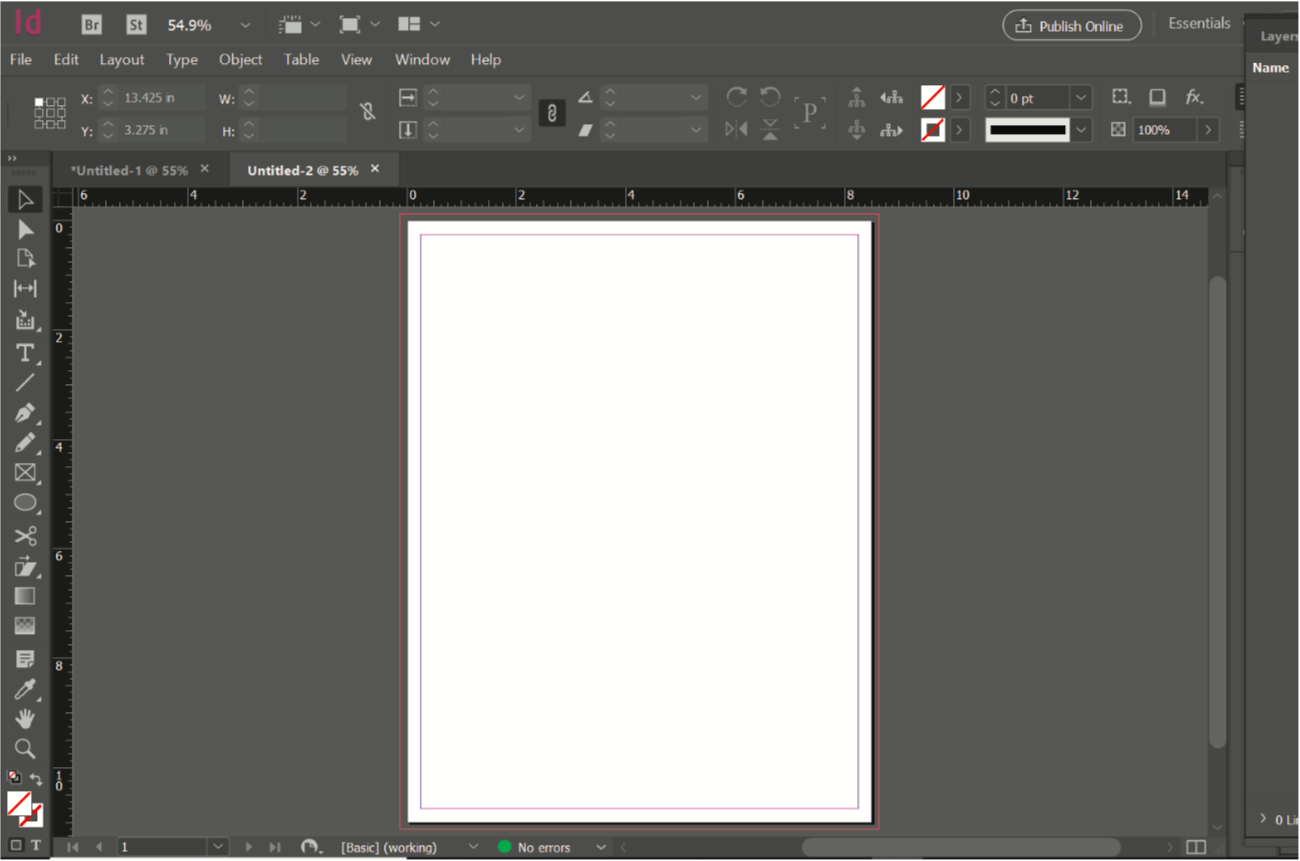
An important thing to note is if your document is going to be cut, please leave any text you may have or image that you don’t want cut 0.25” or 1/4” away from the edge. Adobe InDesign gives you the option to add a margin when creating a document. Alternatively you can use rulers and guides to mark the area. The blue line shows a 0.25” margin in Adobe InDesign.
Microsoft Word
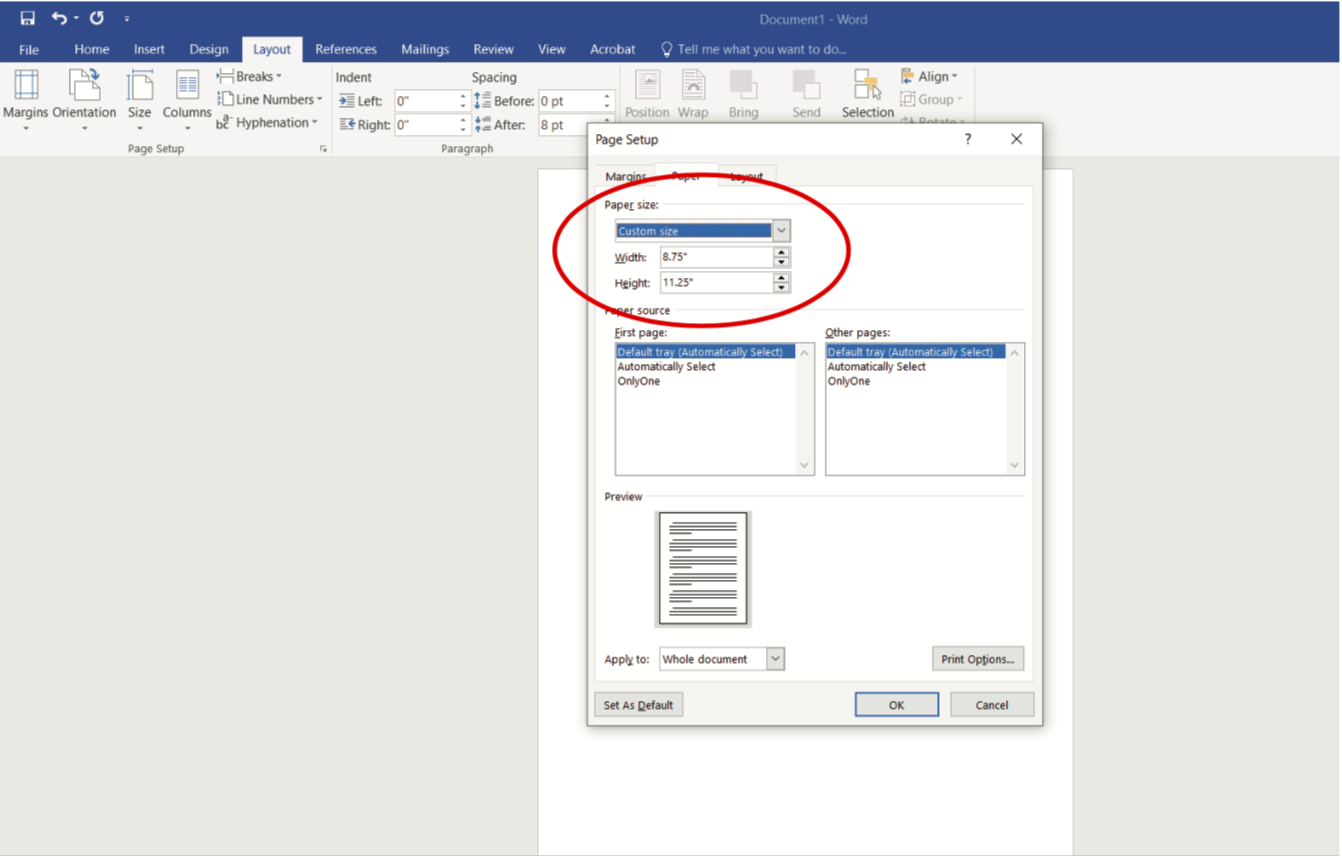
In Microsoft Word, you will need to adjust the page size to be larger in order to set up the document bleed correctly. In order to do this you need to:
- Create a new blank document
- Select the ‘Layout’ heading
- Click on ‘Size’ in the layout menu
- The ‘Page Setup’ window will pop up and ensure the ‘paper’ tab is selected
- Under the ‘paper size’ heading select ‘custom size’ in the first drop down menu, then adjust to the size you need (8.75in width and 11.25in for a standard 8.5inx11in paper)
Canva
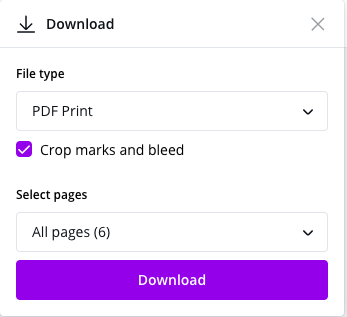
In Canva, you need to drag backgrounds past the edge of the page you are working on to remove the white border. If you do not expand your design slightly past the edges of the document you are working on in Canva, the white border will still appear when you export the document with the bleed and crop settings. Once you have ensured your page is finished, click ‘download’, select ‘PDF Print’ in the ‘File type’ drop down menu. Finally, select the ‘Crop marks and bleed’ box and then press ‘download’.
Ensure your print job comes out exactly how you want by submitting the print job as a PDF. Read our blog post about the importance of PDFs here.
Blog Post Topic Requests
Do you have a print related topic that’s not covered by our blog? Then fill out this form and we may a post about it!
"*" indicates required fields