If you try to add a PowerPoint file to cuPortfolio, it will show up as an attached file and will not embed into cuPortfolio. However it is possible to embed your PowerPoint presentation into cuPortfolio. There are two ways of doing this. You can convert your slideshow into a PDF document or convert your slideshow into pictures and upload the pictures into an image gallery on cuPortfolio.
To convert your PowerPoint slideshow into a PDF file
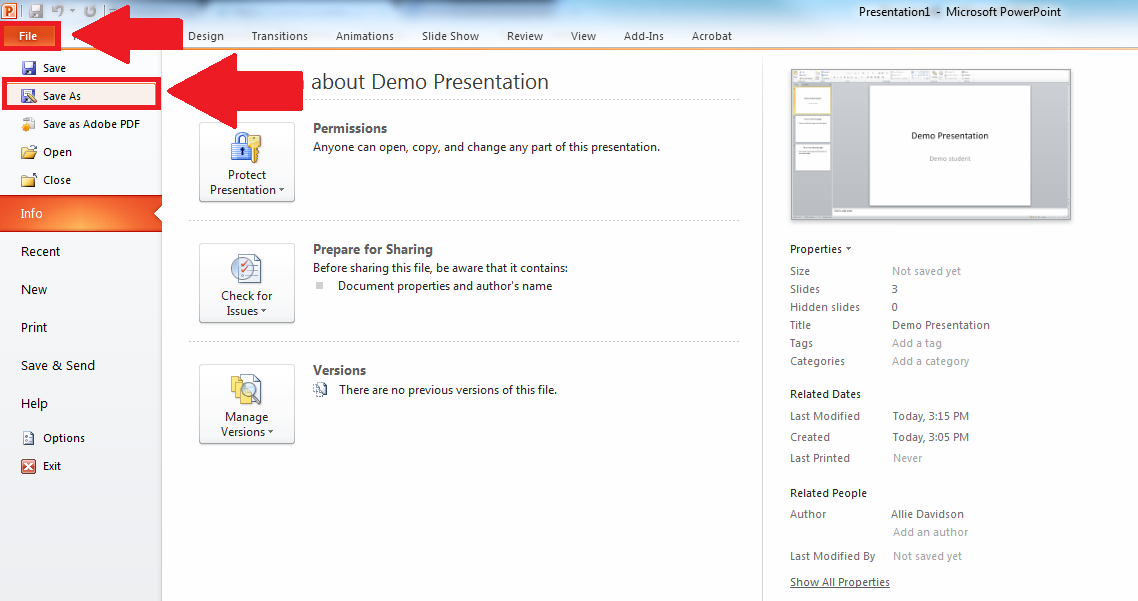
1. Click File
2. Click Save As
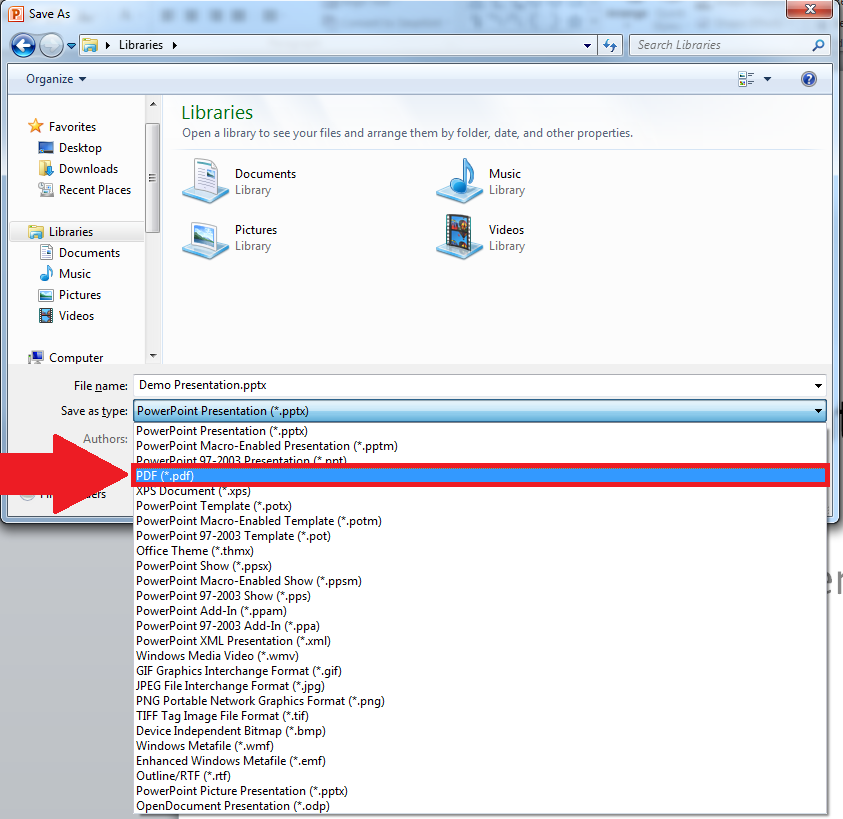
3. In the Save As pop up box, click on the Save as type drop down menu and choose PDF
4. Press Save
To Add the PDF to cuPortfolio
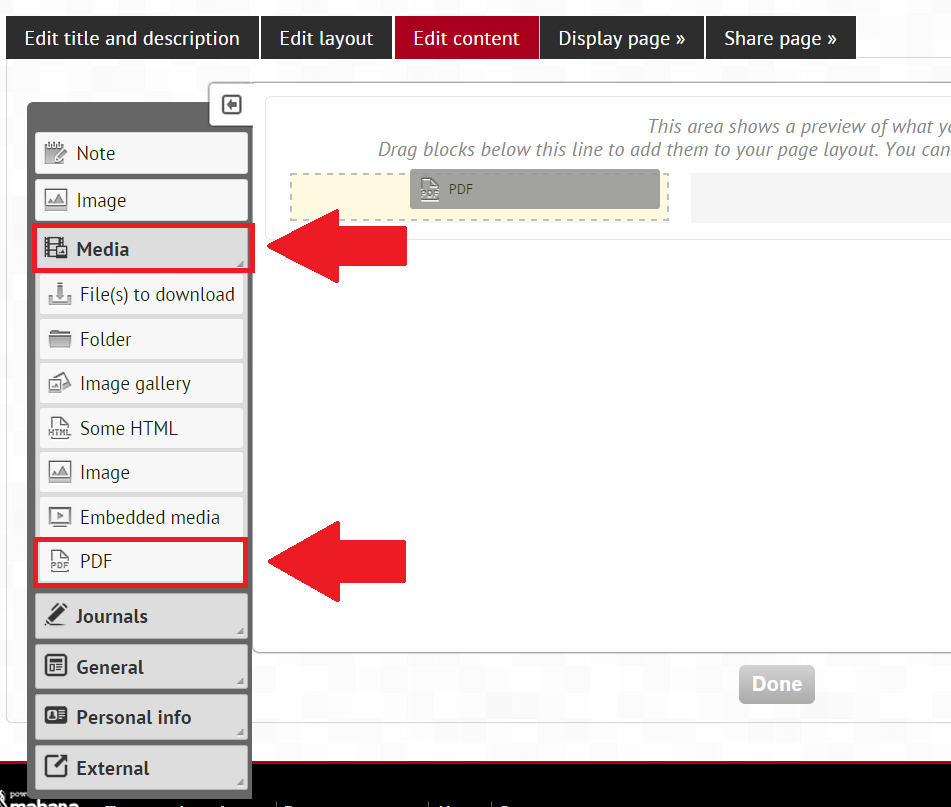
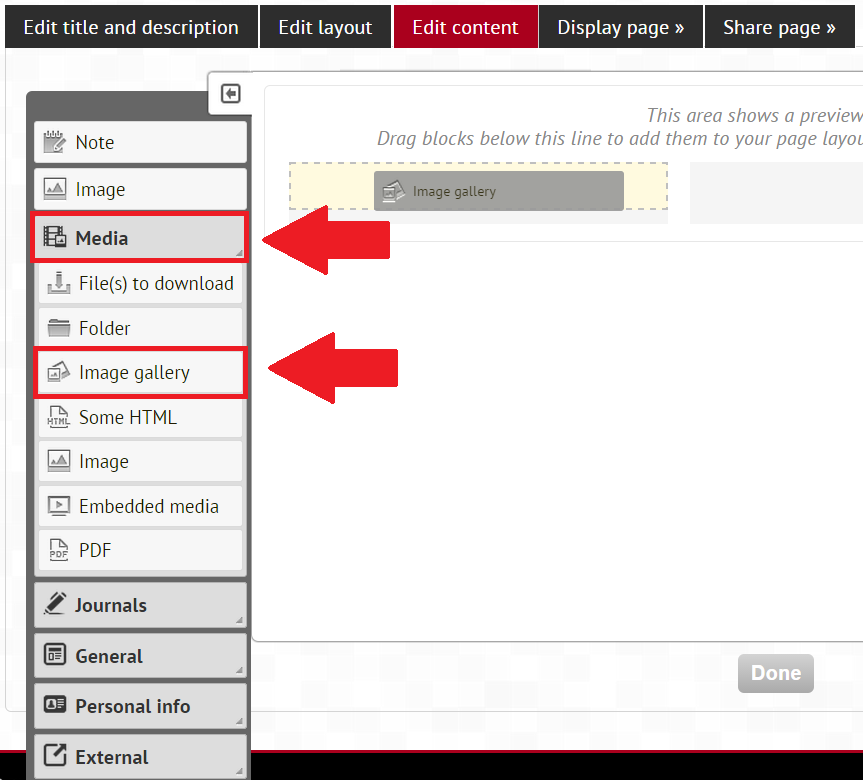
1. Go to the Edit content view of your page
2. Click Media
3. Select the PDF block
5. Press Save
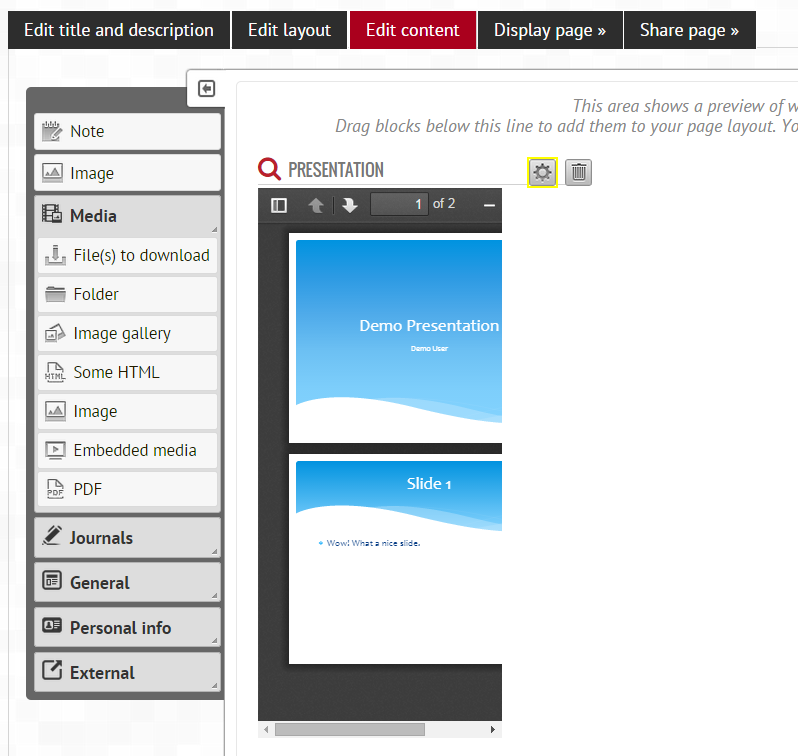
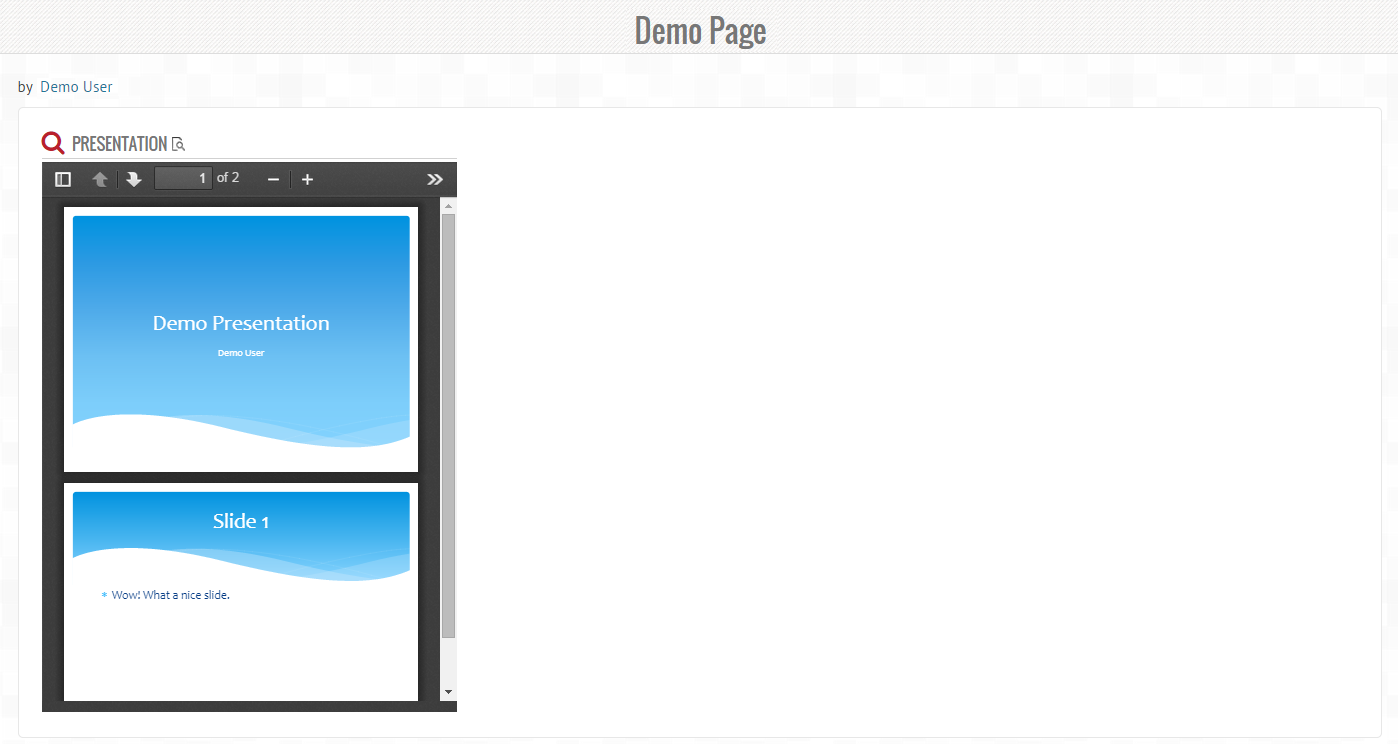
Note: The PDF document on the Edit content view might appear to be cut off (see first image below) . This display only appears on the Edit content view. You can preview how the PDF will properly display by clicking on the Display page view (see second image below).
To Convert your Slideshow into Pictures
1. Click File
2. Click Save As

3. In the Save As pop up box, click on the Save as type drop down menu and choose JPEG File Interchange Format
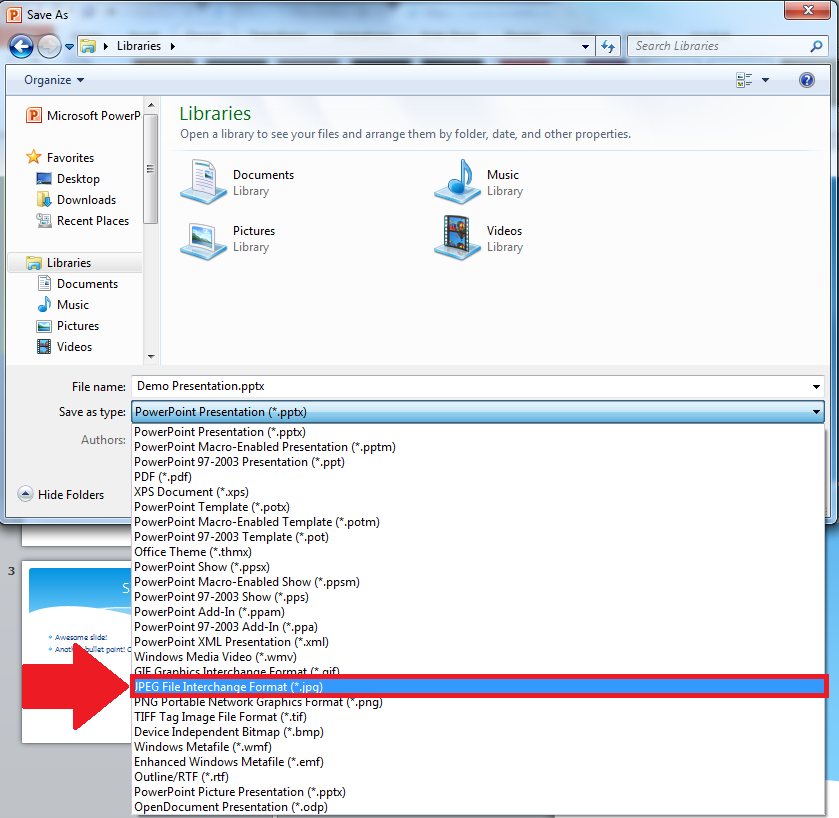
4. Press Save
5. A pop up box will appear. Press Every Slide

6. A second pop up box will appear. Press OK

To Upload the Slide Files on cuPortfolio
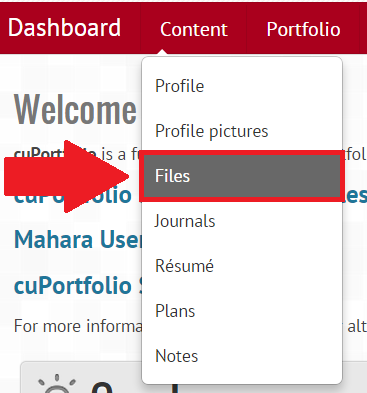
1. On the Dashboard page, hover your mouse over Content
2. Click Files
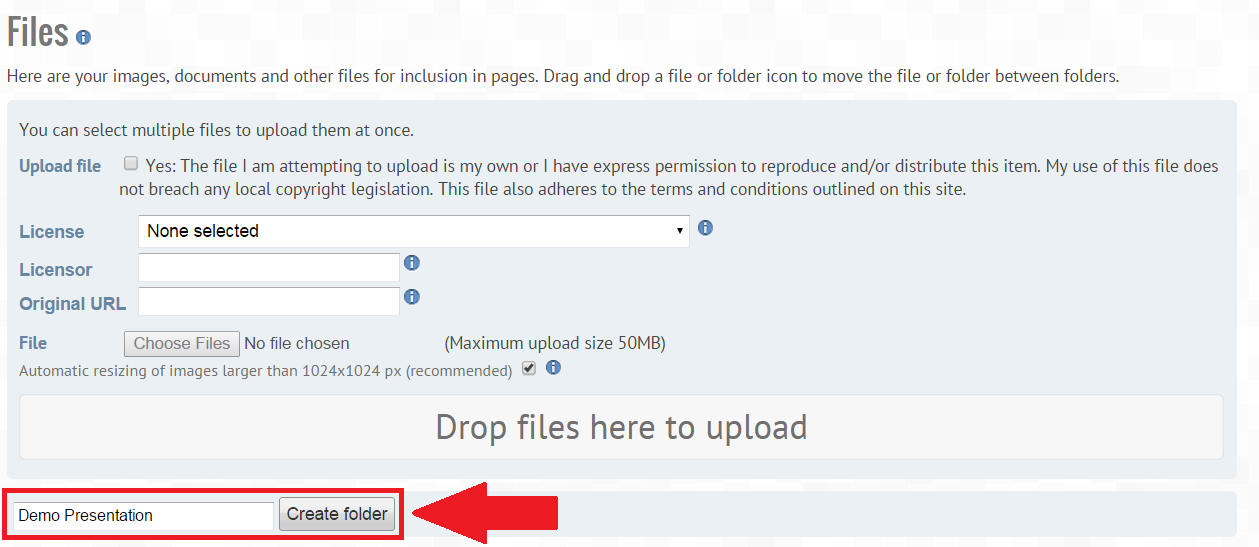
3. You are going to create a folder in cuPortfolio to place all of the JPEG images of your slides into. The name should be the title of your presentation. Add a name to the text field beside the Create folder button (see below).
4. Press Create folder
5. The folder will be listed at the top of the file repository list. Click on the title of the folder.

6. Upload the slide images from your computer
To add the Slide Files as a Image Gallery
1. Go to the Edit Content View of your page
2. Click on Media
3. Select Image Gallery
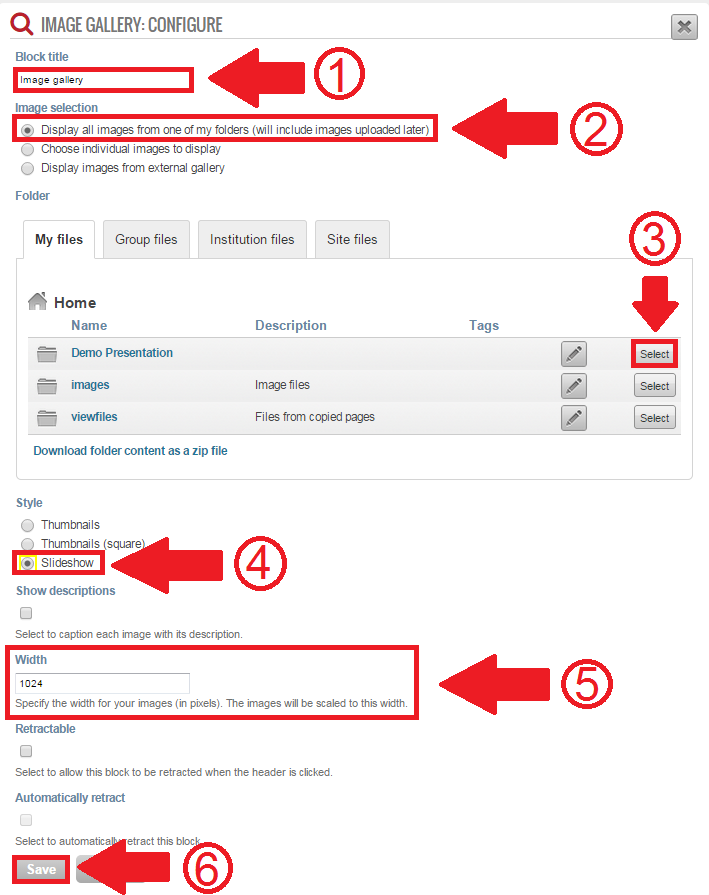
4. Change the title of the slideshow (see below, step 1)
5. Select Display all images from one of my folders (see below, step 2)
6. Press Select on the folder you made to hold the slide JPEG files (see below, step 3)
7. Select Slideshow (see below, step 4)
8. Change the Width to 1024 pixels (see below, step 5). This resizes the slides to the largest and most readable format.
8. Press Save (see below, step 6)
Note: Edit the layout of the page to allow for the slideshow to display in a large enough format so that your presentation is readable.