Contents
2.0 How to find your program in programadmin/Program Management
4.0 Propose a new program/element/option
7.0 Creating or editing detailed program requirements
8.0 Inserting a new courselist
1.0 Overview
If you have both course and program proposals to submit, it is recommended that all course proposals be submitted prior to submitting program proposals.
Access programs via the Calendar pages as described in the steps in Section A, or login directly to Program Management by clicking on the following url: https://nextcalendar.carleton.ca/programadmin/
This section explains how to view, add, edit and delete programs, and edit or create the courselists that are the building blocks of all programs.
2.0 How to find your program in programadmin/Program Management
- In the search field located on the top left of the CIM window type the Program Code or Program Title (e.g.: HBA-11 or Canadian Studies B.A. Honours) and click Search.
- To perform a wildcard search, enter an asterisk before or after your text and click Serach. For example, entering *Canadian Studies* will bring up multiple programs containing the text Canadian Studies.
- The Quick Searches drop down menu allows you to search by Undergraduate, Graduate, Edited, New, Deactivated or by All programs.
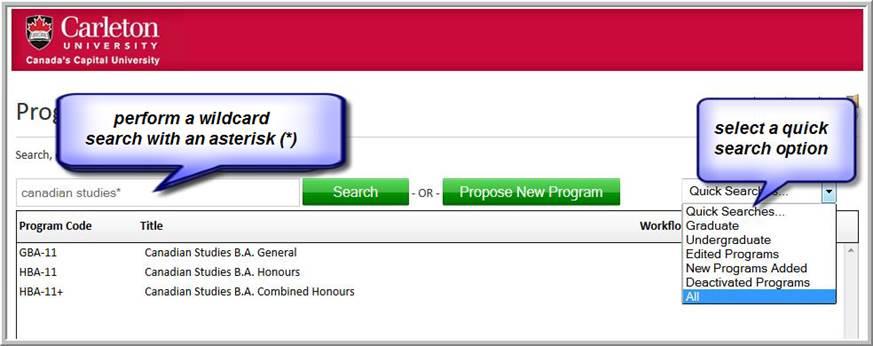
- Programs can also be sorted by clicking on the headings Program Code, Title, Workflow or Status. You can then scroll down and select a program from the list.

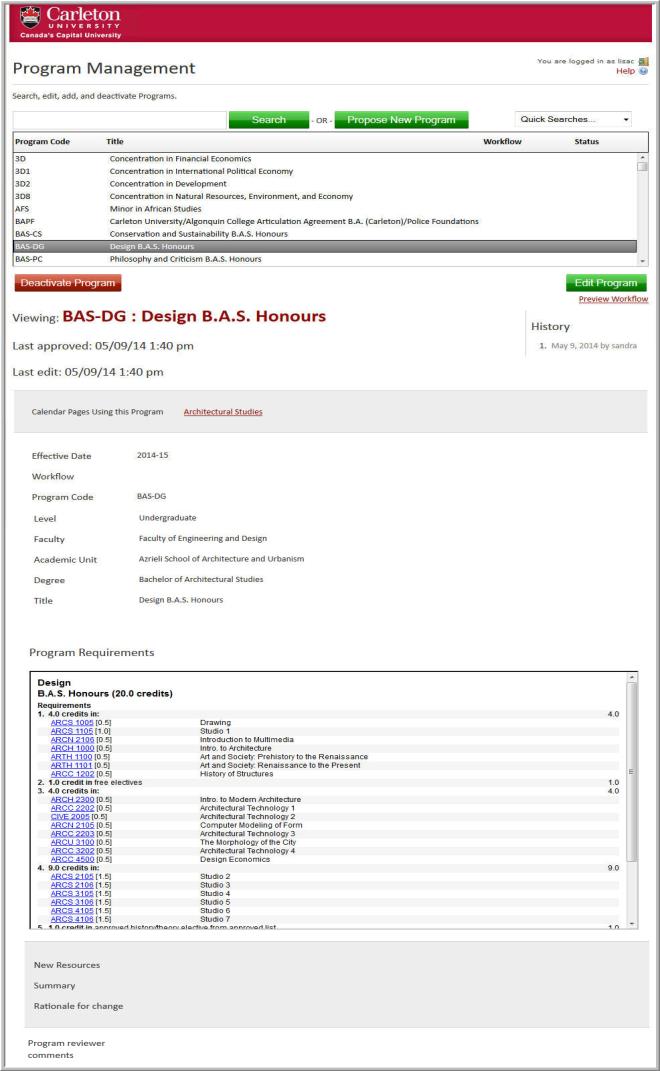
3.0 Viewing a program
Features
- The Course Ecosystem allows you to see courses and programs that would be affected if a proposal is made for the program you are viewing.
- Courses that were discontinued during the last cycle but not removed from program entries will be highlighted with red “Course not found” and should be removed and/or replaced.
- Current changes to program are shown with red/green tracked changes.
- Last approved and last edited dates are provided.
- Workflow status can be viewed if applicable.
- Deleted programs can be viewed but no further actions can be taken.
- Past proposals are archived under History.
4.0 Propose a new program/element/option
Since you are creating a new program rather than editing an existing one, access will be through the program management page at https://nextcalendar.carleton.ca/programadmin/ and not through the Calendar pages.
- Login to the Program Management page (as described in Section A).
- Click the Propose New Program button to access a New Program template.
- Complete the template as required.
| Field Name | Details |
| Effective Date | The calendar year in which the new program is proposed to be offered. |
| Workflow | New Program Approval |
| Level | Graduate or Undergraduate |
| Faculty | Multiple faculties may be entered for collaborative/interdisciplinary programs. |
| Academic Unit | Multiple academic units may be entered for collaborative/interdisciplinary programs. |
| Degree | Select from the list of pre-existing degrees/certificates/diplomas, or select Other to create a new one, or “Not Applicable” for minors. |
| Title | Type in the title of the program. |
| Program Requirements | Build your program as it would appear in the Calendar, following standard Calendar presentation. (See section 7.0 of this document) |
| New Resources | Check all that are applicable. Select “Other” if no new resources are required and note in the text field that appears. |
| Summary | Summarize the proposal being submitted: e.g. “Add new program Bachelor of Humanities and Journalism”. |
| Rationale | Type or copy and paste your rationale. |
| Transition/Implementation | Indicate whether or not any transition and/or implementation steps are required to guide the academic unit(s), or to help students transitioning in or out of the program. |
4. Once complete, select one of the following:
- Cancel to completely discard/not save any changes and return to the previous window.
- Save Changes to save any changes that have been made and come back to the proposal at later time. This does not submit the proposed changes to workflow and will allow you to save without filling out all required fields again when you return to the proposal.
- Confirm and Submit to save and submit all changes for approval. All required fields must be completed before the proposal can be submitted for approval. The proposal will go to the next person in the approval process of workflow. The next user in workflow will be sent an automatic email to notify the user they can now review, edit, approve or reject the new program proposal.The new program will not appear in the Calendar until it has received final approval and has been inserted into the CAT page by the Calendar Editor.

5.0 Edit an existing program
- You may access your existing program through its Calendar page, or through the Program Management page, as the steps described in Section A.
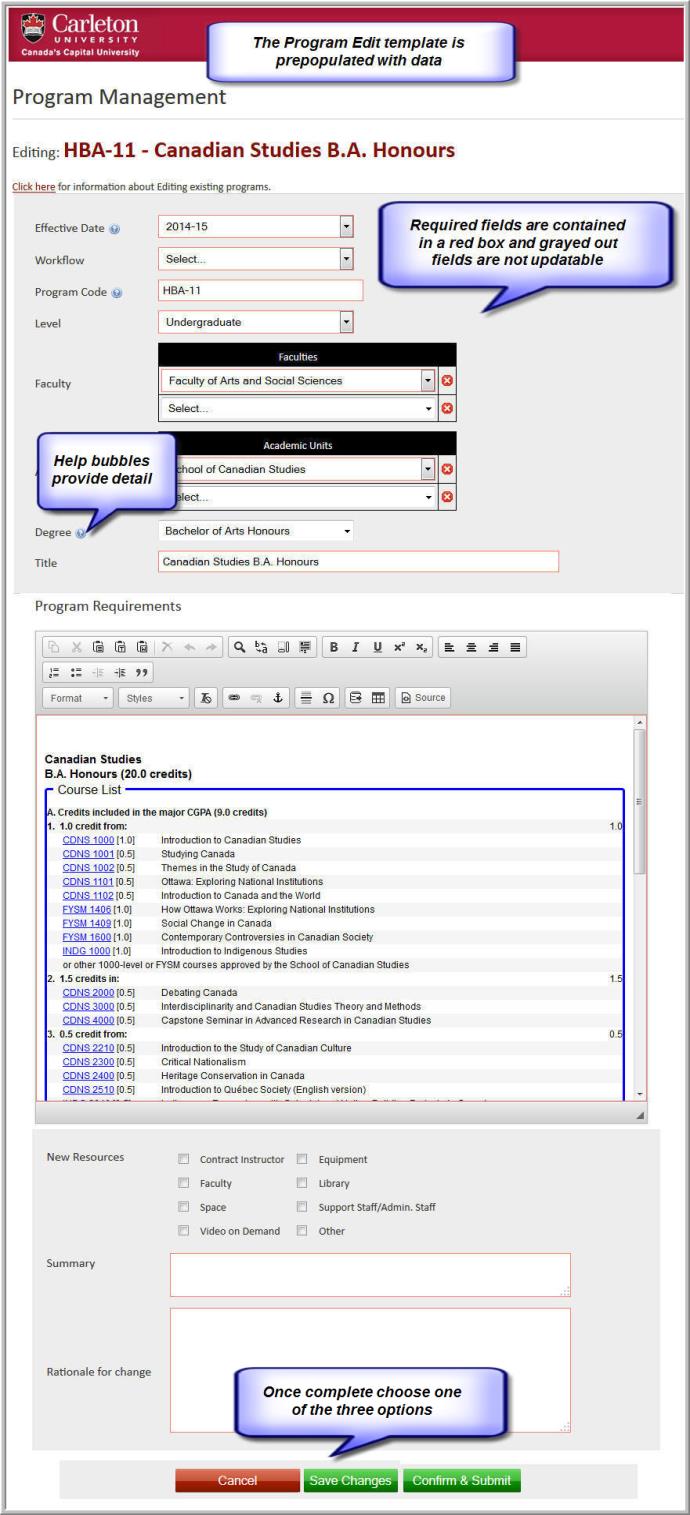
- Select the program you wish to edit, then click the Edit Program button bring up the Edit Program template.
- Modify the program as required. Note: most if not all of your program changes are going to be made in the Program Requirements window rather than the drop-down selections in the template.
- After editing the program, select one of the following:
- Cancel to completely discard/not save any changes and return to the previous window.
- Save Changes to save any changes that have been made and come back to the proposal at later time. This does not submit the proposed changes to workflow and will allow you to save without filling out all required fields when you return the program.
- Confirm and Submit to save and submit all changes for approval. All required fields must be completed before the proposal can be submitted for approval. The new program proposal will go to the next person in the approval process of workflow. The next user in workflow will be sent an automatic email to notify the user they can now review, edit, approve, or reject the new program approval.
6.0 Delete a program
- Follow the steps in Section A to log in to the Program Management page.
- Select the program that you wish to deactivate.
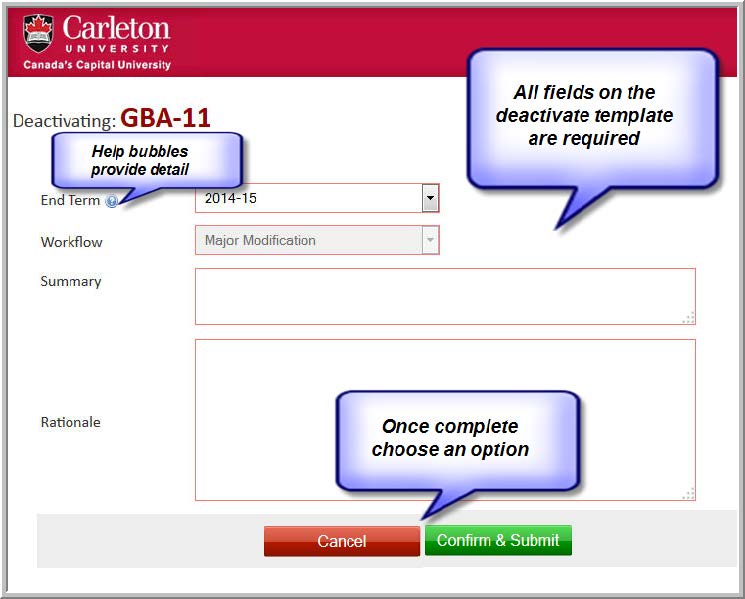
- Click the Deactivate button to populate the program deactivate template.
- All fields on the deactivate template require completion.
| Field | Details |
| End Term | i.e. the calendar year in which the deletion becomes effective. |
| Workflow | |
| Summary | Summarize the action being taken, including full program details (e.g. “Delete program B.A. Honours Potterymaking”). |
| Rationale | Type or paste in rationale here. |
5. Once complete, select one of the following options:
- Cancel to completely discard/not save any changes and return to the previous window.
- Confirm and Submit to save and submit all changes for approval. All required fields must be completed before the proposal can be submitted for approval. The proposal will go to the next person in the approval process of workflow. The next user in workflow will be sent an automatic email to notify the user they can now review, edit, approve, or reject the new course approval.
7.0 Creating or editing detailed program requirements
In CourseLeaf, course lists are the building blocks of all the programs.
A course list provides course requirement information in a pre-formatted table structure. Active courses listed within a page or within program course lists are linked to courses in the Calendar and in Banner.
You can access existing detailed program requirements for editing in one of two ways: through the program’s (CourseLeaf) Calendar page, or through Program Management. The methods are described in Section A.
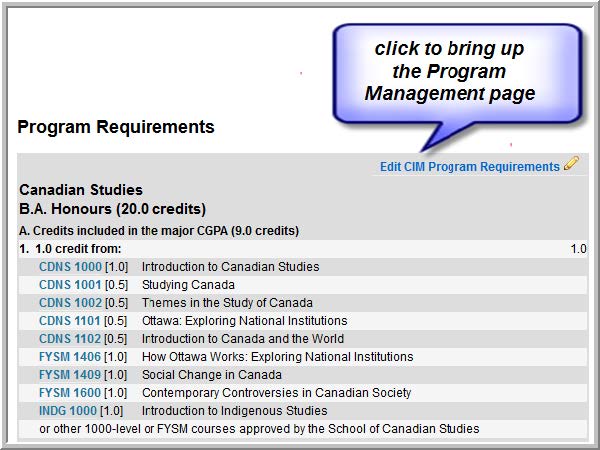
To access a program through the program’s Calendar page, click on the “Edit Page” icon in the top left corner. A beige toolbar should appear across the top of the page, and gray boxes will appear around the programs on the page.
Navigate to the desired program, and click on the text in the top right corner of the gray box that says “Edit CIM Program Requirements”.
Or you can access the program in Program Management. See 2.0 above: How to find your program.
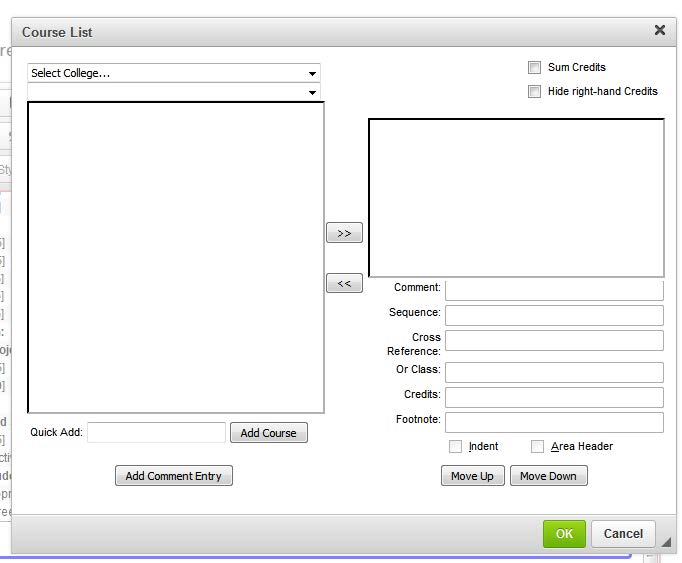
Once you are in the Program Management page, click the green Edit Program button on the right to bring up the Edit template. Then scroll down to the Program Requirements section where you will see the course list. To access the course list for editing, double-click on the blue-outlined box containing the table. The course list dialog box will appear as shown below.
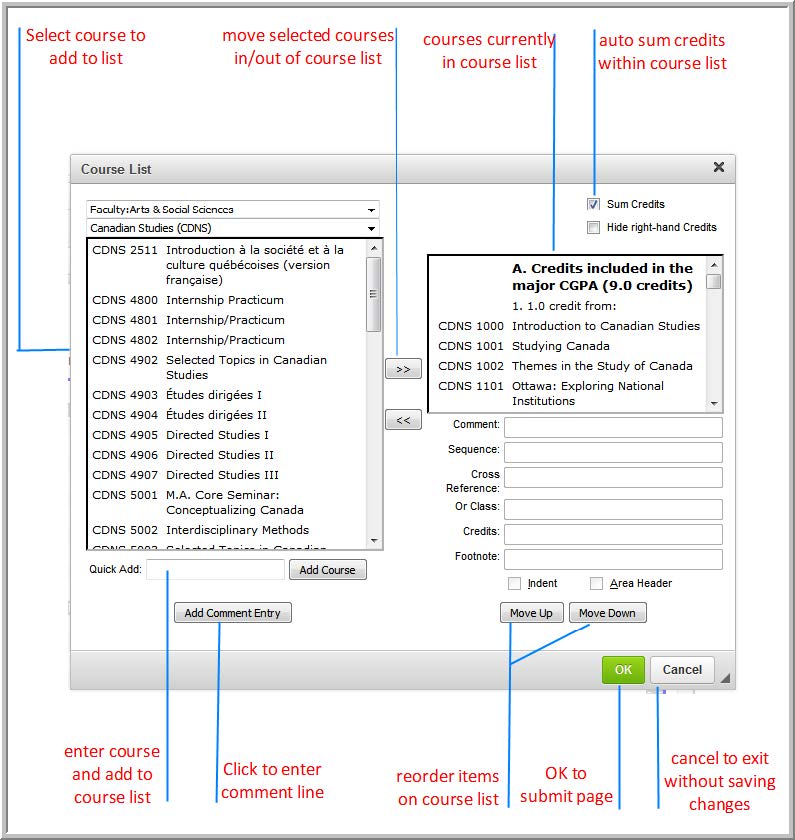
| Field | Details |
| Faculty | The faculty through which the program is offered.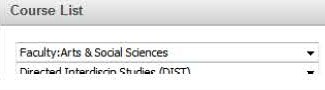 |
| Department | The default setting will show the department offering the program, and all of its associated courses, which may be selected and ‘brought over’ to the program requirements list on the right. As well, other units may be selected, and a list of their courses will be displayed from which you may select.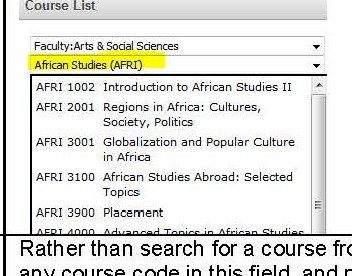 |
| Quick Add | Rather than search for a course from the individual department lists, you may simply type any course code in this field, and press the “Add Course” button, or just <enter>.To add a course to existing requirements, position your cursor on a line of text (comment) or course number directly above where you would like your course to appear.Then either move it over from the list using the arrow, or use the Quick Add feature: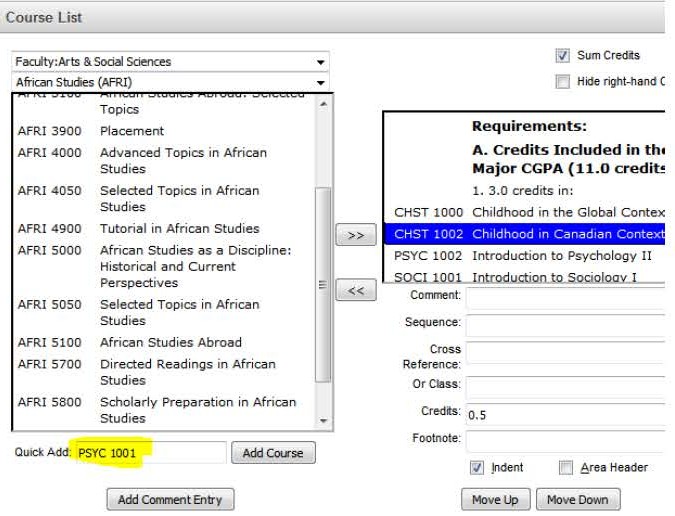 |
| Add Comment Entry | This field enables you to type text lines into the program requirements. It is used to add the “Credits Included in the Major” and other headers and some statements. To add a comment or header to existing requirements, position your cursor on a line of text (or course number) directly above where you would like your line of text to appear. Click on the Add Comment Entry button. Type your text into the field, and press OK (or cancel). Your text will now appear in the Requirements window on the right. It can be moved from that position by using the Move Up/Move Down buttons.1. Select Add Comment Entry2. Type your comment into the field and press “OK”.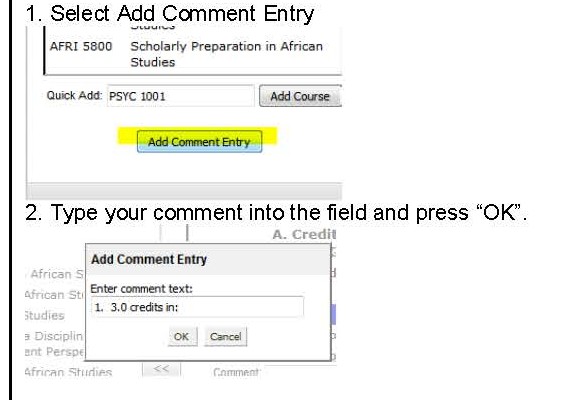 Note: certain standard combinations of text will be automatically bolded upon generation of the Calendar and no additional formatting is required. For example, “1.0 credit in” / “2.0 credits from”. Note: certain standard combinations of text will be automatically bolded upon generation of the Calendar and no additional formatting is required. For example, “1.0 credit in” / “2.0 credits from”. |
| Sum Credits |
When this box is checked, the table will provide a sum of the total number of credits required for the program. |
| Hide right-hand credits |
This feature is often used for lists of electives that are not a part of any program requirements (thematic lists, etc.) where credit values (beyond that in the original course number) are not needed to be listed in the right column, or tallied/summed. |
| Comment |
This feature is different from the ‘add comment entry’ above. It enables a comment in parentheses to be made following a course number in the list of requirements. |
| Sequence |
This will add a second course, to make a couplet of required courses in an item. With the course in the requirements list highlighted, enter the second course in Sequence and the requirement will show as: CHEM 1101 [0.5] & CHEM 1002 [0.5] |
| Cross Reference |
This will add a second course to show that a cross-referenced course may be used. With the course in the requirements list highlighted, enter the cross-referenced course in Sequence and the item will display as:LAWS 5008/SOCI 5204 [0.5] |
| Or Class |
This will add a second course to make a couple of courses from which one or the other may be chosen to fulfil the item. With the course in the requirements list highlighted, enter the second course in Or Class and the requirement will show as CDNS 4903 [0.5] or CDNS 4904 [0.5] |
| Credits |
This item is used ONLY to assign a credit value to the Item Number row, for example 1. 3.0 credits in: The credit value described in this text row (3.0) is entered into the Credits window (as 3.0 or 3). It is from this field that the Sum Credits generates its totals, so it is important that this number matches the number typed in the line of text. |
| Footnote | |
| Indent |
All courses listed within a program must be Indented. This allows the Sum Credits feature to function properly and avoids course credits being counted twice. If there is a problem with the total credits showing as required for the program, check that all of the courses are indented. A course that is not indented will result in a program showing more credits than it actually requires. |
| Area Header |
This feature enables an entire line of text to be bolded. It is used primarily for the main headings.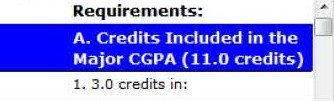 |
8.0 Inserting a new courselist
To create a brand new courselist into which you will add the program requirements, click on the table/list icon at the top of the Program Requirements toolbar.
Then select Course List, and OK.

Your new blank table is now ready for filling in.
Feel free to contact the Calendar Editor at courseleaf@carleton.ca for assistance with setting up new programs.