Troubleshooting Quicklinks: Uploading a Profile Photo that is too Large
Reszing an image with a PC computer (Paint program)
Resizing an image with a Mac computer (Preview program)
Adding a Profile Picture
1. On the Dashboard page, hover your mouse over the Content tab
2. Select Profile Pictures

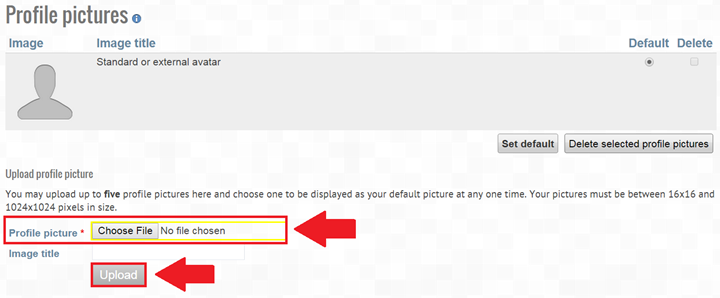
3. Click on Choose File to select a photo from your computer (see below)
Note: A popup box will appear where you can browse through the images on your computer
4. Once you have selected an image in the popup box, click Upload
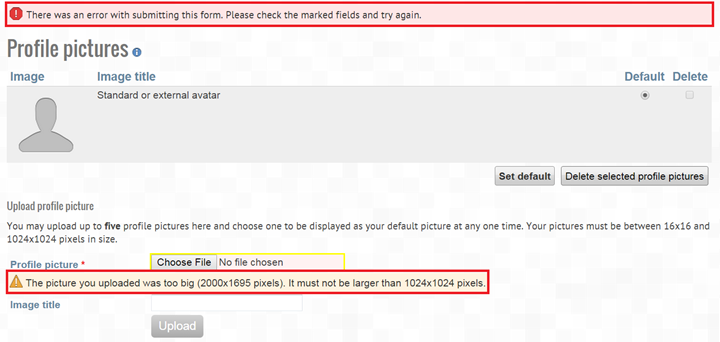
Troubleshooting: Uploading a Profile Photo that is too Large
You cannot upload an image larger than 1024 pixels as your profile picture. This is a unique issue to the Profile Picture uploading process. If you upload a file in any other location on cuPortfolio and the image is too large, cuPortfolio will automatically resize it for you. However when uploading a profile picture, if you try to upload an image that is too large, an error message will display (see below). Do not worry if you see this message, there is a simple way of changing the size of your profile photo on your computer. Follow the instructions below to resize your image.
To resize an image using Paint (PC computer)
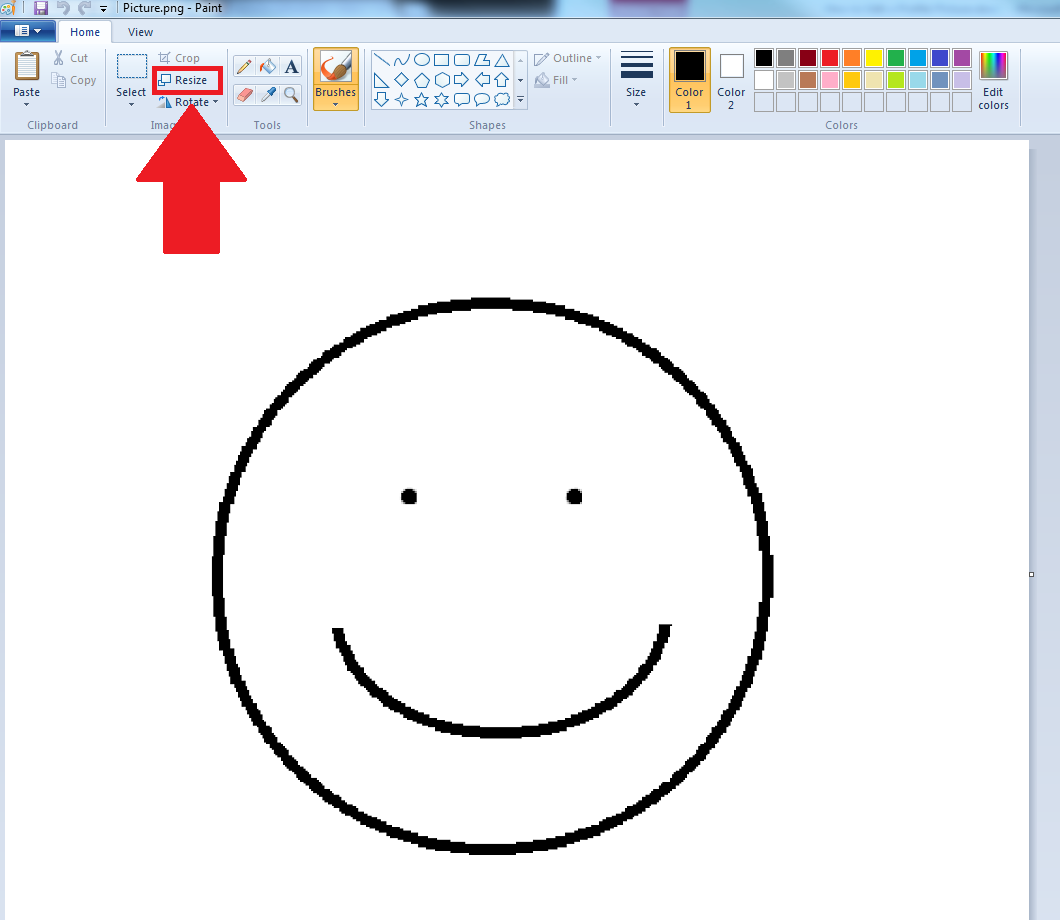
1. Open your photo with the program Paint.
2. Select Resize on the top toolbar (see image below)
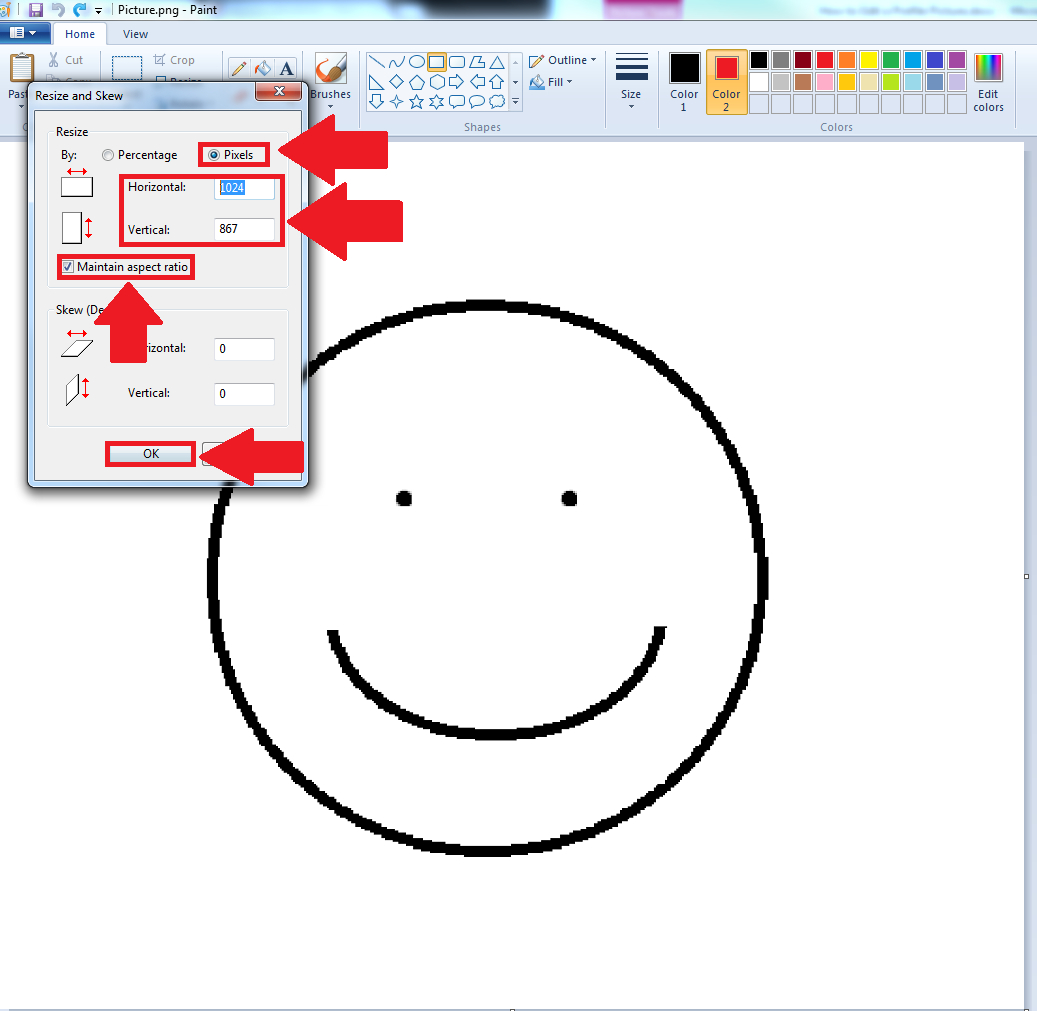
3. A popup box will appear. Select Pixels and change the horizontal and/or vertical size. Change the size to 1024 pixels or less.
Note: To keep the same height and width ratios for your image keep the Maintain aspect ratio box checked. When this box is checked, the vertical size of your image will automatically resize to maintain the correct height and width ratios. This ensures that your profile picture will not be stretched or distorted in the resizing process.
4. Click OK
6. You can now upload this resized photo as your profile picture
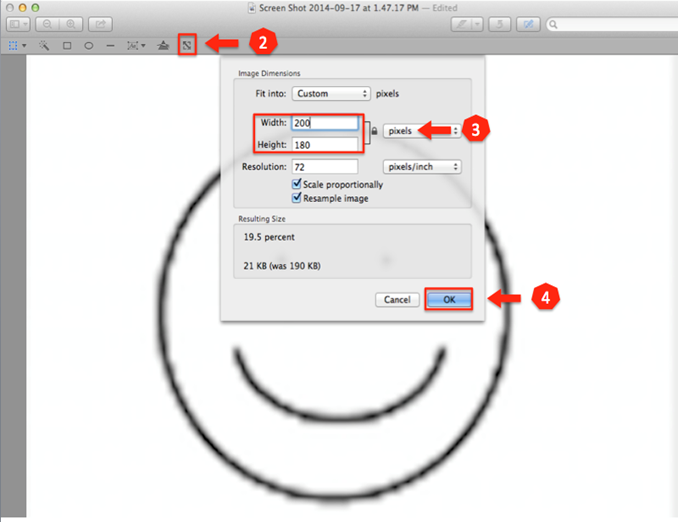
To resize an image using Preview (Mac computer)
1. Open an image with Preview
2. Click on show edit toolbar icon (See below step 1)

3. Select Adjust size icon (See below step 2)
4. In the pop-up box, change the width and/or height of the images (See below step 3). Change the size to 1024 pixels or less.
Note: To keep the same height and width ratios for your image keep the Scale Proportionally box checked. When this box is checked, the vertical size of your image will automatically resize to maintain the correct height and width ratios. This ensures that your profile picture will not be stretched or distorted in the resizing process.
5. Click OK
6. You can now upload this resized photo as your profile picture