Whether you’re new to eShop or consider yourself an advanced user, there may be features you are unaware of! We’ve rounded up our most frequently asked questions in order to provide you with some time-saving tips! Don’t forget our How-to Sheets are also available on the FACTS website.
Questions? Email us at eShop@carleton.ca.
Tip #1: Know where your Requisition is in the workflow
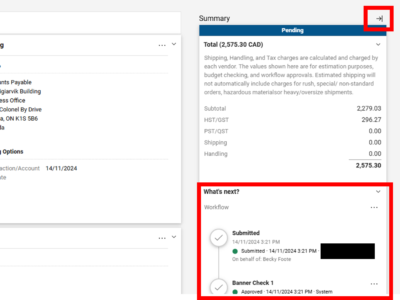
Have you ever submitted a Requisition and wondered when it will be fully approved? Navigate to your Purchase Requisition, and make sure the “Summary” pane is open. If you don’t see it, select the small arrow icon to the right of the “Billing/Payment” section.
Look for the “What’s next?” section to see who has already approved the Requisition at their step, and what steps are waiting to be completed.

Tip #2: Save an official copy of your Purchase Order (PDF)
If you ever need a copy of the official Purchase Order that was sent to the Vendor, navigate to your Purchase Order and select the 3-dot symbol in the top right-hand corner to view additional options. Select “Print Fax Version” and a copy of the Purchase Order will open in a new browser tab. You can then click Ctrl+P to print, or save a PDF copy.

Tip #3: Repeat Orders – copy a previously submitted requisition to a new cart
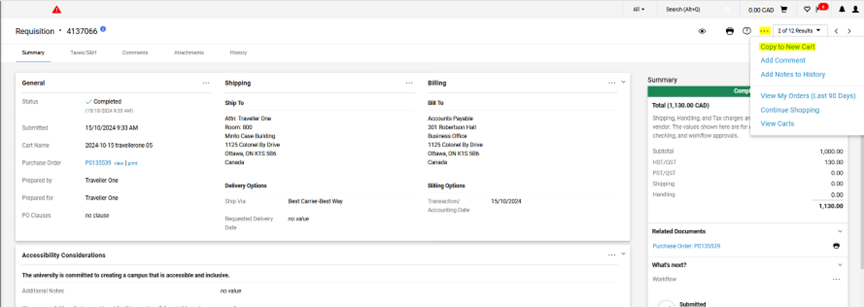
If you need to repeat a previous purchase order, navigate to your Requisition and select the 3-dot symbol in the top right-hand corner to view additional options. Select “Copy to New Cart” and the Requisition will be copied to your current active cart, including details and attachments. You can then make any needed changes (i.e. dates, amounts, updated attachments) and submit the new Requisition.

Tip #4: View a Vendor’s profile
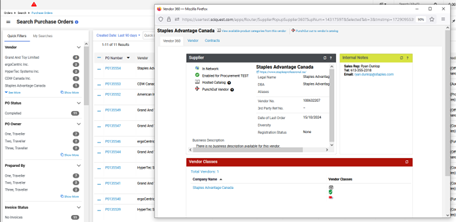
The Vendor’s profile will provide you with helpful information such as ny available contact details or Vendor classes (ex: Ontario Business status, Vendor of Record, etc).There are many ways to view a Vendor’s profile in eShop – one way is by clicking on the small “i” next to the Vendor’s name in your Purchase Order history.


Tip #5: Add a Form to a new cart
There are times when you may see the error message “Cannot add this do-not-mix form to the active cart”. This happens when you have something sitting in your cart and the Form you are completing must be added to an empty cart. There’s an easy way to solve this!
Instead of clicking the red “Add and Go To Cart” button on the form, select the arrow to the right of it for more options and select “Add to New Cart”. This will put the Form into a new cart that you can then submit and go back to the previous cart when ready.
