Uploading Required Documents
After you submit your OSAP application, the next step is to submit your supporting documents. The type of documents you have to submit will depend on the information you entered on your application. The easiest and fastest way to submit your documents is to upload them directly to your OSAP application. Here is our step-by-step guide.
Table of Contents
Step 1 – Print and sign your supporting documents
- Print and sign all your supporting documents.
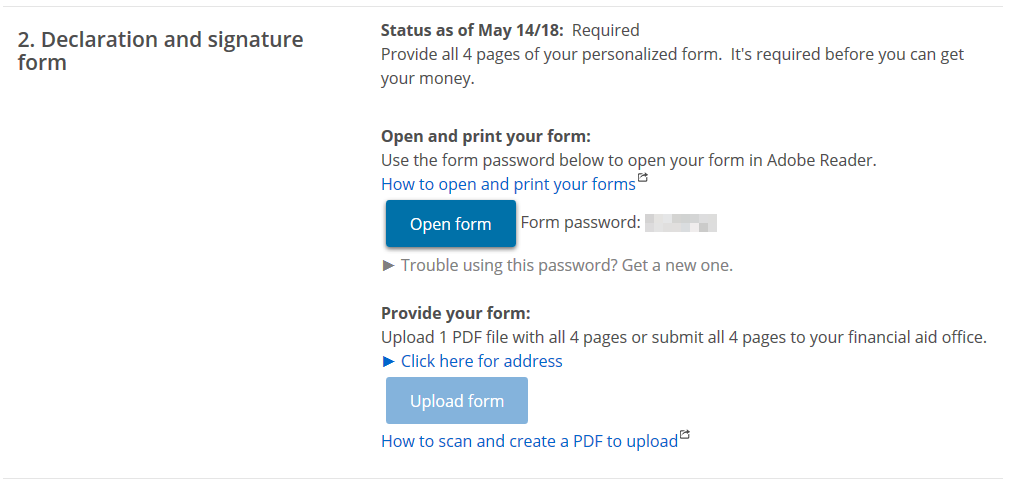
When you download your document, your PDF reader will prompt you for a password before you can open it. This is not your OSAP account password.
- The password to open your document is located right next to the “Open form” button where you downloaded it.
- Each document listed on your required documents page will have its own password.
- After you have downloaded your documents, make sure you read them carefully and understand the terms.
- Sign and date all required fields.
Note:
If you reset the password for a document, you will have to re-download the form to use the new password.
Step 2 – Scan each required document into PDF
- Scan each document into a PDF file that is less than 2 MB in size (less than 5 MB for declaration and signature pages).
Using a scanner/photocopier
Most devices will scan to PDF as the default. If not, you may need to dig around in the settings. You’ll also want to tweak some of the scanning presets to ensure your document size is below the file-size limit. Here are some tips:
- Scan in black and white
- Select a text style option rather than photo or picture
- Set the DPI (dots per inch) to the lowest option, typically 150 or 200.
If your scanned document size is larger than 2 MB, you can try to compress the file using a program like 7zip (for Windows users) or Apple’s built-in file compression utility (for Mac users).
Using a mobile app
If you don’t have access to a scanner/photocopier, there are many mobile apps for your smartphone that will let you take a picture of your documents and convert them to a PDF.
For scanning OSAP documents, we recommend Genius Scan. Genius Scan’s ability to export your document to device memory or encrypt before sharing (requires paid version), means you can securely transfer your documents to your computer. Don’t forget, OSAP documents contain sensitive personal information.
How Genius Scan Works
Here is a quick rundown of using Genius Scan to scan your OSAP documents as a PDF.
Step 1 – Scan your document
- Open Genius Scan and select the camera icon to start a new document.
- If your document has more than one page, you will need to select the batch option.
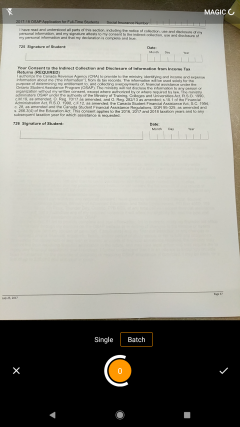
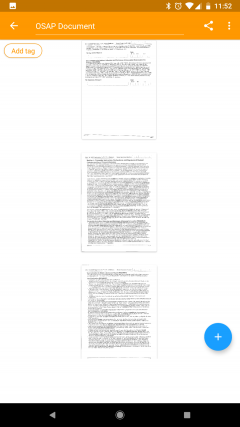
- With the batch option selected, you can keep taking pictures of each page until you have scanned all the pages of your document.
- Once you are finished, select the check mark to save your document.
- You can also enter a custom filename from this screen.
Step 2 – Download your document onto your computer
- Now you need to get your document onto your computer so you can upload it to your OSAP application.
- There are two options to securely transferring your files:
- Export to your device memory:
- One of the sharing options in Genius Scan is to export your PDF to your device memory. This will allow you to plug your phone into your computer and transfer it over through the file explorer (or Finder on Mac).
- Encrypt your PDF before emailing (requires paid version of Genius Scan)
- The paid version of Genius Scan has a document encryption option. Enabling this will secure your document so you can safely send it to your email, cloud storage, etc.
- Export to your device memory:
Note:
Genius Scan provides you with four options: actual, large, medium, and small. Your PDF needs to be less than 2 MB (5 MB for declaration and signature pages) for the OSAP application to accept it.
Step 3 – Upload your documents to your OSAP application
Now you can return to your OSAP application and upload each document. Once you have successfully uploaded your documents, they will appear in the “Uploaded documents” section of your “Required documents” page.
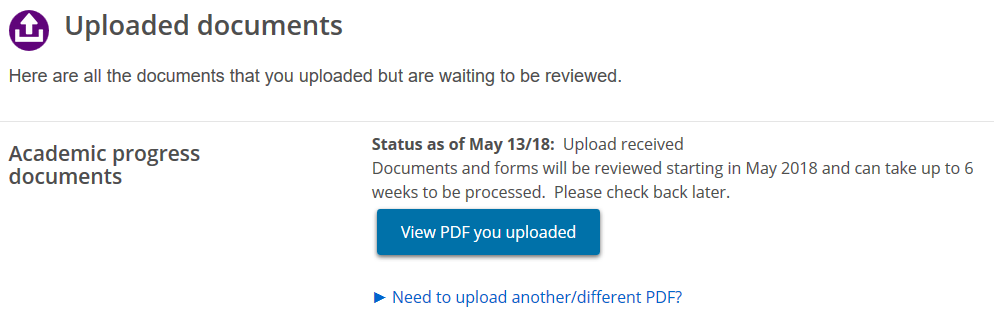
- Once they have been approved, they will move into the “Approved documents” section.
Step 4 – Monitor your application
Keep a close eye on your OSAP Message Centre and Carleton email account. If we are unable to approve your supporting documents or need more information from you, we will contact you.
Master Student Financial Assistance Agreement (MSFAA)
If it’s your first time applying for OSAP, you’ll have to sign and submit an MSFAA. This is your multi-year federal and provincial loan and grant agreement. You’ll only have to submit it the first time you apply for OSAP. This is the only document you won’t be able to upload to your application. This is because it’s processed by the National Student Loans Service Centre (NSLSC), not our office. When you submit your OSAP application, the NSLSC will email you instructions for submitting your MSFAA.