A Pixlr is Worth a Thousand Words: Basic Image Editing with Pixlr
So you have an image to add to your website but it’s not the right size, shape, rotation, or a thousand other little things that keep it from being picture-perfect. Well, in the age of free image editing software, fixing your pixels has never been simpler.
Of course, you’re free to use the software of your choice, but if you’re overwhelmed with the possibilities (or frustrated with your current editor of choice), this post will teach you the basics of image editing with the free, in-browser image editing platform, Pixlr.
Pixlr has two editing platforms: X – their “Quick and Easy” editor and E – their more advanced editor. This tutorial will cover the basics of Pixlr X and common edits that you may need to make in the course of working on a website.
Uploading an Image
From the home page, you will have three options for uploading an image:
- Click the blue Open Image button in the first box. This will let you upload an image for your device.
- You may start a project without an image using the Create new button. After picking your dimensions, you can then upload an image to the canvas using Add Element / Image and then selecting the Add Media button at the top.
- You could also upload an image via its URL using Load url. However, the resolution is not always as high as if you were to download and open the image, using the first option.
If your image is large, Pixlr may ask if you want to resize it. Choose whichever option is appropriate for the amount of pixels your picture will need. For example, on Carleton websites, banners should be 1600px wide by 700px high, while thumbnails should be a minimum of 300px by 230px, or a maximum of 800px by 600px.
Cropping and Rotating
One of the most common edits you’ll likely have to make to an image is to change its size and/or dimensions. You can do this easily using Pixlr.
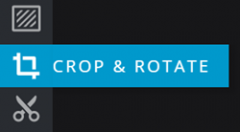
From the left-hand tool bar, click on the Crop & Rotate option.
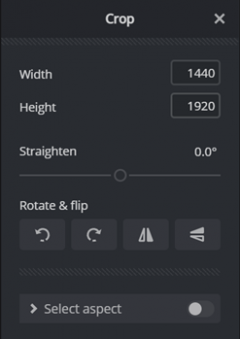
You will be shown a menu with the following options:
- Using the Width and Height fields, you can adjust the size of the crop area in pixels.
- Drag the Straighten slider to the left or right to rotate the image while keeping the aspect ratio and shape the same.
- You can rotate the image clockwise or counter clockwise, as well as flip it horizontally or vertically using the four buttons under Rotate & flip.
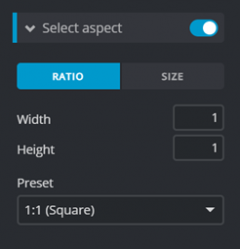
- Select aspect will be toggled off by default, but by opening it, you can crop by ratio or size using the Width and Height fields. Using the size option here will resize the image to the entered dimensions. This section also includes a list of pre-sets for different image uses such as social media posts, profile pictures, and banners.
Darkening an Image
When creating an image that text will appear over top of (such as a banner), you might need to darken the image so that the text appears more clearly. Keep in mind that if you are adding this image as a banner to a Carleton website, there are options to darken the banner within the website itself.
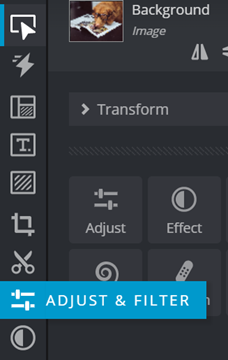
- Navigate to the Adjust menu, either by clicking the Adjust & filter icon or by clicking the Adjust button under the Arrange & style menu.
- You will need to have the layer both selected and unlocked.
- You will need to have the layer both selected and unlocked.
- From this menu, open the Light dropdown and move the slider under Brightness to the left. About -50 should be enough to have white text appear clearly over the image, depending on the original brightness.
- You can test this by adding text to the image (Add Text in the side menu, then add default text). Be sure to remove this text after you are done testing the brightness.

- You can test this by adding text to the image (Add Text in the side menu, then add default text). Be sure to remove this text after you are done testing the brightness.
Saving an Image
Once you’ve completed your changes to the image, be sure to save it!
- When you are finished editing your image, click the blue Save button in the bottom right corner.
- The next screen will prompt you to select quality and file type. Pixlr will recommend saving as a JPG, as this type of file is best suited for loading quickly on web pages. However, you are free to choose any image type. Pixlr offers options to save as a JPG, PNG or WebP image or to save the entire project as a PXZ file.
- Click Save As in the bottom right corner and save your file to your device. You can also name it from this screen.
Try It Out!
Using the instructions above, you should be able to accomplish all the basics of image editing for the web. Let’s put them to the test by making a banner for a Carleton website.
- Upload your image. You can find a guide to finding copyright-free images here.
- Crop your image to the dimensions 1600px wide by 700px high.
- Darken your image to -50.
- Save your image.