Guide to WordPress’ Built-In Image Editor
Did you know that WordPress has a built-in image editor? Equipped with an intuitive interface, this tool empowers you to effortlessly enhance your website’s visual content without the need for external software. In this article, we will explore all the editing options offered by WordPress’ built-in image editor, providing you with a step-by-step guide on how to make the most of this incredible feature!
Accessing the Built-In Image Editor
WordPress’ image editor is conveniently accessible from the Media Library or directly within the editing screen of a post or page.
WordPress Media Library
- On the backend of your website, click on Media in the left-hand menu.
- In the Media Library, locate and click on the image you want to edit. This action will open the Edit Media screen, displaying the selected image.
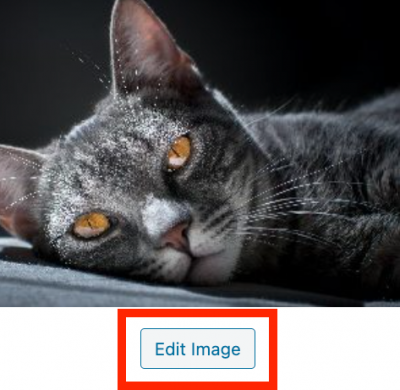
- Within the Edit Media screen, you’ll find an Edit Image button just below the image preview. Clicking on this button will launch WordPress’ built-in image editor.
WordPress Editor
- On the backend of your website, navigate to the post or page where you want to edit an image.
- Select Add Media. This action will open the Media Library.
- In the Media Library, locate and click on the image you want to edit. This action will open the Edit Media screen, displaying the selected image.
- Within the Edit Media screen, you’ll find an Edit Image button just below the image preview. Clicking on this button will launch WordPress’ built-in image editor.
Basic Image Editing
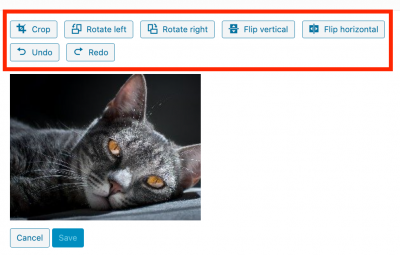
WordPress’ built-in image editor offers various editing options. In the toolbar, you can choose to crop, rotate, or flip your images. As well, you have the option to undo or redo your edits. Let’s go over these in more detail:
- Crop: The cropping tool allows you to crop images to custom dimensions. By selecting “Crop”, you’ll see an adjustable selection box overlaid on the image preview. By dragging the edges of the box, you can adjust the crop area to focus on the desired portion of the image. Once satisfied, click the “Crop” button to finalize the change.
- Rotate: The rotate tool allows you to adjust the orientation of your images. This tool has two options: “Rotate left” and “Rotate right”
- Rotate left: This rotates your image 90 degrees in a counterclockwise direction
- Rotate right: This rotates your image 90 degrees in a clockwise direction.
- Flip: Similar to the rotate tool, the flip tool allows you to adjust the orientation of your images, and has two options: “Flip vertical” and “Flip horizontal”
- Flip vertical: This inverts your image (the top part of the image becomes the bottom part, and vice versa).
- Flip horizontal: This mirrors your image (the left side of the image becomes the right side, and vice versa).
- Undo and Redo: The Undo and Redo tool enables you to revert your most recent edits. By selecting “Undo”, you can reverse the most recent change, while selecting “Redo” allows you to redo the previously undone change.
That’s not all! On the right column of the image editor, you are given the option to scale image, image crop, and adjust the thumbnail settings. Let’s go over these in more detail:
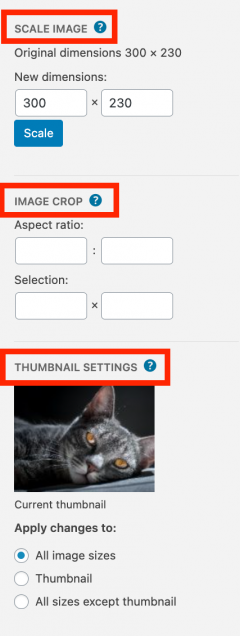
- Scale Image: This tool enables you to resize images while preserving the original aspect ratio. Enter either the width or height value, and then click “Scale” to automatically adjust the other dimension.
- Image Crop: This tool offers two options for cropping: “Aspect ratio” and “Selection”.
- Aspect ratio: This option allows you to specify a particular aspect ratio to maintain while cropping the image. Once you have set the aspect ratio, you can then click the “Crop” button and crop out the selection you choose with the predefined ratio.
- Selection: This option allows you to specify the size in pixels that you want to crop. Once you have set the size in pixels, you can then click the “Crop” button and it will automatically crop the selection.
- Thumbnail Settings: When you upload an image to WordPress, it automatically generates different sizes of the image. Thumbnail settings allows you to choose which image size to apply your changes to.
- All image sizes: This option applies the changes you make to all the different sizes of images generated by WordPress, including the thumbnail size, medium size, and large size.
- Thumbnail: Selecting this option will only apply the changes to the thumbnail image. The medium and large size image will remain unchanged.
- All image sizes except the thumbnail: This option applies the changes to all image sizes generated by WordPress, except the thumbnail size. The medium and large sizes will be modified, while the thumbnail size will remain as it was before.
Saving an Image
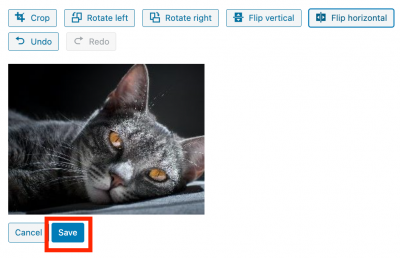
After editing your image, click the Save button to apply the changes.
WordPress will save the modified version of the image and update it in the Media Library. Once the changes are saved, you can use the edited image in your WordPress posts, pages, or anywhere else within your website. The modified image will replace the original version, seamlessly integrating into your content.
Restoring an Image
WordPress itself gives you the option to restore your original image even after saving the edited image.
To restore your original image, you can follow these steps:
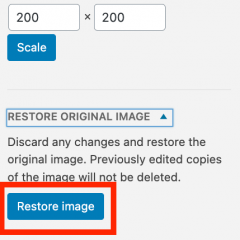
- Locate the image you want to restore and select Edit Image.
- On the right column of the image editor, open the Restore Original Image tab
- Click on the Restore Image button
Try It Out!
Using the instructions above, you should be able to accomplish all the basics of image editing for the web. Let’s put them to the test by making a banner for a Carleton website.
- Upload your image. You can find a guide to finding copyright-free images here.
- Crop your image to the dimensions 1600px wide by 700px high.
- Save your image.