What are categories?
Categories are used to group similar content together on your site. Categorizing your content allows you to easily display content of the same category anywhere on your site.
For example, if you had a “News” category with multiple items categorized as “News”, you could pull in that entire category and present it on any page you wish.
Step-by-Step
Creating a new category
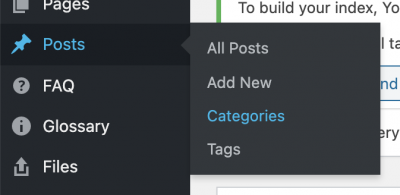
- On the dashboard, hover over the type of content you’d like to add a category for and click on Categories.

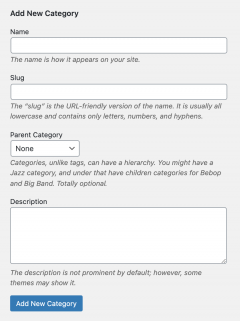
- Fill out the appropriate information on the next page. You are required to give the category a Name and a Slug. Parent Category and Description are optional.

- Once you’ve filled out the information, click Add New Category
Adding a category while editing
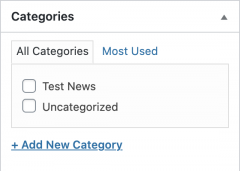
 In the content editor screen, navigate to the Categories menu
- Select a category by clicking it
- You can also create a new category while editing:
- Click Add New Category
- Fill out the name under New Category Name
- Click the Add New Category button at the bottom of the menu
Adding a category using “Quick Edit”
- Hover over the title of the content you would like to add a category for and click Quick Edit
- Check off the categories you wish to apply under Categories in the center of the screen

- Click Update in the bottom right corner to save your changes
Video Tutorial
Transcript
Try It Out!
Now that you have learned how to create and apply categories, time to try it out!
- Create a new post category.
- Apply the new category to an existing page; or
Create a new page and apply the new category.