Dashboard Overview
Basic Training Module 1: Getting Started
The Dashboard is the control centre of your website. After logging in, you’ll use the Dashboard to create, edit, organize, and manage your site’s content.
As you work through the training modules, you’ll spend most of your time moving between the Dashboard and the Block Editor. Becoming familiar with the Dashboard will help you quickly find the content you need and navigate your site more efficiently.
What is the Dashboard?
The Dashboard is the administrative area of your WordPress website. It provides access to all site content, settings, and tools that are available to your role.
Depending on your permissions, you may see different menu items and options than other users on your site.
From the Dashboard, you can:
- Create and edit pages and posts
- Upload and manage media files
- Access forms and other site tools
- Manage menus and other site features
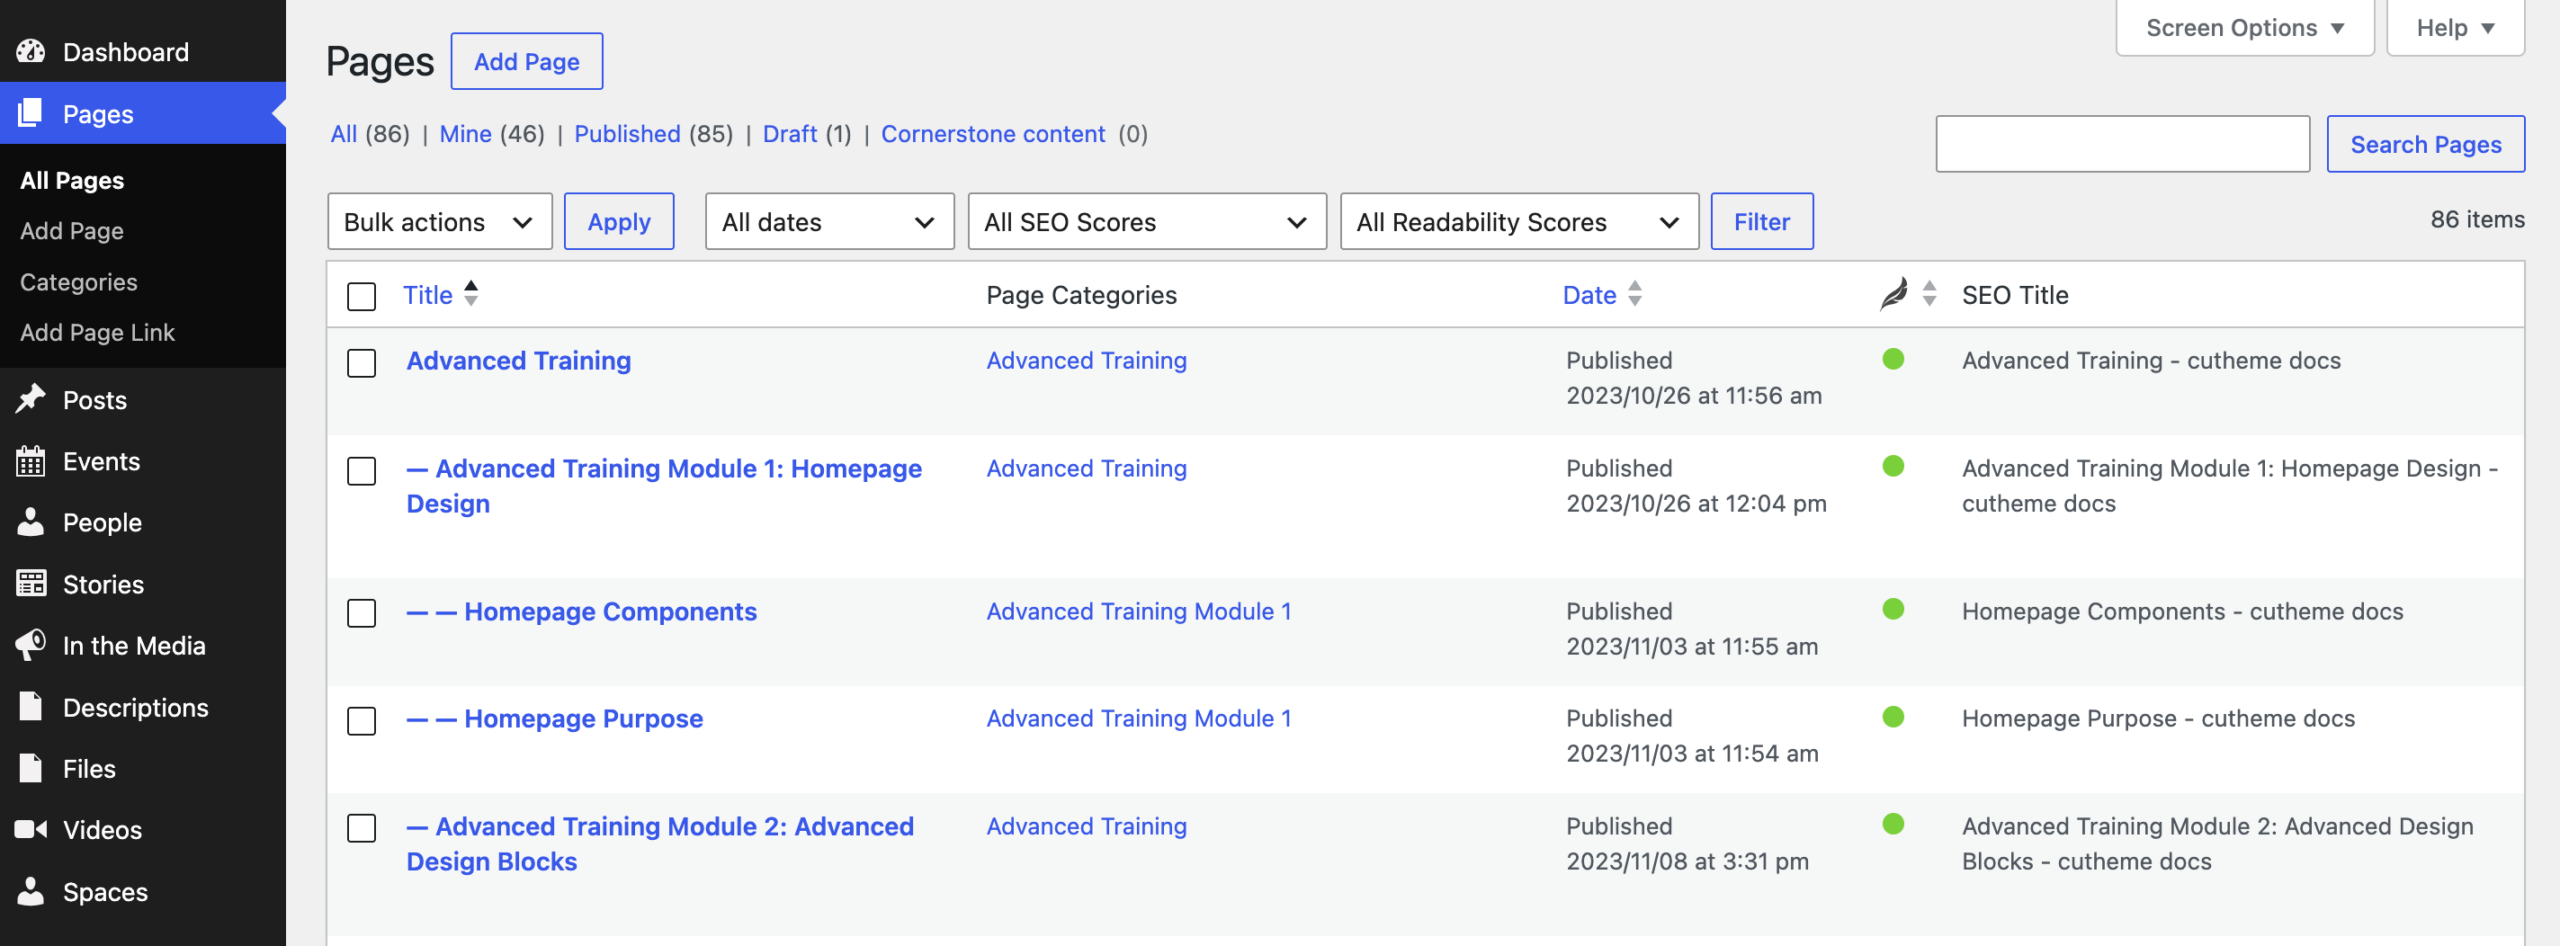
Main Areas of the Dashboard
The Dashboard is organized into three primary areas.
Left Navigation Menu
The navigation menu on the left side of the screen provides access to your website’s content and tools.
Common menu items include:
- Pages – Create and manage website pages
- Posts – Create and manage news and blog content
- Media – Upload and organize images, documents, and other files
- Forms – Manage online forms and submissions
- Appearance – Access site design and navigation features, depending on your permissions
Additional menu items may appear depending on the features enabled on your website.
Tip: Hover over a menu item to reveal additional options.
Admin Toolbar
The Admin Toolbar appears at the top of the screen when you are logged in.
The toolbar provides quick access to commonly used actions, including:
- View Site – Open the public version of your website
- Add New – Quickly create new content
- User Profile – Access your account settings and profile information
You’ll use these shortcuts frequently as you become more comfortable working with your site.
Content Lists
Many sections of WordPress display content in a list view. For example, the Pages and Posts screens show all content of that type in a table format.
Content lists typically include:
- Filters to narrow results
- Search tools for locating content
- Status indicators showing whether content is published, draft, scheduled, or otherwise
You’ll learn more about working with content lists throughout the training.
Finding Your Content
One of the most common tasks you’ll perform is locating existing content for editing.
Finding Pages
To view all pages on your website:
- Select Pages from the left navigation menu.
- Click All Pages.
A list of pages will be displayed, including their publication status and last modified date.
Finding Posts
To view news articles or posts:
- Select Posts from the left navigation menu.
- Click All Posts.
Like pages, posts can be searched and filtered to help you find specific content.
Searching for Content
If you’re looking for a particular page or post:
- Navigate to the appropriate content list.
- Enter a keyword into the search box.
- Click Search.
WordPress will display any matching content.
Tip: Search is especially useful when working with large sites that contain many pages and posts.
-
Hello and welcome to getting started with see cutheme, module one. In this video, we’re going to talk about the dashboard.
Once you log into cutheme, the dashboard is the first screen that you’ll see. It’s the control panel where you can view information about your site add new content and access content to edit.
for example, let’s hover over Pages and go to All Pages. You can view all of the pages that are on your website right here. Use the tabs at the top to filter. You can see all the pages that are published. Or if you click on Mine, you can see all the pages that you have published. These are everything that have been done by Charlotte Bradley.
You can also sort your pages by title. This sorts them alphabetically. Or you can sort them by date.
Use the search bar at the top to search for pages that have a particular word in them. This can be really handy if you have a large site with lots of different pages.
You can also open a page to edit by hovering over and clicking Edit. You can also do quick edit which allows you to do things such as change the title, the slug, choose a different category or change the publishing status.
For example, I could put this into draft mode and then click Update and that would change the status.
Take a bit of time and try out the other options on the top and along the lefthand navigation bar to get familiar with the various options and settings.
Try It Out
Now that you are familiar with the Dashboard, take some time to explore your site’s content.
- Log in to your website.
- Open Pages → All Pages.
- Locate a page that already exists on your site.
- Use the search box to find a page by keyword.
- Open a page and review its contents in the editor.