Introduction
(Slide 1) Wall art is the most mysterious, personal and irreplaceable part of our ancestral remains. It is widespread temporally and geographically, occurring wherever there was a will to paint, peck or draw on an available rock surface. Whether religious symbolism or mythology, ignorance of its dating diminishes insight into its meaning. A dependable date improves its interpretation because we can compare many similar motifs of the same time period (Slide 2). To do this, we must find datable organic remains and pigment particles on the same soil layer below the pictograph. The method I will explain does this by using a digital camera and laptop filtering (Slide 3).
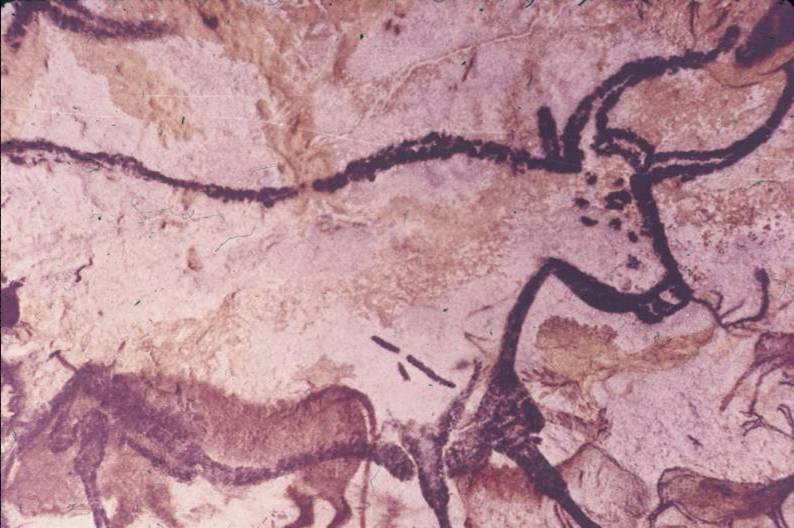
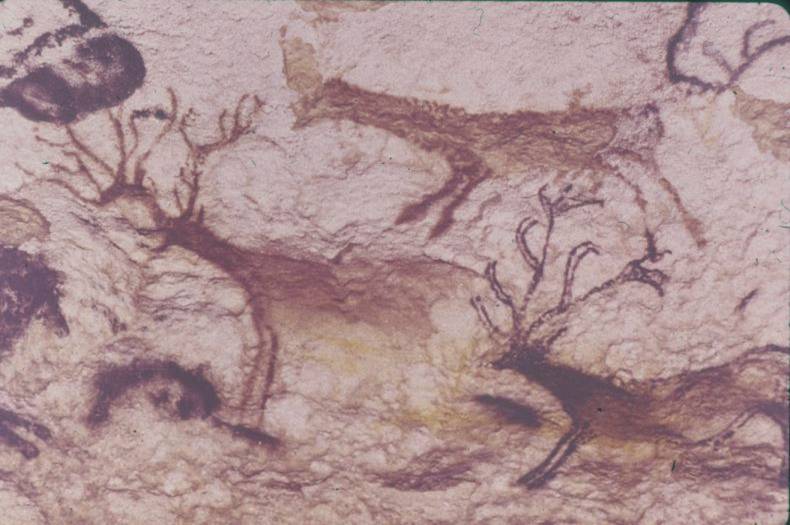
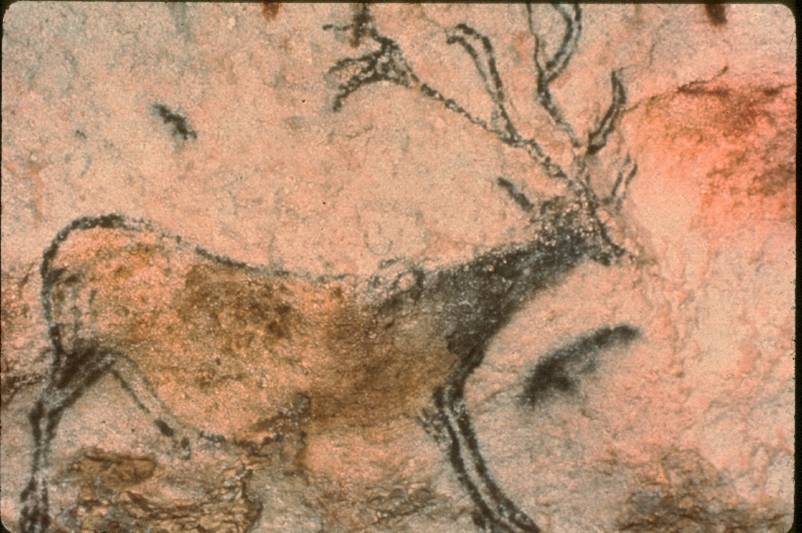
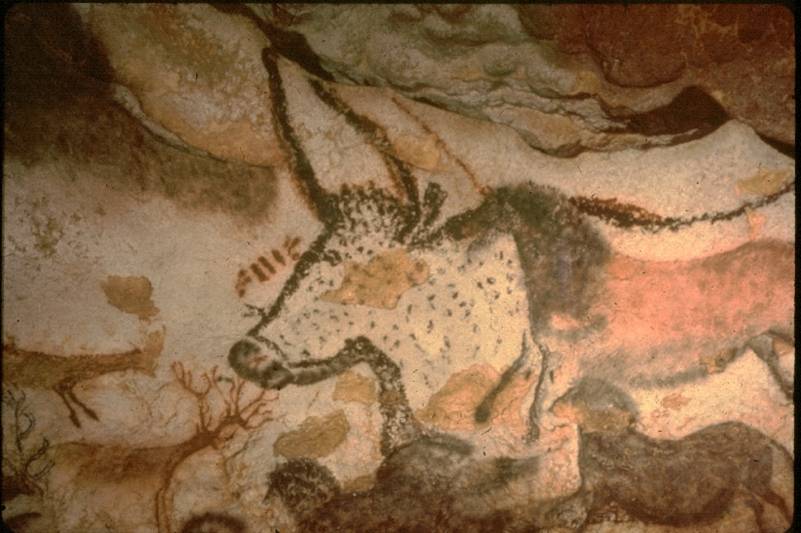
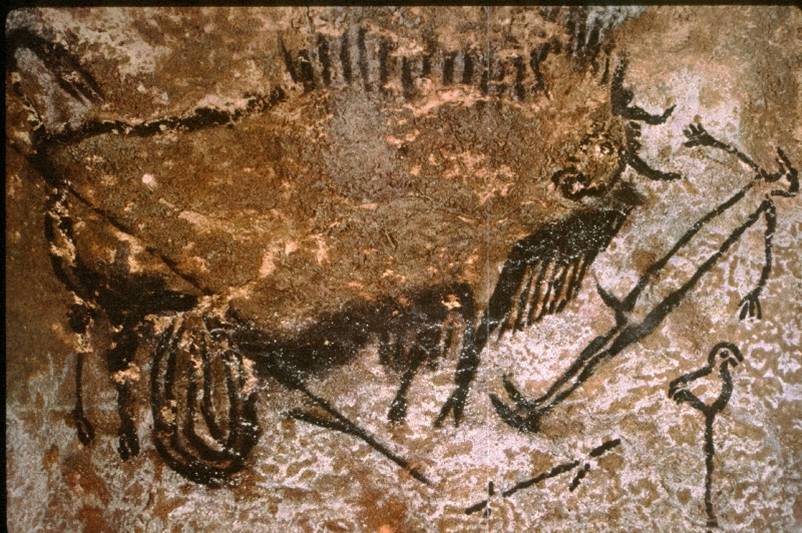
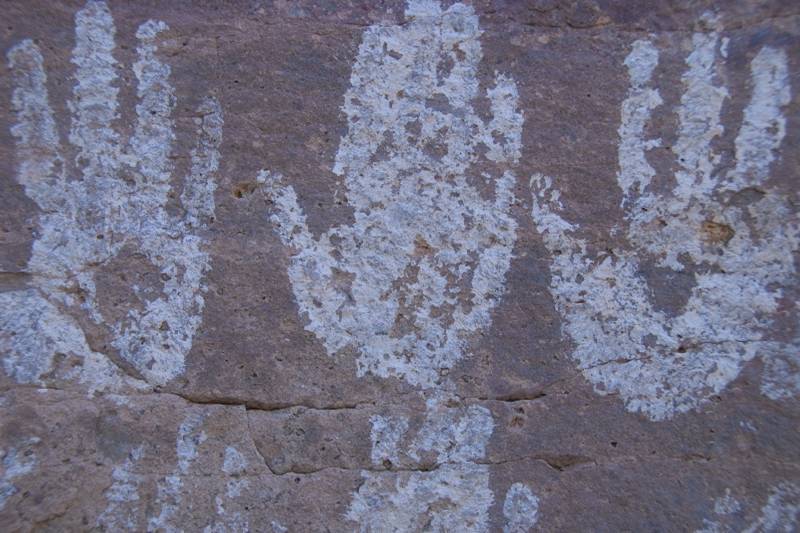
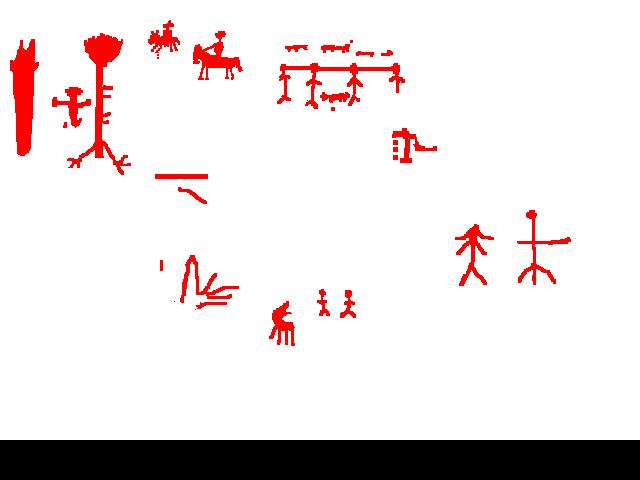
All nine techniques used in the past to date wall art have drawbacks. (1) Weathering depends upon exposure and severity of elements and can vary on angular sections of the same motif. (2) Lichen Dating is marginal because lichen can invade anytime after the art and does not grow evenly. (3) Stratigraphic Dating of portable art in soil below wall art is rare and indirect. (4) (Slide 4) Superimposition or palimpsests of one motif over another shows sequence, not age. (5) Prehistoric links may or may not be relevant. The bones of solitary, dangerous or colourful animals in Lascaux’s Magdalenian art are absent in the underlying soil. (Slide 5) Bones are predominantly reindeer which have none of these traits. But prehistoric links thousands of years old may be useful in cross-dating if good analogies exist e.g.,. well-dated Woodland dentate-stamped pottery in the crevices of the Peterborough Petroglyphs. (6) Stylistic interpretation. Identical motifs exist from ancient to modern times. (Slide 6) Negative hand images made by blowing pigment through a straw are timeless and world-wide. Simple or complex styles reflect culture, not age. Lascaux’s polychrome art was replaced by simple monochrome Neolithic art. (7) Ethnohistoric dating rarely exceeds several centuries and works only if the oral tradition refers to the art. (8) Historic Dating applies only if a motif is linked to a dated event (Slide 7). Calligraphy-inspired motifs by 19th century Chinese railroad workers appear near those of their Aboriginal wives. (Slide 8) One hundred km east, a series of 1st Nations 19th century motifs depict a legend of two horsemen and four White prisoners tied at the neck being led away (9) Carbon Dating, both AMS and conventional, date charcoal pigment and paint binders like fish egg in inorganic paints like ochre. Both destroy the art; cheaper conventional dating even more so.

New Method of Dating Wall Art
My method for dating wall art is simple and non-destructive. As an artist works, some pigment dust or droplets fall to the ground and are buried in the soil over time. Men quickly grasp this phenomena. As boys, we were often sent to the blackboard as punishment, repeatedly writing “I shall not throw brushes” or “pull girls’ pigtails”. We noticed dust falling from our chalk.
If we can find and date the soil level on which the pigment fell, we can date the wall art. Only a single common conifer needle or leaf, wood, shell, bone or charcoal fragment is needed. Multiple buried pigment levels represent palimpsests or re-applications of motifs at different times. Detectable petroglyph detritus also falls to the ground, and can be dated, but I will confine this discussion to pictographs.
We first tested the method by substituting a small sheet of plywood for a wall, and a standard artifact drawer for the underlying sand or soil. After hinging the plywood to the back of the drawer and tilting it 45 degrees forwards over the drawer, we drew ochre motifs on the plywood. Pigment particles fell onto the sand as we drew. Tilting the plywood backward, we took a vertical high resolution photograph of the sand with a manually-focussed digital camera to define the sand grains. The camera, which need not be expensive, was mounted on a tripod for repeated precision-focussing. We repeated the following sequence until the sand was 4-5 cm deep: (1) We sprinkled about 5mm of sand evenly across the bottom of the drawer. We first used white sand because it contrasted sharply with the ochre, and was clearly visible. Then, we used regular, clayey and even dirty sand. (2) We drew yellow or red ochre motifs on the left and right sides of the plywood. (3) We tilted the plywood backward for photography, then placed a pigment-coated neutral-gray paper strip on the sand surface to provide an RGB (red, green, blue) colour standard. Particles became visible in highly-magnified digital images. Repeating this 4 to 5 times, we scraped away 5mm peels of sand with a masonry trowel, photographing each level with the pigment colour standard for later comparison.
It was impossible to scrape to each original buried surface, but we found sufficient particles on our

Slide 9
scraped surfaces to confirm our method (Slide 9). Particles are present but very few and tiny. In our initial test we used software filtering so only pigment particles appeared, as in this photo. We also created fast automatic scanning to hasten our filtering, but the expected few pigment particles were easily missed. Direct observation of each enlarged surface, without filtering out the sand grains, proved best. But automatic scans registering the most particles allowed us to focus on those surfaces needing close observation. Confirmation was necessary because ochres and soil ferromagnesian compounds have similar color. I had two assistants verify independently the presence and locations of particles.