QNX on RCS resources
There are multiple ways of developing for QNX OS. The QNX-supported OS, where development occurs, is Linux or Windows. If you work on a MacOS, or with an ARM processor, you may experience difficulties setting up your QNX development environment. To support these cases, the RCS team has a virtual machine setup for students without access to hardware that meets the QNX requirements.
Requesting an account
To have access to the VM, you need to request an account from RCS. Please send an email to its.rcs@carleton.ca to request your account including the following information:
- Your full name
- Your student number
- A brief description on where you attempted to setup your QNX environment and the issues you encountered
- The course that requires the use of QNX, or the research project and primary investigator
Once your account is created, you will receive your username, the IP address of the VM, and your password to access the VM.
* Note: to access these RCS resources, you will need to be connected to Carleton’s VPN (more information here).
QNX tools
There are two main pieces of software required to run QNX: QNX Software Center and QNX Momentics IDE. Both are installed in the VM and can be accessed in their default locations provided in this section. There are also desktop shortcuts on the VM for easy access. Both QNX SDP 7.1 and 8.0 are installed and can be used in their default locations.
* Note: You still require a QNX account, which will be required when opening the QNX Software Center. Follow the instructions provided in your course to acquire a QNX license, or through QNX Everywhere.
Default locations
These locations can be used as reference when needed. Throughout these instructions, these locations will be mentioned:
QNX Software Center: /usr/local/bin/qnx/qnxsoftwarecenter/qnxsoftwarecenter
QNX Momentics: /usr/local/bin/qnx/qnxmomenticside/qde
QNX SDP 7.1: /usr/local/bin/qnx/qnx710
QNX 8.0: /usr/local/bin/qnx/qnx800
Connecting to the VM
You can start applications directly through a terminal, or using the graphical interface through Remote Desktop Protocol.
SSH
You can connect to the VM through a ssh terminal and use X11forwarding for graphical user interfaces, which is required for QNX Momentics and QNX software center. You require an X11 client to open the user interface (e.g. XQuartz for MacOS). When connecting through SSH, X11forwarding should be enabled with the “-Y” option to access the QNX software through a graphical user interface using the following command:
ssh -Y <your_username>@<ip_address>
Once you provide your password and are logged in the VM through SSH, you can start the QNX Software Center and QNX Momentics IDE with the following command:
/usr/local/bin/qnx/qnxsoftwarecenter/qnxsoftwarecenter && /usr/local/bin/qnx/qnxmomenticside/qde &
RDP through SSH port forwarding
You can access the Linux VM using Microsoft Remote Desktop. The default port used by RDP is 3389, which is not open in the RCS environment. To overcome this, you should start a terminal SSH connection and forward the localhost port connections to the RCS VM.
To forward the RDP connection through an ssh connection, use the following command:
ssh -L 3389:localhost:3389 <yourusername>@<ipaddress_vm>
You will then have access to a terminal on the provided VM, but the main goal here was to forward RDP connections.
Install the Microsoft Windows App, which includes the old Remote Desktop. You can find instructions about Microsoft App in this link.
* If you have access to Remote Desktop, you can use it instead.
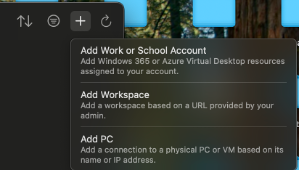
Once you installed the Microsoft Windows App, you can create a new connection to a PC. Click on the plus sign in the top right corner, and select “Add PC”.
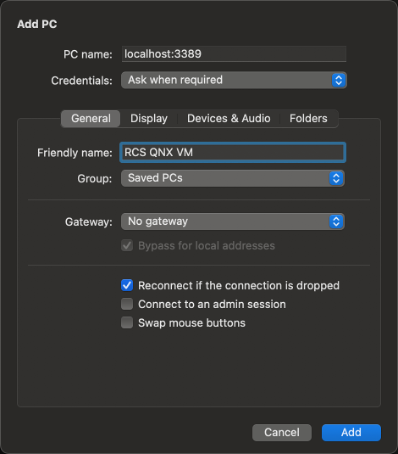
In the new opened dialog, fill up the PC name with “localhost:3389”. For credentials, you can set it up or fill it in when required, using your username and password provided by RCS.
With the SSH connection established and the PC configuration finalized, connect to the VM in the Microsoft Windows App. A screen similar to the one below should pop up:
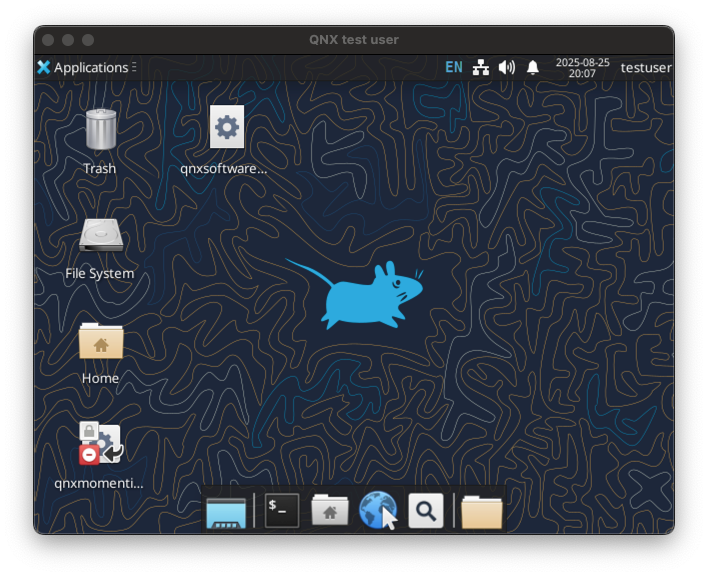
Both QNX Software Center and QNX Momentics IDE are available in your desktop (soft links pointing to the default locations mentioned above).
QNX licenses
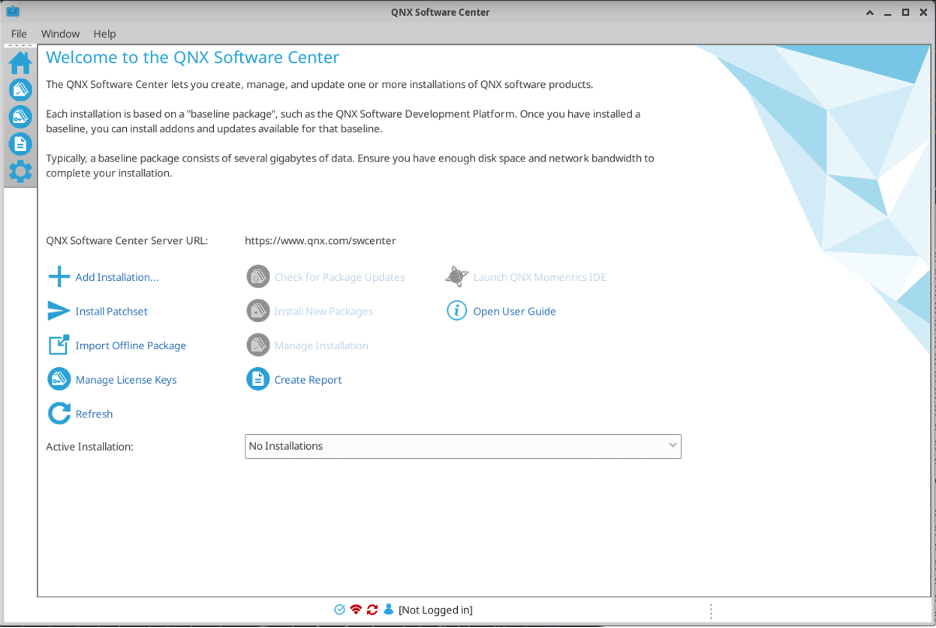
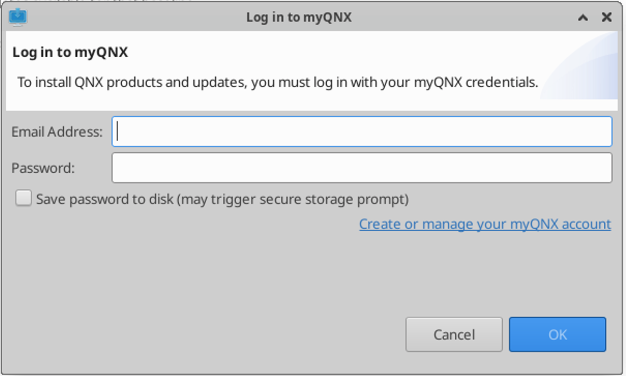
To develop software with QNX you require a license. The first time you log into the RCS VM, you need to open the QNX Software Center and log in with your QNX credentials to retrieve information about your licenses. To open the QNX Software center, double click the desktop icon or access it in its default location (/usr/local/bin/qnx/qnxsoftwarecenter/qnxsoftwarecenter). At the bottom of the screen, you should click on “Not logged in” and follow the login instructions using your personal QNX credentials.
Once logged in, click on Manage License Keys, and click “Activate” for the licenses you intend on using.
QNX VM
To develop software for QNX, there should be a host VM for development, and a target machine with the QNX OS to test and deploy your software. A straightforward way for a target machine is a QNX Virtual Machine. In this section we go over the configuration required to create a QNX target VM using VirtualBox.
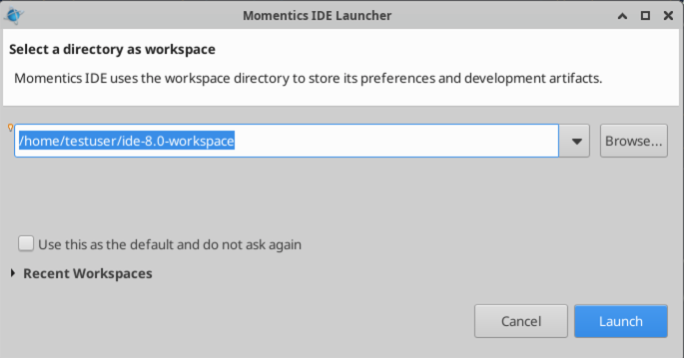
Open the QNX Momentics IDE, and select the workspace location, then click “Launch”. Note that the default location is in a folder inside your home directory.
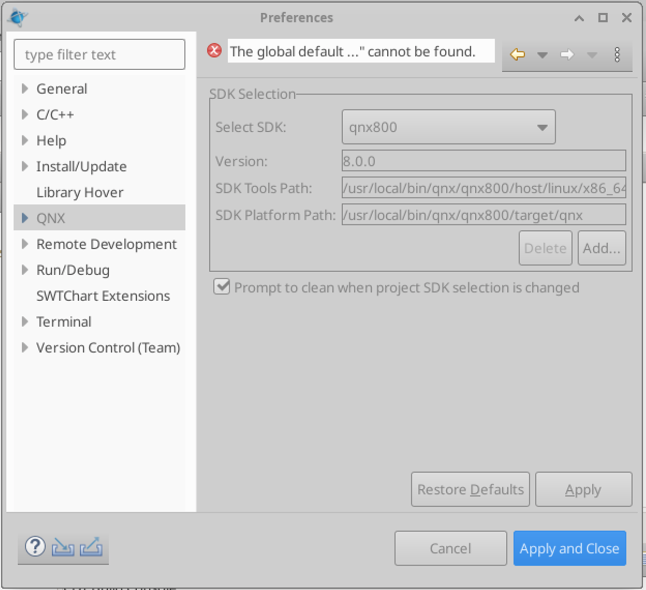
If this is the first time setting up QNX Momentics, you should setup the path to the SDK you intend on using (QNX710, QNX800, etc…). Click menu, Windows > Preferences, and click QNX.
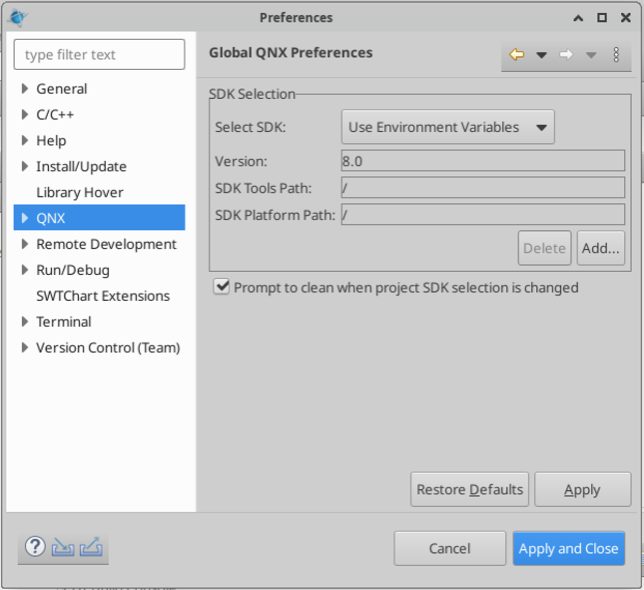
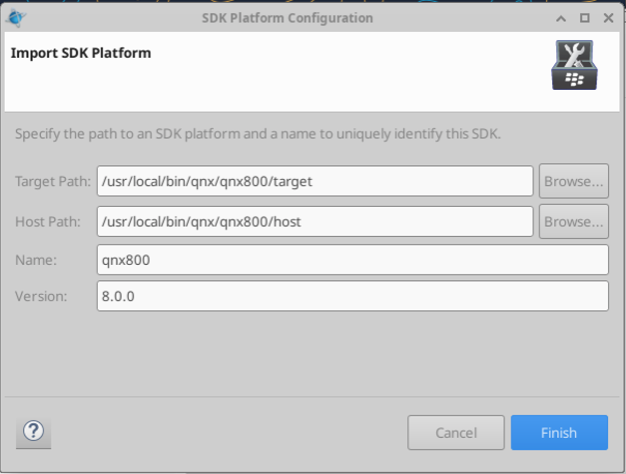
In the SDK selection, click “Add…”, then “Browse”. In the newly open dialog, navigate to the default path where the SDK is installed (/usr/local/bin/qnx/qnx800) and select that path. Finally, click “Finish”.
The configuration should now look similar to the one below. Click “Apply and Close”.
With all the license setup finalized, you can close the QNX Software Center and move on to create a QNX target and sample project.
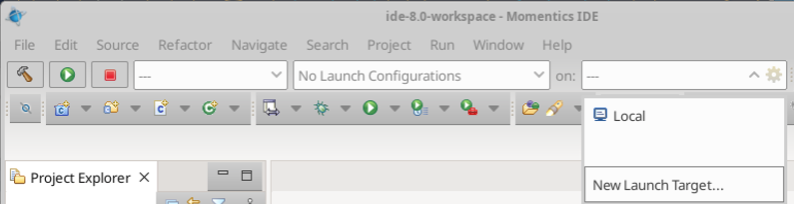
You will first need to create a target (QNX VM). To create a target, click the dropdown menu besides “on:” and click “New Launch Target…”.
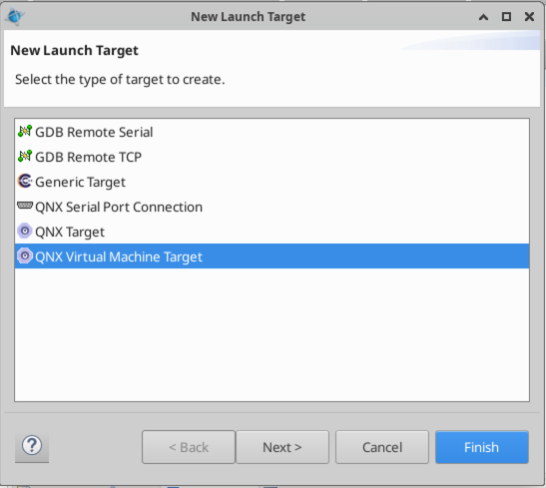
Then select a “QNX Virtual Machine Target”, and click next.
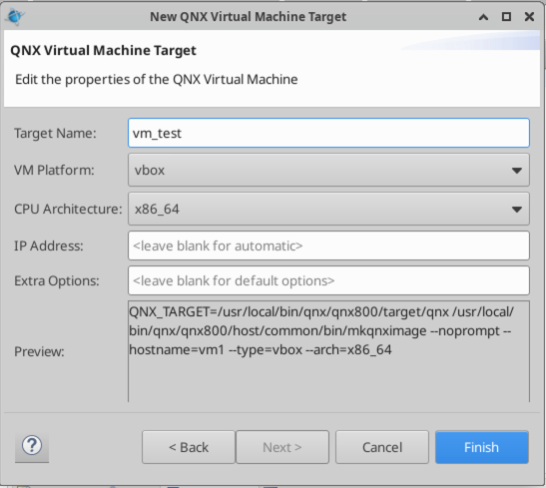
The virtualization/emulation software can be selected in this screen. The installed methods are “Virtual Box”(vbox), and “QEMU”(qemu). For this exercise, select vbox, give the vm a name, and select the CPU Architecture as x86_64. With everything set up, click “Finish” and wait for the VM to be created.
Once the QNX VM is created, you will see something similar to the following screen:
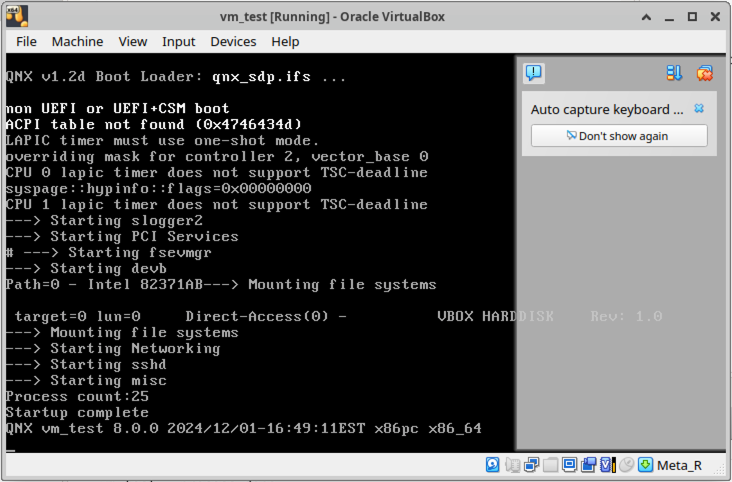
Notice that at the bottom right corner there is a “Meta_R” key set as host key, which is required to get out of the QNX VM. Make sure that this setting is properly configured to your keypad.
If this is the first time you are using virtualbox in this VM, you might have to create a “Host-only Network”. To do this, open a terminal and type: virtualbox, then press enter.
With Virtualbox open, click the list icon beside tools, and select Network. Then click “Create”, to create a network. Make sure DHCP is enabled.

If everything went well and QNX Momentics was able to find the IP address of the QNX VM then you are ready to create your first project. It is possible to verify this by looking at the icon of the QNX VM (vm_test). The figure below shows a correctly configured VM.
Creating your first project
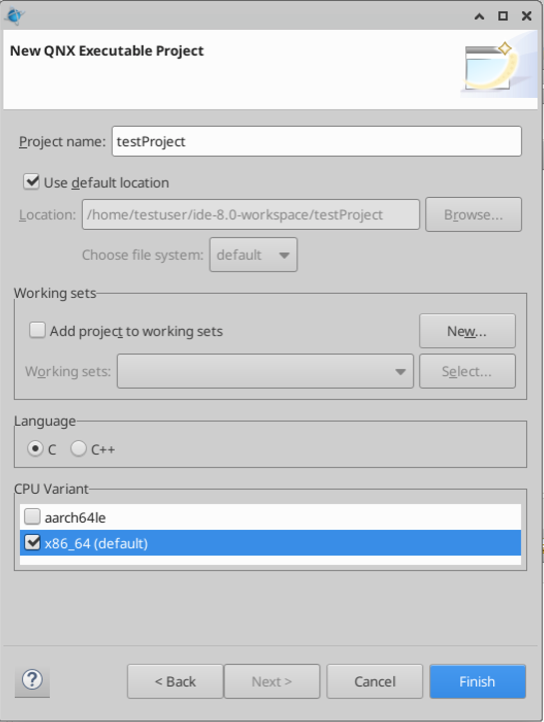
To create a simple project, click on the menu File > New > QNX Project, then select QNX Executable and click next. Create a project a name and select the CPU Variant as x86_64.
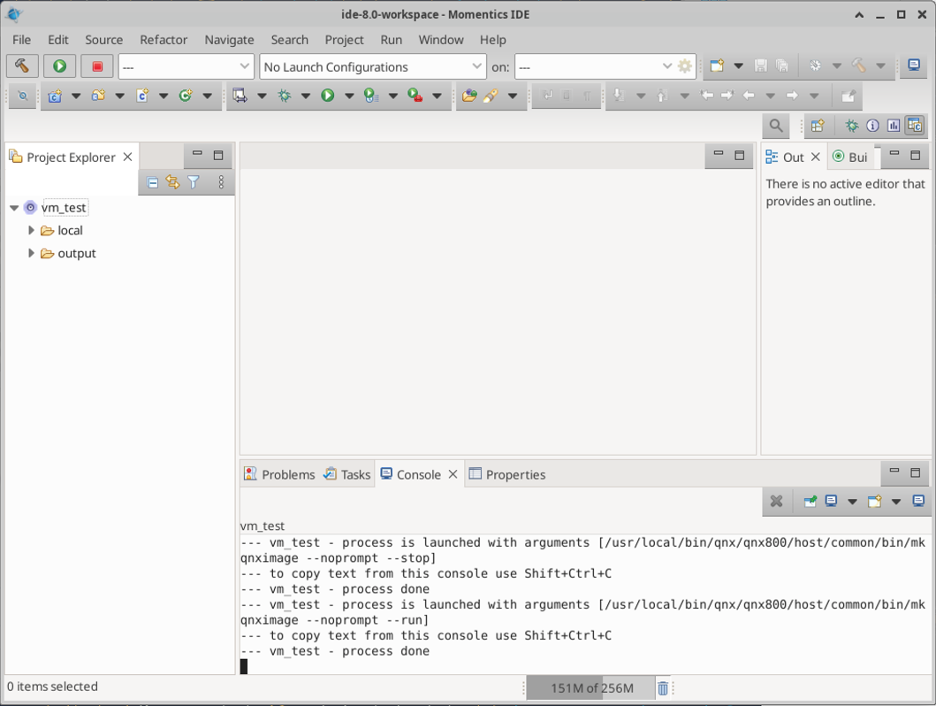
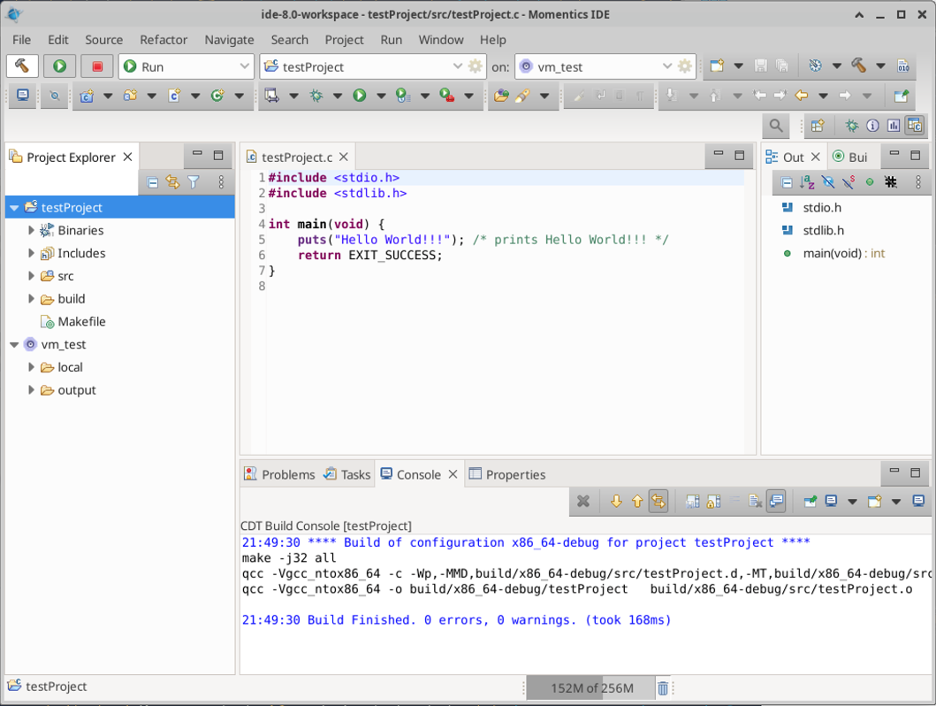
With the target connected, you are able to build the project by clicking the “Build” button (hammer icon at the top left corner). After clicking the “Build” icon, you should see a message in the terminal at the bottom, similar to the following:
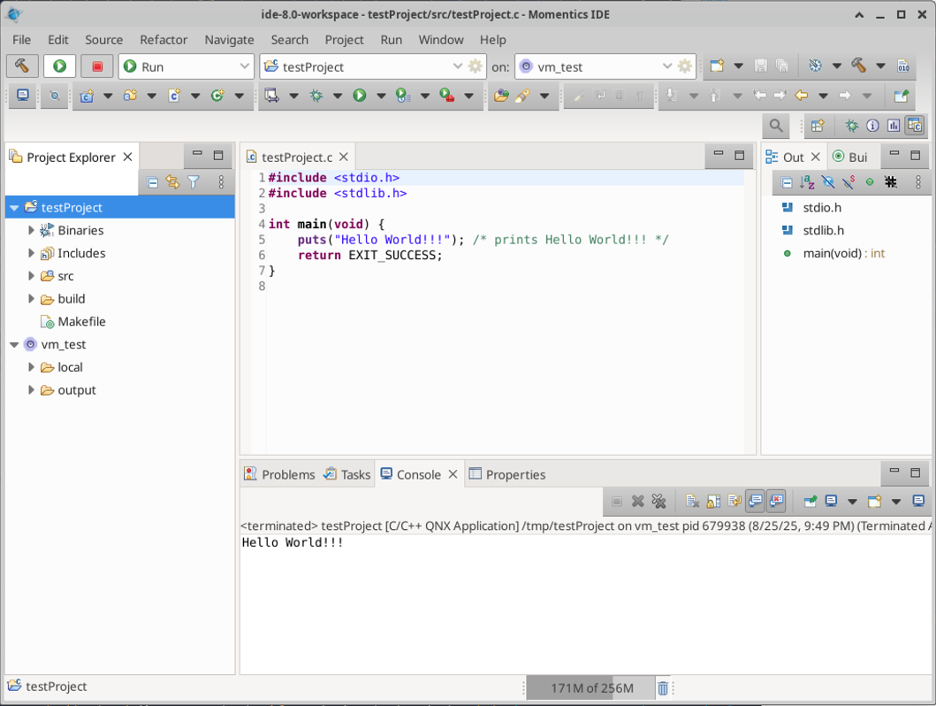
With the successful build, you can launch in “Run” mode by clicking in the play icon (beside the build icon). A message should appear at the Console at the bottom of the application:
Known issues
VM starts, but Momentics does not find it
Sometimes you might need to manually configure the IP address in the Momentics software. To do this, you can use the “ifconfig” command in the QNX VM, then look for the assigned IP address for the QNX VM. Take note of the IP address, then go to the left pane of the Momentics IDE, right click in the VM and click Properties. In the new dialog window, go to “QNX Qconn Target”, and fill out the “Hostname or IP” with the IP address assigned to the QNX VM. This should fix the problem and QNX Momentics should be able to communicate with the QNX Target VM.
Contribute
Found something wrong or have suggestions to improve? Send us an email through its.rcs@carleton.ca.