Texts
Any document that is longer than a few paragraphs require structuring to make them easier for readers to understand. When you have the Navigation Pane open on the left hand side of a document, you should be able to see all the headings listed in a hierarchical order. (How to open Navigation Pane). By clicking on these headings, you will be able to navigate between sections easily. Similarly, screen readers will be able to recognize and navigate between these headings as well.
- To apply headings to text
- To modify heading styles
- To use heading style that is not listed in the Style section
- To create an ordered or unordered list
To apply headings to texts
- Select the text you want to be a heading
- Go to menu item: Home
- In the Styles section, select the heading style (e.g. Heading 1, Heading 2, etc.) that you wish to apply to the selected text
The following image shows you where to select heading styles:

The Title and Subtitle styles are for the titles of the document, so it is better to apply them to the titles at the very first place in the document. If it is possible, please match the titles in the document to the name of this document, so that assistive technologies, such as screen readers, will be able to recognize the correct and consistent name or title of the document.
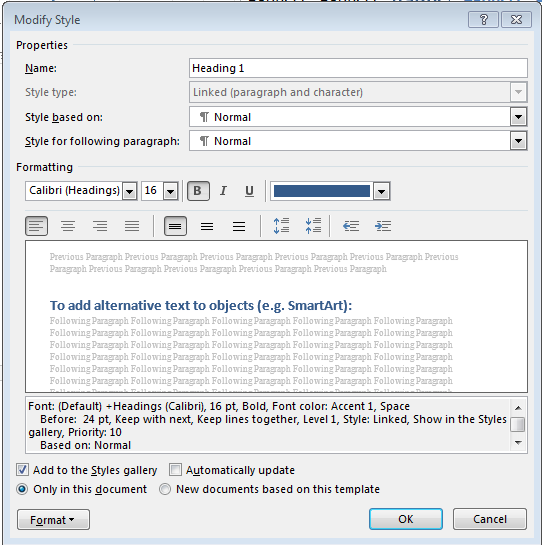
To modify heading styles
- Go to menu item: Home
- In the Style section, right-click the style you wish to modify
- Click on Modify option
- In the Modify Style dialog, make your desired changes to style characteristics
- Click on Ok button when you are done
The following image is the Modify Style dialog you will see before your modification:
Using heading styles not listed in the Style section
Sometimes default headings styles may not appear in the Style section. In this case, you need to select them from an expanded list of heading styles, and apply them to the text that needs to be in these heading styles.
- Select the text you want to apply the heading style to
- Go to menu item: Home
- In the Style section, select the down arrow style option expand down arrow to expand the list of style options
- Click on the Apply Styles… option
- Select the heading styles from the Style Name drop down menu

The following images show you where to select Apply Styles… option, and the Apply Style dialog:
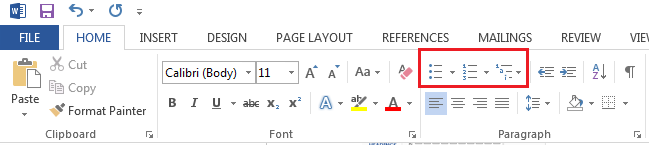
To create an ordered or unordered list
When you create lists, it is important to use the default list options, and keep the lists well structured. Otherwise, assistive technologies will interpret your list as a series of short separate paragraphs instead of a coherent list of related items.
- Go to menu item: Home
- In the Paragraph section, select the Bullets icon unordered lists or select the Numbering icon for ordered lists
The following image shows you where to find the Bullets icon and Numbering icon:
[]