Stacked Blocks
Module 2.2 – Advanced: Listing Blocks: Stacked
Table of Contents
Listing blocks pull categorized content onto a page. Stacked listing blocks are formatted like a list (sequentially as a unit) vs. card blocks which are formatted like individual cards.
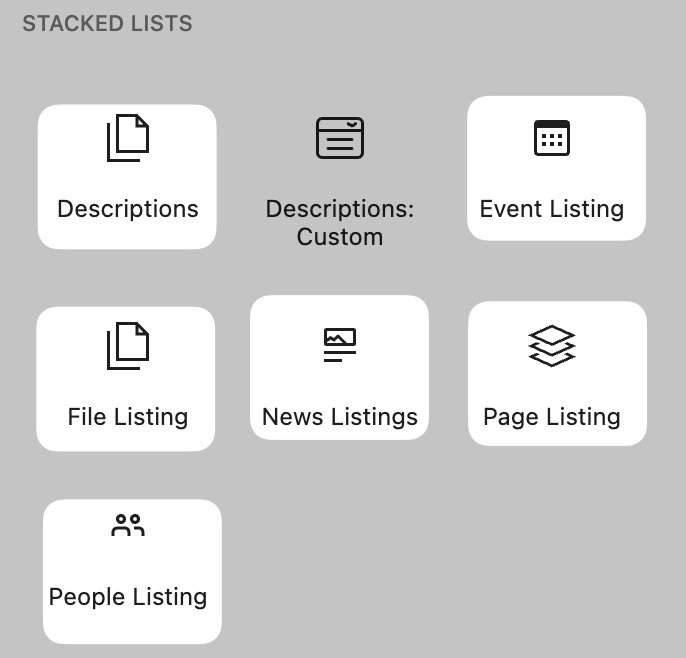
Six stacked listing blocks are available: Events, Files, News, Pages, People, and Descriptions.
Follow along below to learn more about using a stacked listing block. I’ll focus on the News Listing block but the process is the same for all listing blocks:
- Add a stacked listing block
- Select Display Options (e.g., header, block background color, number columns)
- Select Listing Options where applicable (e.g., show images, dates, excerpts)
- Select Filter Options where applicable (e.g., number of posts, more button, categories)
Here is an example to give you an idea of what the news listing block looks like.
News Listing Block – Example
-
How to Replace a Media File in cuTheme (Without Breaking Anything)
Update your files while keeping the original URL exactly the same.
-
Introducing the “In the Media” Block!
We’re excited to share a new way to highlight your media mentions — the In the Media block! This new feature makes it easy to…
-
cuTheme Image Size Cheat Sheet
For anyone adding images to posts, pages, people profiles, or content blocks — here’s a quick reference to help you choose the right size and…
Step-By-Step
Add a Block
1. Add a Listing block using the block menu. Under Stacked Lists, choose from Descriptions, Event Listing, File, News, Page, or People Listing.
News Options
Select options from the Block menu on the right.
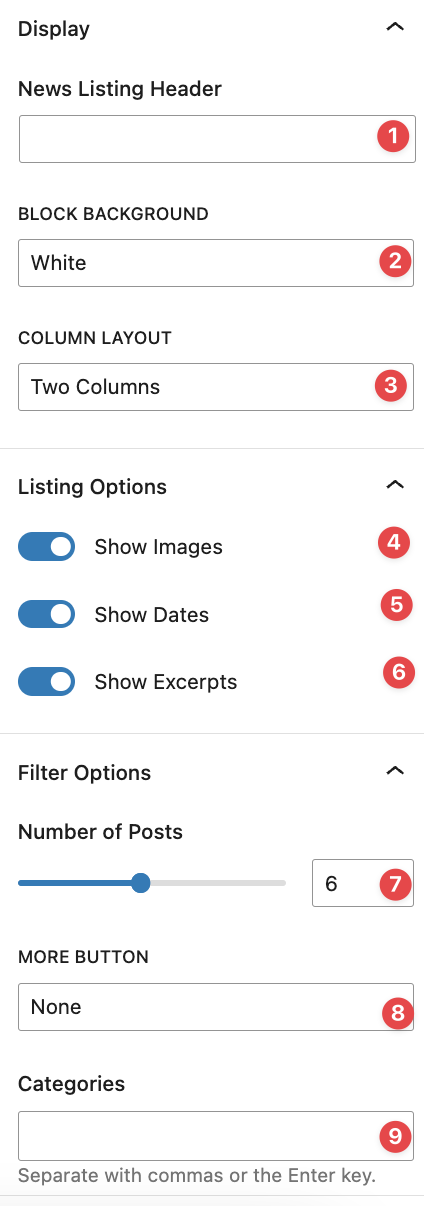
Under news listing block options:
- Add a header (title)
- Select white or gray for block background
- Select column layout (number of columns) using the dropdown (options: one or two)
- Toggle to display image thumbnails
- Toggle to display the publishing date
- Toggle to display post excerpts
- Determine the number of posts to display using the slider
- Add a More Button to show more posts
- Choose Load More to display more on the page
- Choose View More to bring visitors to another page
- Display posts from one or more categories by typing the category name into the text box
Event Options
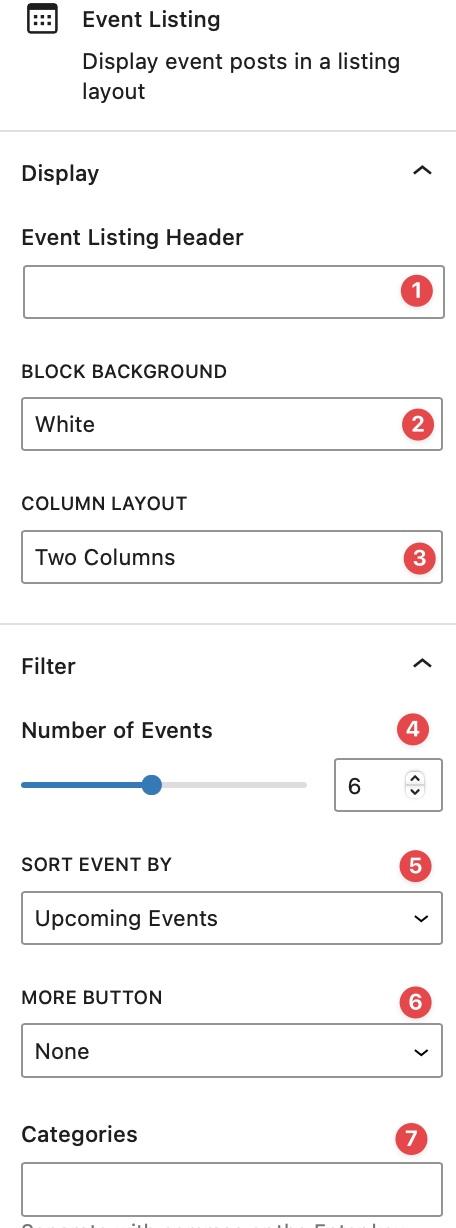
Under event listing block options:
- Add a header
- Select white or gray for block background
- Display one or two columns
- Select the number of events to display
- Use the selector to display upcoming or past events
- Add a More Button to show more events
- Display events by category
File Options
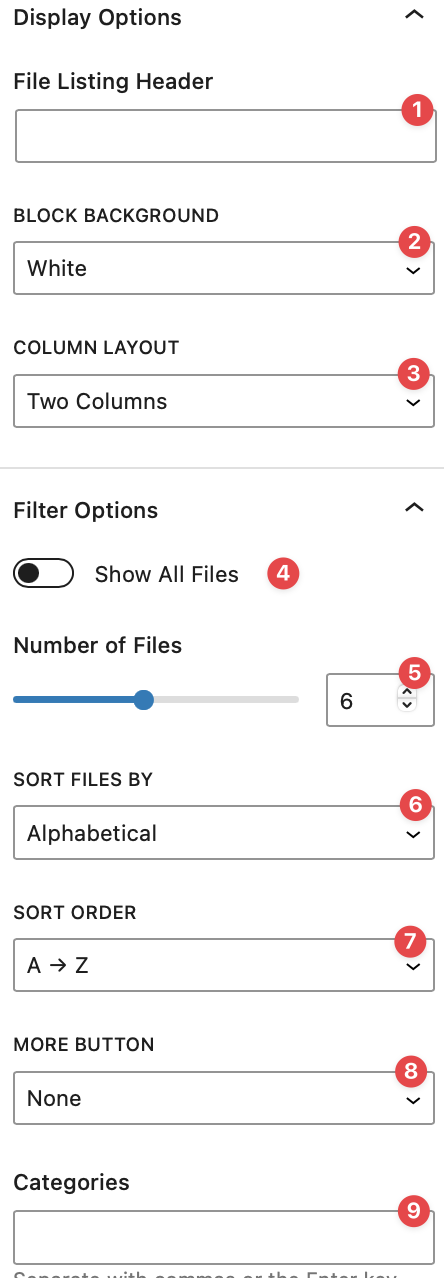
Under file listing block options:
- Add a header
- Select white or gray for block background
- Display one or two columns
- Option to show all files
- Select the number of files to display
- Choose sort type (Alphabetical, by modification date)
- Select sort order (Chronological/Reverse Chronological_
- Add a more button
- Display by category
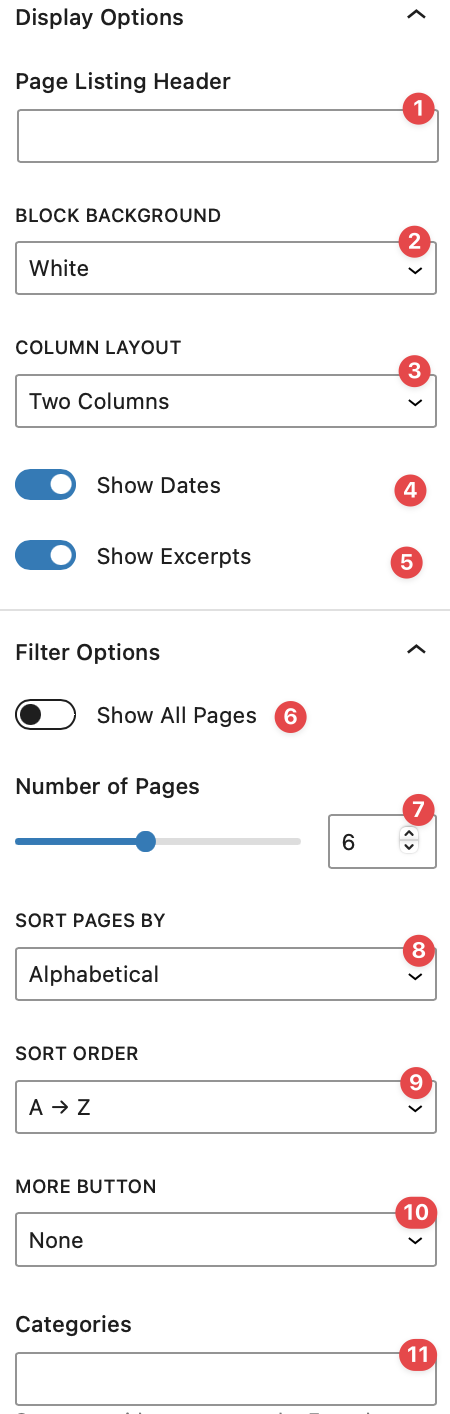
Page Options
Under page listing block options:
- Add a header
- Select white or gray for block background
- Display one or two columns
- Toggle to display publishing date
- Toggle to display page excerpt
- Option to show all pages
- Select the number of pages to display
- Sort pages alphabetically or by date last modified
- Order alphabetically/chronologically or reverse chronologically
- Add a more button
- Display by category
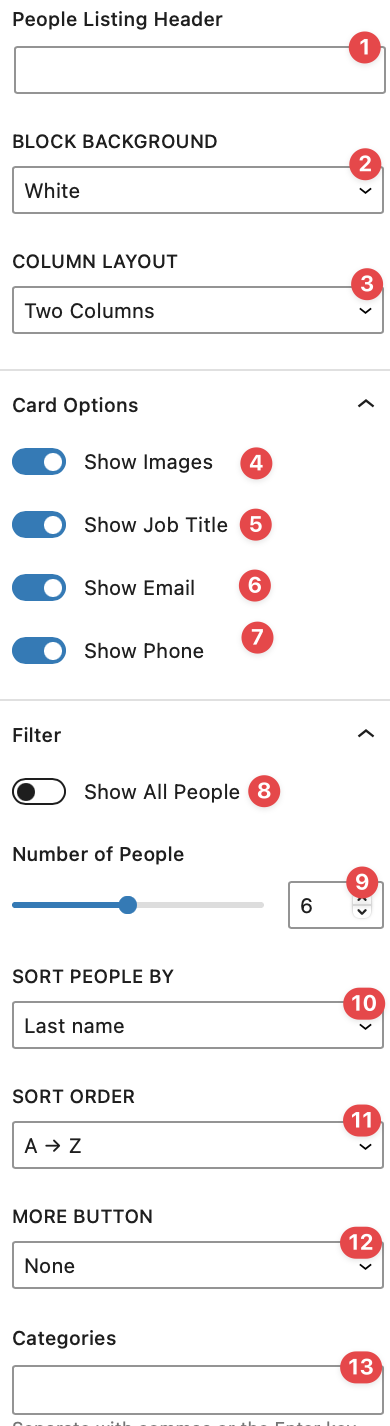
People Options
Under people listing block options:
- Add a header
- Select white or gray for block background
- Display one or two columns
- Show images
- Show job title
- Show email
- Show phone
- Show all people
- Select the number of people to display
- Sort people by first or last name
- Order alphabetically or reverse
- Add more button
- Display by category
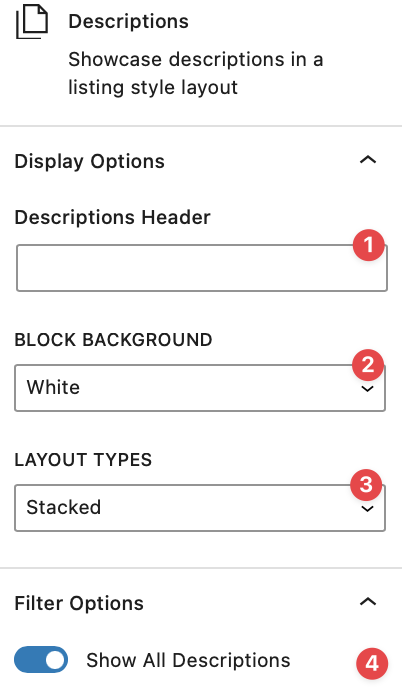
Descriptions
Under Descriptions listing block options:
- Add a header
- Select grey for block background
- Display as Stacked, Columns or Accordion
- Show all Descriptions
Video Tutorial
-
Welcome to cuTheme Advanced Training, Module 2. In this video we will cover listing blocks.
Listing blocks are handy for listing content all in one place. They can be used for descriptions, events, files, news, pages, or people.
In this video I will quickly go over the options for each type.
First, to add a listing block, click the blue plus to open up the block selection menu.
Scroll Down to “Stacked Lists”, and I’m going to start with a News Listing.
Close the menu, and now you can see you have your news listing here.
All options for the block will be on the right.
For News Listings, you can add a block header, some intro text, change the background between white and grey, and choose between 1 or 2 columns.
For the new posts themselves, you can show images, dates, and excerpts from the news article. You can also choose the number of posts.
The default is 6. You can go between 1 and 12, and at the bottom you can choose to have a “more” button.
The default is none, but you can also have a button that will load more articles so you’ll stay on the same page, and more articles will be loaded, or you can view more where it will redirect you to another page with all the links.
You can add that page in the view more link here.
Lastly, for categories, you can filter between the different categories your site has, to only have those specific new articles in the listing.
I am going to delete this block and go to another type of listing, the event listing. Event listings list different events that your page promotes.
Like the News Listings, for Event Listings you can add a header, change the background, and choose the number of columns. You can choose the number of events, and sort by either upcoming, or past.
There is also a “more” button and categories, just like for news listings.
After that, we have File Listings. File listings list all the files on your site. File listings have a lot of the same options as before, with some new options. You can choose to show all files, which will show every single file on your site.
You can also choose a custom number of files, and list them either from A-Z or Z-A. You can also list your files by modified date, from oldest to newest, or newest to oldest. And just like the others, you can choose tohave a more button, and filter by category.
Next are page listings, which list all the pages on your site. It’s similar to the others, you can add a header, change the background, choose column layout, and you can toggle between dates and excerpts.
There is also an option to show all pages like there was for files, and you can sort them either alphabetically or by date.
Next up are People Listings, which list all the people added to your site. People Listings offer the most customization of any listing block. Aside from all the features talked about before, you can toggle their images, job titles, emails, and phone numbers.
Then, the last type of listing block are Description Lists. These list all the descriptions on your site, and they are quite simple.
You can add a header and change the background color, and you can also choose the layout type as, either stacked, columns, or accordion.
And that’s a little walkthrough of all the types of listing blocks on cuTheme.
Try it Out!
Now that you have learned how to add a listing, time to try it out!
- Add a news listing block.
- Display news from one category only.
- Play around with some of the listing block options.
- Add an event listing block and try out options.
- Add a people listing block and try out options.