Timeline Block
Module 2.5 – Mastery: Design Blocks: Timeline
Table of Contents
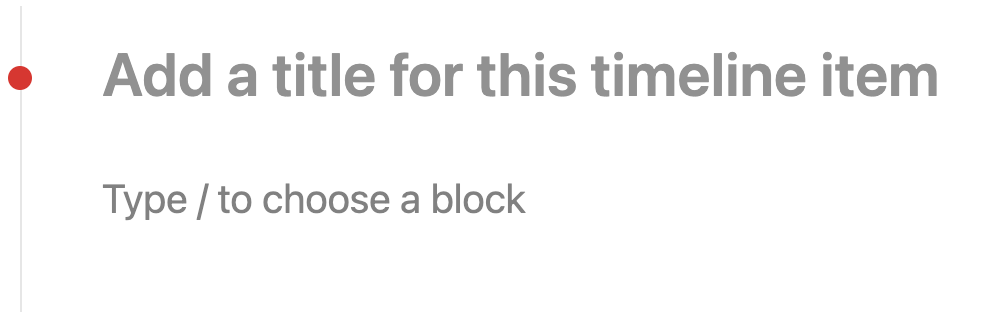
The Timeline Block allows you to organize content in a vertical timeline format. This is perfect for showcasing the history of your department, program, or any chronological sequence of events.
Each timeline entry displays a date on the left, while the right side can include a title (heading), text, and an optional button for added functionality. It’s an engaging way to present a visual story or detailed progression.
Step-by-Step
1. Add the Timeline block using the block menu.
2. Enter a date or an aside, by clicking in the text area at the left.

3. Add a title and text on the right text by typing in the provided areas.
You can also make a list or button by adding either block using the block inserter menu.
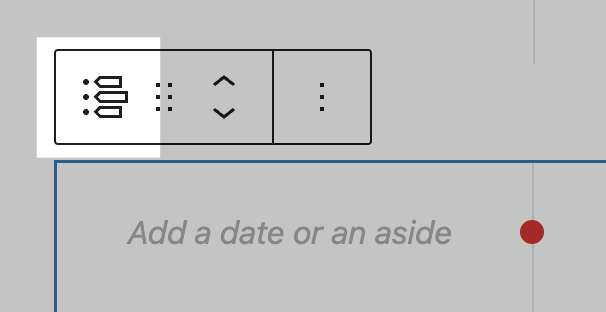
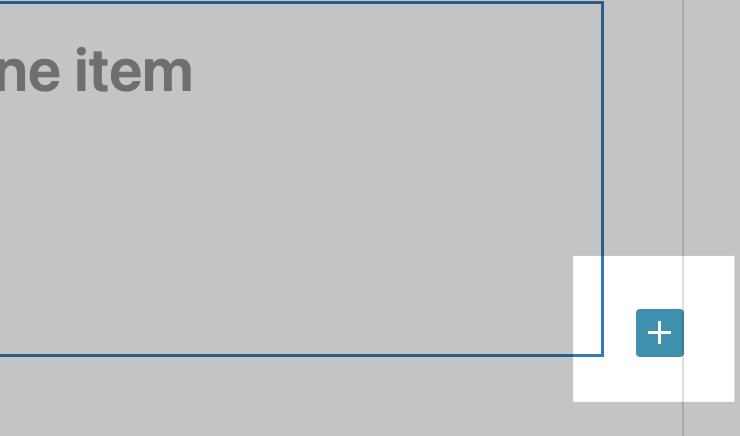
4. Add a second timeline item: Select the entire block by clicking the timeline icon at the top left. (*Note: this won’t work if you only have an individual timeline item selected)
Click the blue plus sign at the bottom right.
Video Tutorial
-
The timeline block lets you organize content along a vertical timeline.
You can display dates on the left and then titles with information like a description as well as a button to click for more information.
To add a timeline block, click the block inserter at the top left and choose timeline. Once you have a block on your page, you can add the date over here on the left. And then over on the right, add your title as well as a description or further information.
Optionally you can also use a button. So let’s have a look at what that looks like on the front end. We’ll publish it and view the page. So as you can see we have one item in our timeline. But in all likelihood, as it’s a timeline you’ll probably want to add more.
So to add more you’re going to select the timeline block. Right now I’ve only got one item selected. To select the entire block I want to click this icon here. And you’ll notice that now it’s outlined in this blue color.
Click the plus sign at the bottom right and now you can add a second item below Christmas Day. Again you can add your information here as well as the optional button.
And once you’ve got that saved have a look and you’ll now see what it looks like with two items.
That is a quick rundown of the timeline block!
Try it Out
Now that you have learned how to work with the timeline block, it’s time to try it out!
- Add a timeline block to your page.
- Add a date or an aside.
- Add a title and some content (text, list and bottom)
- Add another timeline item
- Try out some of the gallery block options.