Module 3.3 – Advanced: Site Organization: Footer
Use the site options to customize the footer and add your departmental information.
1. From the Main Navigation Panel, hover over Appearance and click Site Options.
2. Fill in the site options, including departmental name, location, and contact information.
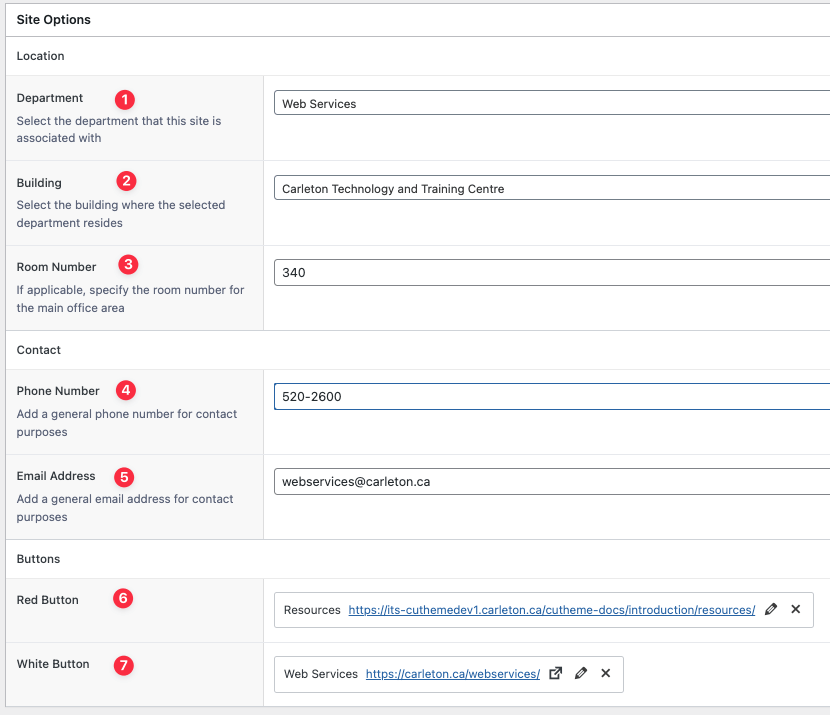
3. Optionally, add red and white buttons to link to important information such as a related site. You can link to internal pages or to external sites.
Hello and welcome to module 3 of our Advanced cuTheme training series. This video is about your website’s footer.
The footer is the bar of content that appears throughout your website near the bottom just above the menu. It usually contains your department’s contact information. Here’s an example on our documentation site.
To customize your footer, go to the back end and then from the navigation go to Appearance and Site Options. Here you will see options for location, contact, and buttons.
Under Location, select your department. Choose your building and optionally you can enter the room number.
Under Contact information, enter your telephone number and your email address.
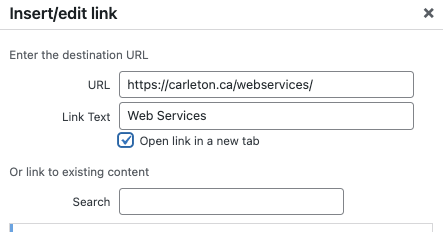
Under Buttons, you have the option to add two buttons – a red and a white. You just click Select Link and you paste your URL in there. You can change the text here and also you have the option of opening that link in a new tab.
From the front end, here are the two buttons that we have on our site – one that links out to resources and the white button that links to our main website for Web Services.
Once you have filled out all the information in the back end just make sure to click Update to save your changes.
Now that you have learned how to work with site options, time to try it out!
This site uses cookies to offer you a better browsing experience. Find out more on how we use cookies and how you can change your settings.