Site Navigation
Module 3.1 – Advanced: Site Organization: Site Navigation
Table of Contents
The navigation menu is an essential element of your site. A good menu allows users to navigate through your website easily enabling them to find important information quickly.
Step-By-Step
Add a page to your menu
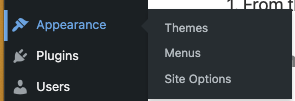
1. From the Main Navigation Panel, hover over Appearance and click Menus.
2. On the left-hand side of your screen, you will see a list of pages on your site.
Check off the page(s) you would like to add to the menu. You can find your pages using Most Recent, View All, or Search.
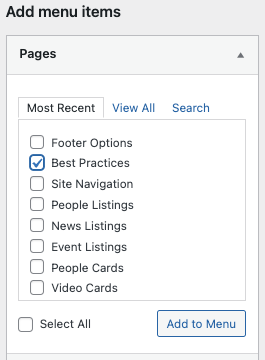
3. Click Add to Menu. The added page(s) will appear at the bottom of the list.
Arrange menu items
1. Drag and drop a menu item to move it up or down the navigation
2. To make a page a sub-item (or child) of the page above it, indent the child page by dragging it to the right. You can display up to three levels in the menu.
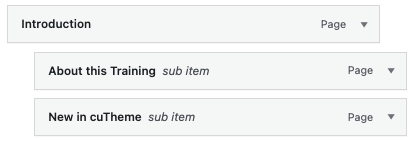
3. Click Save Menu to save your changes.
Rename a navigation item
By default, the navigation label is the name of the page. However, there may be times you’d like to change it to something shorter.
1. Scroll down to the menu item you wish to remove and click the arrow beside it to open the menu item settings.
2. Click in the text box underneath the Navigation Label. Type in a new name.
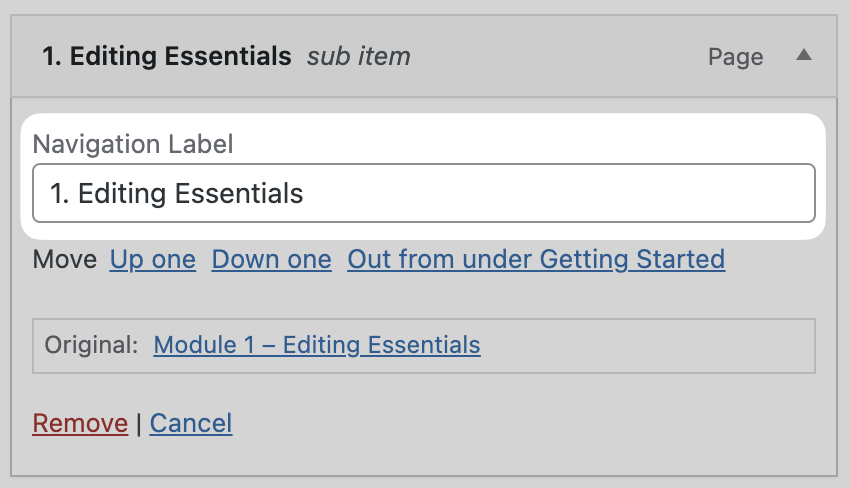
3. Click Save Menu to save your changes.
Remove a page from the navigation menu
1. Scroll down to the menu item you wish to remove and click the arrow beside it to open the menu item settings.
2. Click Remove.
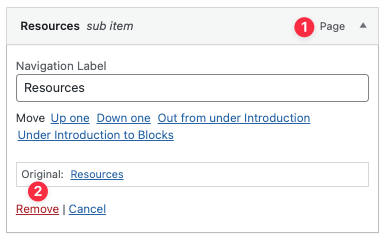
3. Click Save Menu to save your changes.
Video Tutorial
Try it Out!
Now that you have learned how to set up your site navigation, time to try it out!
- Add a new page to your menu.
- Change the order of your items.
- Change the hierarchy of your menu so that it has at least one main menu item, one second-level item, and one third-level item.
- Shorten the navigation label for one of your menu items.
- Delete an item from your menu.