Block Editor Workspace
Module 1.3 – Getting Started: Editing Essentials: Block Editor Workspace
Table of Contents
The block editor workspace is the area where you create content for your website’s pages and posts. It offers a variety of blocks that you can use to design and add information.
Remember, blocks are the fundamental elements that you use to create content layouts. Have a look at this page to review how blocks work.
You can customize this area to suit how you best work. This lesson will give you an overview of the three sections of the block editor workspace: the top toolbar, sidebar, and content area.
Step-By-Step
1. Launch the Block Editor
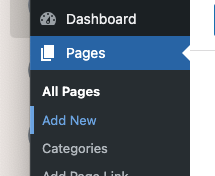
To launch the block editor, click on Pages > Add New.

2. Choose your Work View
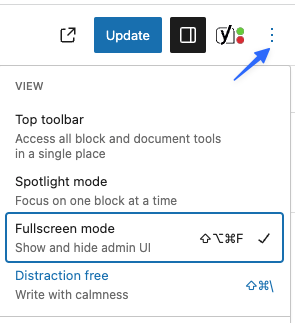
By default, the editor opens in fullscreen mode. I prefer to work with the lefthand navigation bar showing. This may be your preference if you are familiar with our ccms and the classic WordPress Editor.
To change the setting, click on the three dots at the top right of your screen. Click Fullscreen mode to toggle off and on. Experiment with the different modes under View to find what works best for you.

The block editor workspace has three main areas: the top toolbar, sidebar, and content area.
3. Top Toolbar

Toolbar options (from left to right) include:
- Block Inserter: Add blocks or patterns to your page.
- Tools: Switch between editing a block and selecting a block.
- Undo and Redo: Undo or redo an action.
- View Page: Get a page preview.
- Publish or Update your page.
- Show or hide page and block settings.
- Choose your workspace view.
4. Sidebar
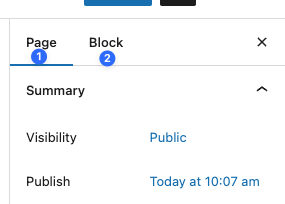
The right-hand sidebar allows you to switch between
- Page and
- Block
Here, select specific options for each.

5. Content Area
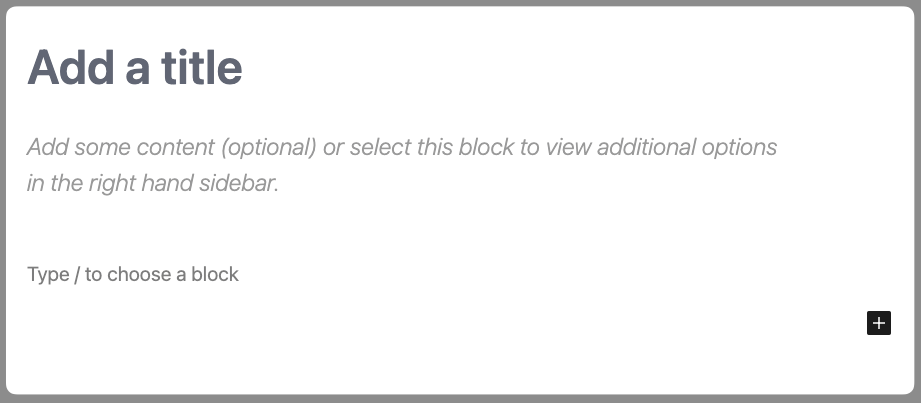
The content area is where you will add content blocks in order to create your pages.

We will go into all of these areas in great detail throughout this training.
Video Tutorial
-
Welcome to getting started with cuTheme, module one. This video will teach you all about the block editor workspace. The block editor workspace is where you will build and develop all of the content for your website.
There are different options in how you can set it up to best suit your preferences and workflow.
First, let’s start by launching the block editor workspace. Hover over Pages and click Add New Page. Now you can choose your preferred work mode. By default, it’s set to full screen. Click on the three dots at the top right to change this setting. Personally, I prefer to see the left-hand navigation bar while I work. So I like to toggle full screen mode off.
And you’ll notice that there are several other options here. You can play around and see which you prefer.
There are also some options over here at the top left. The first one is the block inserter. And just like what it sounds like, you click on this to add blocks to your web page.
Next, you have the option to switch between the select tool, which allows you to select blocks, and the edit tool which is for editing.
Click the undo icon, which is right here, to revert to your most recent changes. And you can click the redo button right beside it to reapply changes that you have undone.
The document overview button right here will give you an overview of the entire page. You can see these are all the blocks on your page and you can navigate to them by clicking. You can view it either as a list or an outline.
The Save Draft button allows you to save your page without publishing it. This button is only available if your page still needs to be published. And you’ll also see the Publish button. Again, this is only available for brand new pages that have not yet been published or are still in draft.
Once your page is live and has been published, you’ll notice that there’s an Update button over here. Every time you make changes to this page, you’ll want to click the update button to save the page.
Click on this icon right beside the update button to view your page.
The setting button over here at the top right allows you to see the options for the page as well as your blocks on the page.
Click the last icon at the right to view more tools that are available. We’ve already looked at the view options here at the top. Another one that you might find handy is down here – copy all blocks. Click on that to copy every block on your page and then you can add a new page and when you get the blank page you can paste in the blocks by clicking Command+V .
Try it Out!
Now that you have learned how to navigate the block editor workspace, it’s time to try it out!
- Visit your site’s dashboard and add a page.
- Switch to fullscreen mode. Try out the different editing modes under View.
- Go to the sidebar and click the Page and Block tabs to get familiar with the options available.
- Put your cursor in the content area and click + to add a block.