Image
Module 3.3.1 – Getting Started: Basic Building Blocks: Basic Image Blocks: Image
Table of Contents
The Image block allows you to add images to your page or post. Using the Image block is a great way to add colorful and engaging content to your page. Below is an example of how you can use the Image Block surrounded by text.
Image Block – Example
Ut egestas sapien ac urna laoreet lobortis id sit amet sapien. Suspendisse tellus urna, semper id elementum sed, lobortis eu eros. In hac habitasse platea dictumst. Nam viverra lorem non quam faucibus, id ultrices erat sodales. Nullam vitae mi vitae risus faucibus volutpat at vel magna.

Curabitur eu sem nunc. Sed eu mollis neque. Suspendisse ut augue tincidunt, cursus turpis at, tincidunt mauris. Quisque euismod libero eget diam lacinia, ac rutrum nulla faucibus. Duis sed leo non massa ornare imperdiet in nec nunc.
Sed ultricies nibh vitae pharetra facilisis. Vivamus sed erat blandit sapien tristique imperdiet. Fusce vitae orci elementum, sollicitudin justo eget, gravida massa. Sed at urna vitae tortor ullamcorper dapibus.is dis parturient montes, nascetur ridiculus mus.
Step-by-Step
1. Add the Image block using the block menu.

2. Upload an image of your choice. You have 3 options:
- Upload: to upload an image from your computer;
- Media Library: to select an image already uploaded to your site;
- Insert from URL: to add an image from the web using its image address.

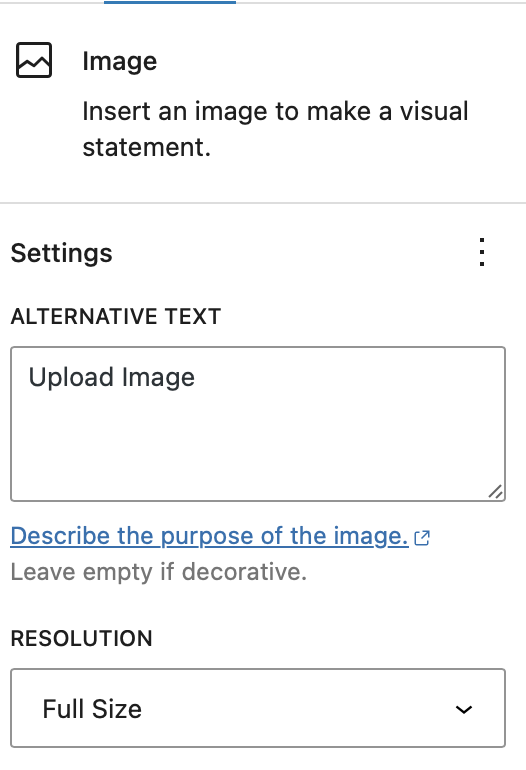
3. Open the block settings menu to add Alt text or change the size of the image.

You can also toggle a button in the block options to expand an image when the user clicks on it.

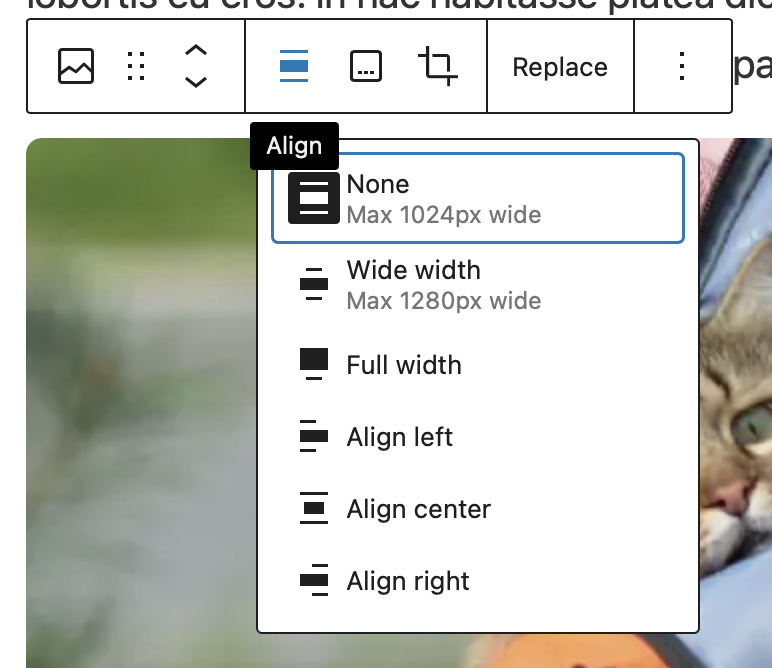
4. You can change the image alignment by clicking on the block and selecting the Change alignment button from the toolbar menu. You can then select an alignment from the dropdown.
If you align the image to the left or right, text will wrap around the other side.

5. Add a caption to your image by clicking the toolbar option and entering your caption.

6. You can replace an image by hovering over the image and clicking on Replace. From here, select a new method of uploading an image, and choose a new image.

Video Tutorial
-
Welcome to getting started with cuTheme, module 3.
This video is going to introduce you to using the image block. Let’s start by adding an image block.
The image block allows you to add images to all of your pages and your posts. To do this you have two options. First, you can click upload to upload the images from your computer. And uploading an item this way means it will also add that image to your website’s media library. This means that it can be used across the site by anybody.
Next, you can select an image from the media library. Once you pull up the media library, you’ll have access to all of the images that have already been uploaded to your website. Click on one of those images and then press select. Now have a look over here at the block options on the right. This is where you can add alternative text to describe the image. And you can also choose the size – whether you want to have a thumbnail, medium, or full-size image.
When you click on the image, you’ll also notice that you have a contextual menu up here at the top. Use this contextual image for alignment. You can align your image to the left or the right. You can also add a caption. And if you need to replace the image simply click on the replace button and you can choose something different from your media library.
Try it Out
Now that you have learned how to work with the image block, it’s time to try it out!
- Add an image to your page/post.
- Add alt text.
- Add a caption to your image.
- View your block on the front end!