Table
Module 1.3 – Mastery: Text Blocks: Tables
Table of Contents
Step-by-Step
1. Add the Table block using the block menu.

2. Add header labels to the table columns

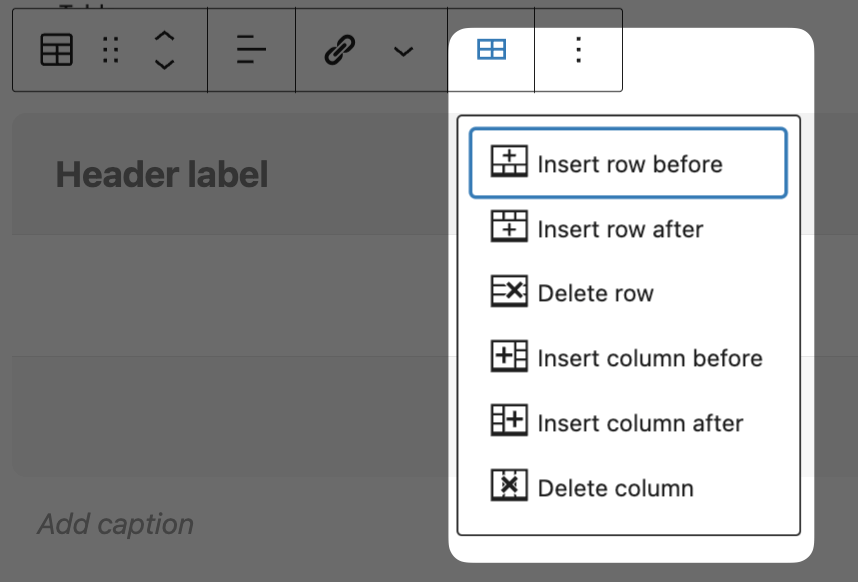
3. Use the Edit tool to insert and delete rows and columns.

Video Tutorial
-
In this video, we are going to look into using tables for your website’s content.
Tables allow you to sort data into a more systematic manner. This allows a user to group together and compare a set of data or information together more easily.
As you can currently see in the screen, an example of a table in use is shown.
Now that we have explained the purpose of a table and how it can improve your website’s content, we will now show you how to add them to your pages.
First, you want to go into editing mode of the page you want to add a block into.
Then navigate to the block menu and add the table block to your page.
Once its in place, add header information to the table.
After that, you can now add data below the headers.
If you want to add more columns, rows or delete them, you can do so by clicking on the block itself and pressing the edit tool.
options to modify the table should show up in the dropdown menu that appears.
If you want a caption, for example to describe the table and what its contents are about, if the table has footnotes you want to convey, or if the table has a primary source on its data, you can add it on the captions text box below the table.
If you want to customize how the table looks, select the block and a menu on the right should appear.
From there you can:
- Fix the width of your table cells,
- Disable or enable the header,
- Or add a footer.
Once those steps are done, then we have now successfully added a table to a page.
Try it Out
Now that you have learned how to work with the table block, it’s time to try it out!
- Add a table to your page
- Add table headers
- Make it a 4 column table