Form Confirmations
Module 5.2 – Mastery: Forms: Form Confirmations
Table of Contents
When a user submits a form, they will be presented with a message onscreen, or directed to a new page with a message. By default, this message lets them know that the form has been successfully submitted. You can easily customize your confirmation message.
Step-By-Step
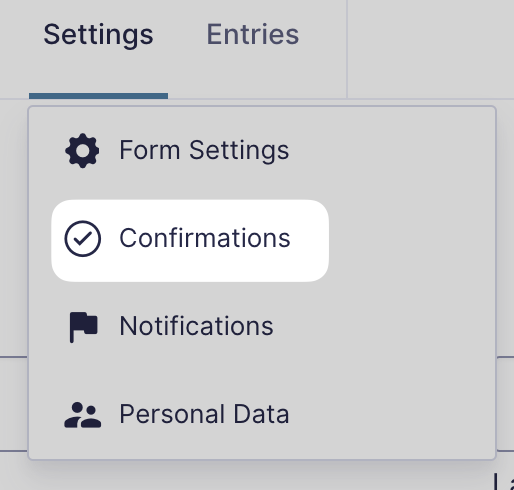
1. To access confirmations, hover over Settings then click Confirmations.

2. Either add a new confirmation or edit the existing default confirmation message.

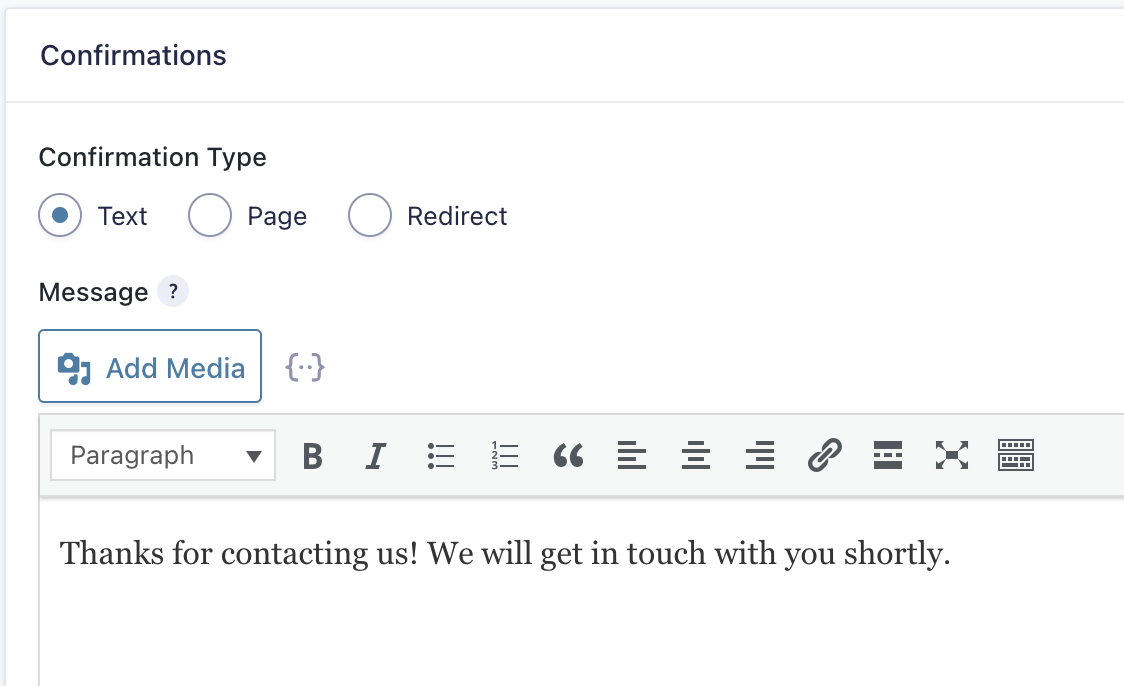
3. Next to Confirmation Type, you can choose where the user is sent after submitting your form.
- Text is the default, and will present them with a message onscreen which you can edit using the content editor under Message.
- Page will redirect the user to a page within your website which you can select using the Page dropdown.
- Redirect will redirect the user to a URL which you can insert into the Redirect URL field.

4. Don’t forget to save your changes!

For detailed information on configuring confirmations, please visit the Gravity Forms documentation site.
Video Tutorial
-
Hello and welcome to cuTheme Mastery Training, Module 5. In this video, we will go over Form Confirmations.
Confirmations are messages that are displayed to users once they complete a form. These messages confirm that the form has been completed and submitted, and can thank the user or give any other necessary information.
To get to Confirmations, make sure you’re on your form’s edit menu right here. Go to “Settings”, and click “Confirmations”.
You will be redirected to a new page, which lists all your form’s confirmations. Since this is a new form, the only confirmation right now is the default. You can edit a confirmation by clicking on it, or add a new one by clicking the “Add New” button.
You’ll be taken to a new menu by clicking on the button, allowing you to create your confirmation. You can give it a name, and choose the confirmation type. Text allows you to display a message upon completion. Page will redirect you to a different page on your site, and Redirect will take the user to a URL that you can copy and paste.
There is also an option for conditional formatting, which can change the message depending on the user’s entry on a specific section of the form. For more information on Conditional Formatting, please visit the Gravity Forms documentation site.
Try it Out!
- Create a new confirmation
- Make it so that it will appear onscreen to the user
- Change the default message
- Save your changes (we’ll test things out in module 4 of this tutorial!)