Creating Patterns
Module 6.2 – Mastery: Patterns: How to Create Block Patterns
Table of Contents
It’s simple to create block patterns that you can use to consistently layout content on your website!
Step-By-Step
1. Create a pattern base
You can create a pattern from an existing set of blocks on any page on your website. Or you can make a brand new page of blocks to use as your base.
2. Choose blocks for your pattern
Select the blocks you wish to include in your pattern.
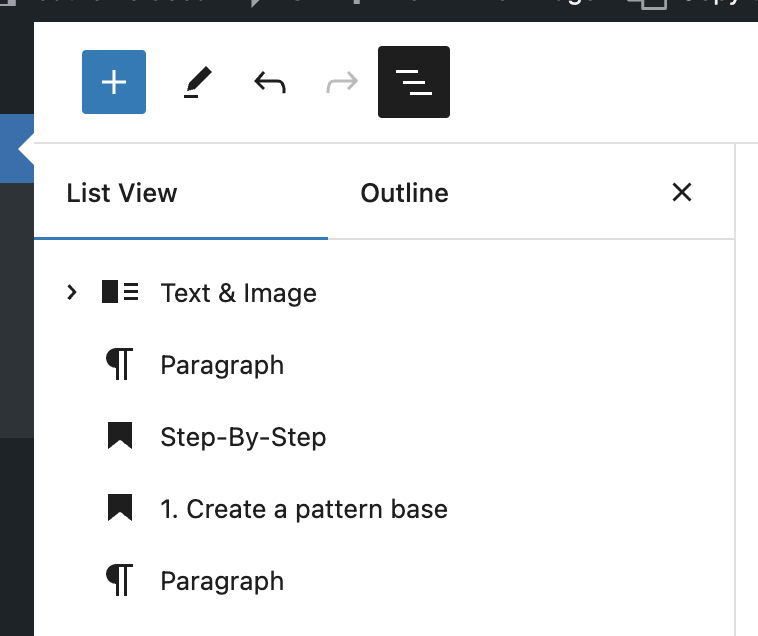
Tip: Use the List View at the top left to select blocks. This is often easier than trying to highlight blocks in the design area.

3. Create a Pattern
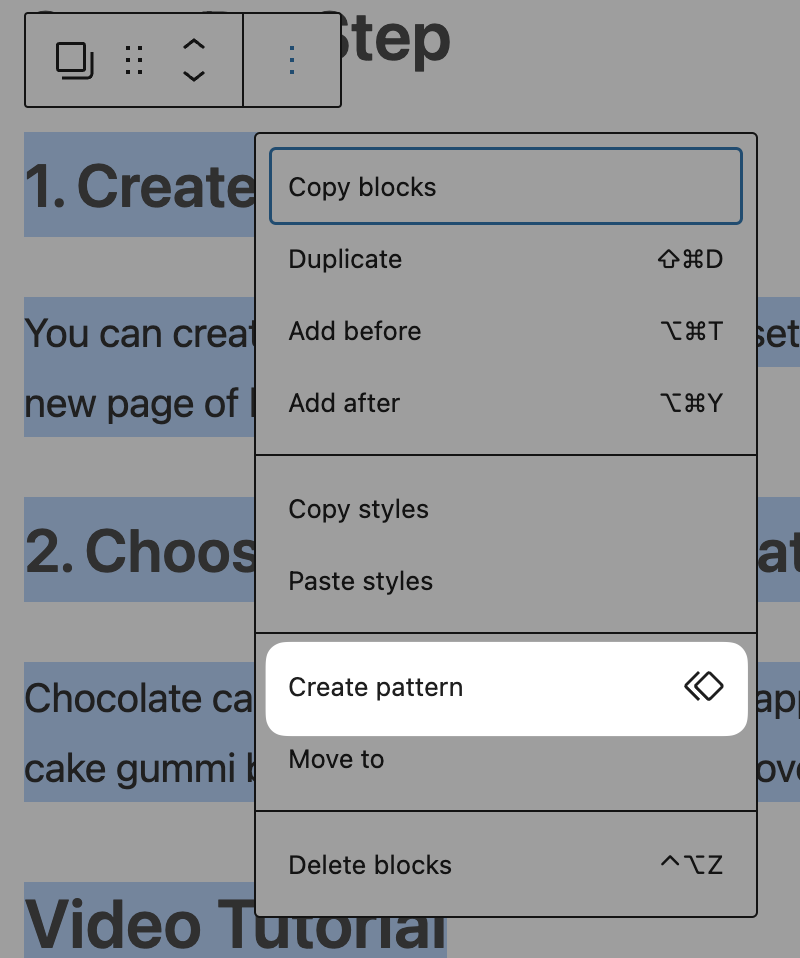
Click the three dots in the block context menu once you have the blocks highlighted.

4. Name and Save!
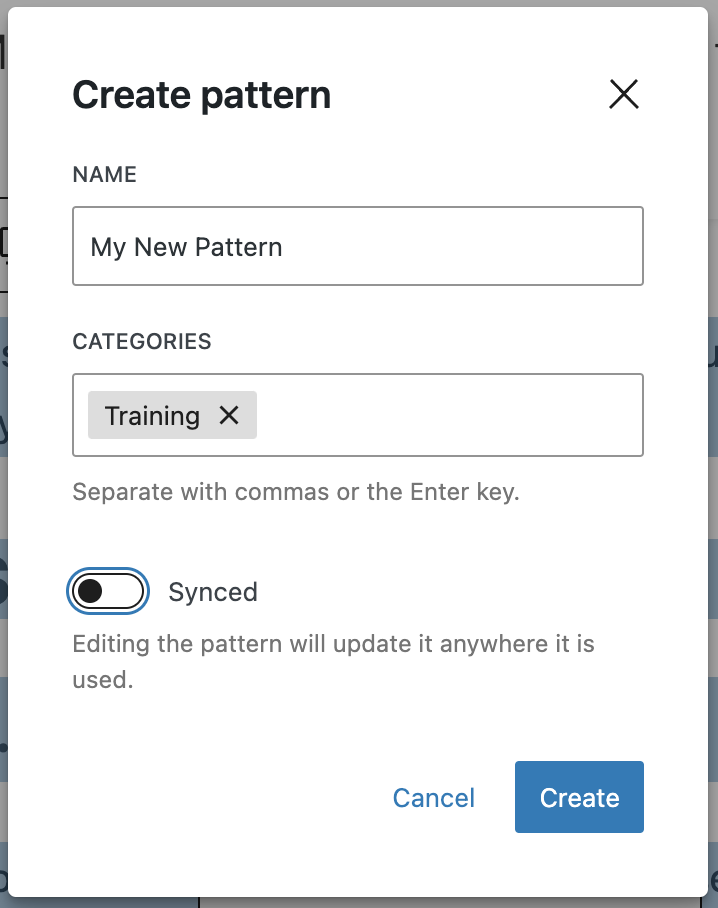
- Give your pattern a name.
- You can also categorize it.
- Use the toggle to choose whether you want a synced or non-synced pattern.
*Note that by default, “Synced” is selected. Choosing this option will result in updates to the pattern across the entire site when edited. Choose with caution! Find out more about synced vs. non-synced block patterns. here.

Note: Not all blocks can be used in patterns. If Create Pattern does not appear when you have blocks selected, you have likely included a non-compatible block.
Video Tutorial
-
Hello, and welcome to cuTheme Mastery Training, Module 6. In this video, we will go over creating patterns.
So, now that you know what a pattern is, it’s time to see how they can be created.
First, create the base for your pattern, the specific blocks in their specific locations. I have this one made here, but feel free to experiment with different layouts for your patterns, and use what works best for your site.
Next, select the blocks you want included within your pattern. To do this, select the three lines here. You can select what blocks you want in it. So, select your first block, and select your end block, and shift-click. This will select all blocks in between, so now all your blocks have been selected.
Once all your blocks are highlighted, select the three dots, and select “create pattern”.
You will then be able to give your pattern a name, and place it in any categories you feel fit.
Lastly, you can choose whether this pattern is synced or non-synced.
By default, synced is selected, which means when you edit the pattern, it will update every instance of that pattern across your site. Make sure your choice is the one that will work the best with your site.
Now click create, and you now have your own pattern.
Try it Out!
Now that you know how to create a pattern, time to try it out!
- Create a set of blocks to use as a pattern. For example, a Header block, a paragraph block, and a text & image block.
- Create and save as a synced pattern.
- Create a second set of blocks – it can be similar!
- Create and save as a non-synced pattern.
We’ll explore using your patterns in the next module!