Creating a new message
Creating a new message to send to the members of a list is a multi‐step process. First you create the message, then you test it. If the message does not look the way you intended, you can modify the message, then test it again. Once the message is correct, you can then approve the message and Lyris starts processing a copy of the message that gets sent to each member of your list.
From within the Lyris web interface (https://lists.carleton.ca/):
To create a new mailing using the Lyris web interface, from the left menu bar, go to Mailings and select New Mailing.
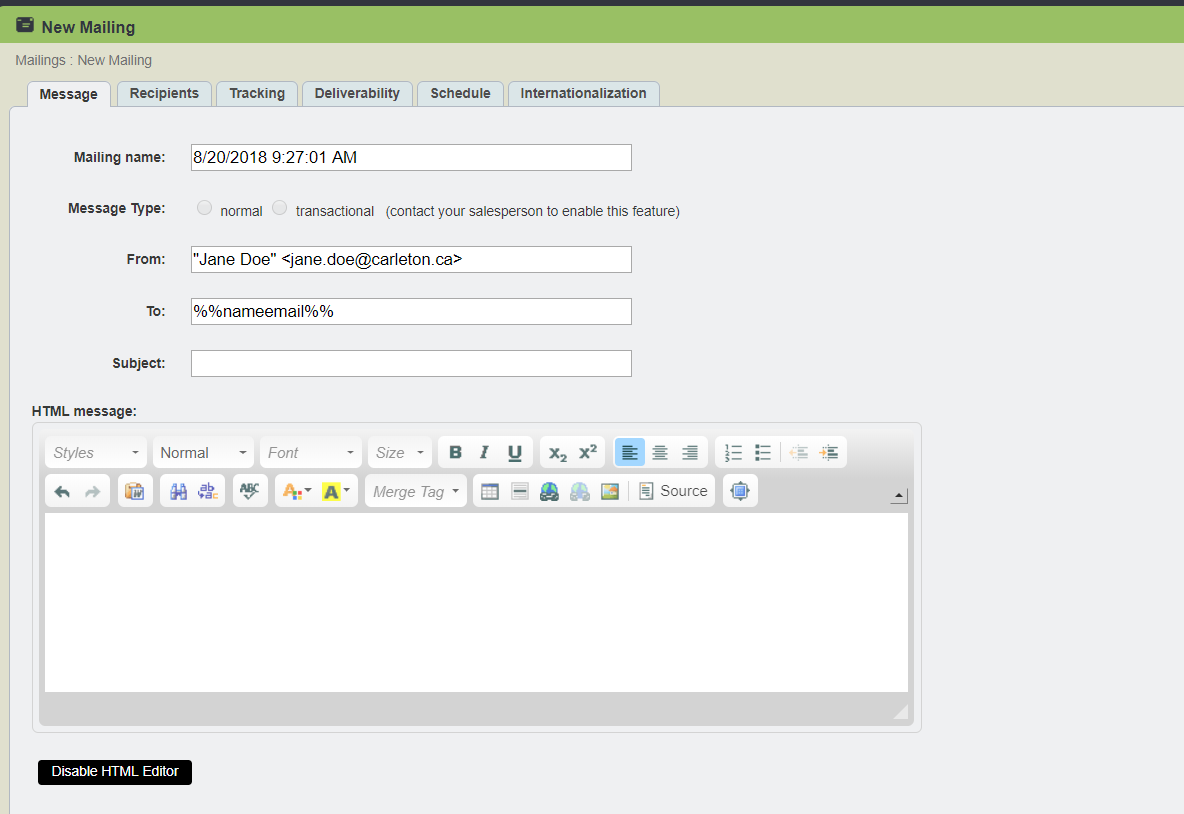
You should to include a Subject line, and then add the text of your message on to the HTML message window. If necessary, you can format the text and insert other HTML elements such as links or pictures. If there is no need for additional formatting, you can skip the HTML block, and include your text into the Text message block below.
Testing your message
Once your text has been included, you can scroll down to the bottom of the page and click on the Save And Test button.

You will now see the following dialog:
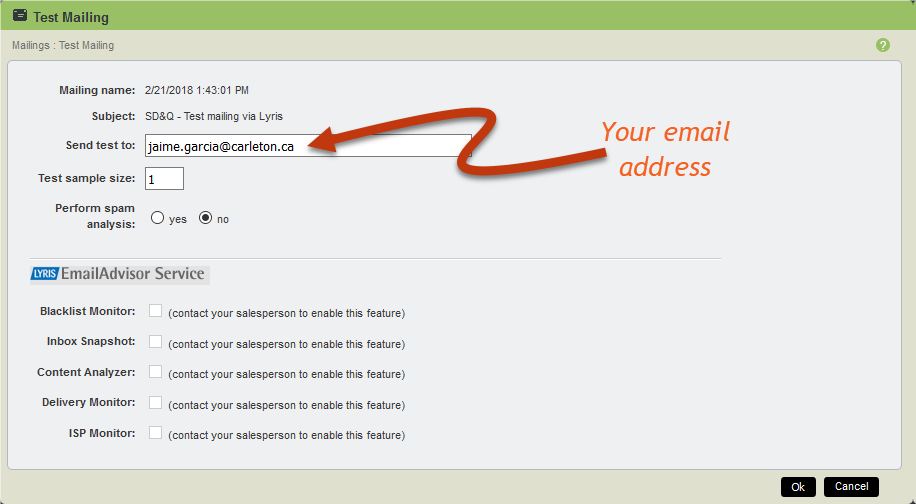
Once you click OK, a test message will be sent to your own mailbox.

Click OK again, and you will see the Need Approval window.
Go to your mailbox (associated with the email address you use to log in to Lyris) and confirm that the message looks the way you intended.
If it does not look the way you want, go back to Lyris and click on the ID number next to the message entry and you will be taken back to the window where you can continue editing the message contents. Send another test to confirm: you want to do this every time you modify the content of the message. The reason for this is that you want to make sure the mail client software displays the content correctly.
Sending your message
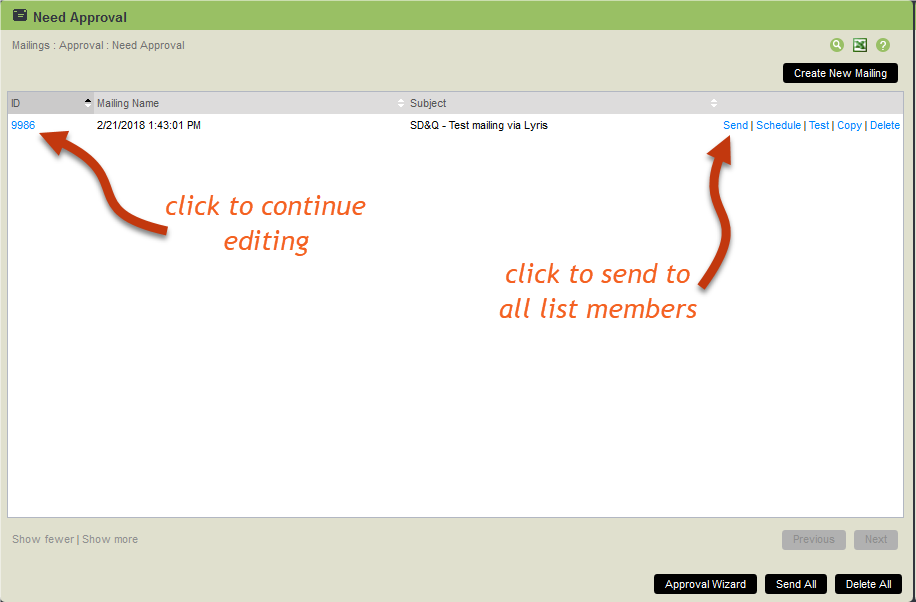
Once the test message is rendering the way you want, click Send. This will send a copy of your message to all members in the mailing list.
You can check on the progress by clicking Home on the Menu.
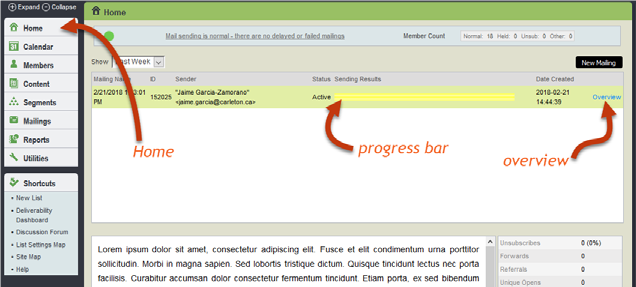
If you click on Overview, you can obtain detailed information on the progress of your mailing.
Depending on the number of members on the list, it may take the server up to an hour to process the mailing.