- Using an iPad
- Use the Built-In Screen Recorder
- Upload to MediaSpace Using KMS Go
- Using a Drawing Tablet
- Kaltura Personal Capture’s Annotations
- Annotating with Zoom
- Using a Document Camera
There are many reasons why instructors might want to record their handwriting during a lecture. The first instance that comes to mind is teaching formulae. Demonstrating how to do hand calculations is best done by drawing out the process by hand. In a face-to-face environment, an instructor might decide to do this using the blackboard. However, in online learning, we need to be a little more creative.
Just like there are many reasons why you might want to record handwriting, there are many ways to accomplish the task. The bottom line is that it largely depends on preference, comfort level, and goal. If you’re looking for a lower-tech option, you might decide to use a document camera to write with markers on a piece of paper. However, if you were hoping to use an iPad and Apple Pencil, because you’re used to it or you want an infinite scroll, that might be the best option for you. If you are lecturing using a slide stack and you’re looking to annotate your slides, you might turn to Kaltura’s annotations.
This page attempts to guide instructors in using different methods for recording handwriting in their lectures. Note that this is not an exhaustive list. Would you like to contribute to this resource with your positive experience? Please request support from the Capture Support Team through our TLS Support Portal!
| Note: Teaching and Learning Services (TLS) has sourced and acquired equipment to loan to instructors to help develop and teach online courses. Please visit out Equipment Loans for Teaching Online website to request to loan equipment. |
- Using an iPad
Using an iPad
Apple’s iPad comes equipped with the Notes application, which allows users to use an Apple Pencil to draw (in colour) on a white background. The iPad also comes equipped with a built-in screen recorder. This means that you can record your entire screen using the iPad itself.
Use the Built-In Screen Recorder
You can use Apple’s built-in screen recorder to record you drawing in the Notes application. To accomplish this:
|
1. Go to Settings  > Control Center, then tap > Control Center, then tap  next to Screen Recording. next to Screen Recording.
|
|
2. Open Control Center, tap  , then wait for the three-second countdown. , then wait for the three-second countdown.
|
|
3. Continue to the Notes application and record your segment.
|
|
4. To stop recording, open Control Center, tap  or the red status bar at the top of the screen, then tap Stop. or the red status bar at the top of the screen, then tap Stop.
|
|
5. Go to Photos  , then select your screen recording. , then select your screen recording.
|
Video Tutorial for Using Notes on the iPad
Upload to MediaSpace Using KMS Go
KMS Go is not a screen recording tool but rather it is an application (available to both iOS and Android users) that allow you to upload your recordings to MediaSpace. This is handy because it means you don’t need to worry about sending yourself files to upload from your computer.
To accomplish this, you’ll need to follow the instructions on our KMS Go Resource site to download the application and upload videos.
Video Tutorial for Uploading Videos Using KMS Go
- Using a Drawing Tablet
-
Using a Drawing Tablet
While Carleton does not support drawing tablets, the applications for using these types of tools are supported: Personal Capture and Zoom. Both of these softwares has built-in annotation tools.
Kaltura Personal Capture’s Annotations
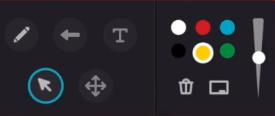
When recording using Personal Capture, you’ll notice that you can launch Kaltura’s annotations toolbar. This means that you can annotate your screen recording as you record. You can also use the whiteboard to capture your handwriting. To accomplish this,
- Install and launch Kaltura Personal Capture
- Configure your application (make sure to disable auto-minimize)
- Click Start Recording
- Click on the little pencil icon

From there, you’ll be able to choose from Kaltura’s Annotation tools to begin annotating your presentation.

To launch the whiteboard, click on the whiteboard icon  and continue using the tools from the toolbar to draw within the whiteboard.
Video Tutorial for Annotating Using Personal Capture
Annotating with Zoom
Zoom had its own set of annotation tools that will allow you to annotate your presentation and draw on a whiteboard as well. In any meeting, click on the Share Screen icon and click Whiteboard to launch the whiteboard. From there, you will notice the annotation toolbar that is similar to the tools available in Personal Capture.
Video Tutorial for Annotating with Zoom
- Using a Document Camera
-
Using a Document Camera
All of the aforementioned options requires one to navigate different sorts of tablets. However, a lower-tech option is to use a document camera, a pen, and a piece of paper. To accomplish this:
- Plug in your document camera to a USB port on your computer.
- Install and launch Kaltura Personal Capture
- Configure your application
- Change the Screen (or first visual input to your document camera).
- Click to Start the recording.
Unlike the other recording options, Kaltura Personal Capture will actually display your document camera footage on the screen as you record.
Video Tutorial for Using a Document Camera
Share: Twitter, Facebook
Short URL:
https://carleton.ca/kaltura/?p=2404
