- The Recording Process
- Kaltura Capture will not show the webcam as you record
- Upload Later
- Find Personal Capture Recordings on your Computer
- Next Steps
The Recording Process
- Launch the app – If you have already installed the software, launch the software by clicking on the application on your computer. If you have not installed the software, see How to Install Capture.

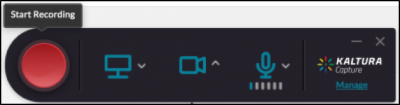
- In the Kaltura taskbar (see image below), click the webcam, screen, and microphone icons to select your desired recording settings. For more information on setting up your recording, see Recording setup options.
- NOTE: By default, the application will record your computer screen and the webcam.
- NOTE: By default, the application will record your computer screen and the webcam.
- Click the red record button to start recording. You will see a 3-second countdown and then your recording will start. If you decide to cancel your recording during the 3-second countdown, click Cancel.
- NOTE: When the recording begins, the duration of your recording is displayed in the Recording Menu (this will not be displayed in your video recording).
- You have the option to customize and annotate your recording using the following tools:
 Pencil: draw and handwrite
 Arrow: add an arrow
 Text: add a text box
 Cursor: highlight mouse clicks during the recording
 Select: highlight a selected area on your screen during the recording
- When you are finished recording, click the white Stop button. You will be prompted with the message “Are you sure you want to stop this recording?“. Click “yes, stop it” to end your recording.
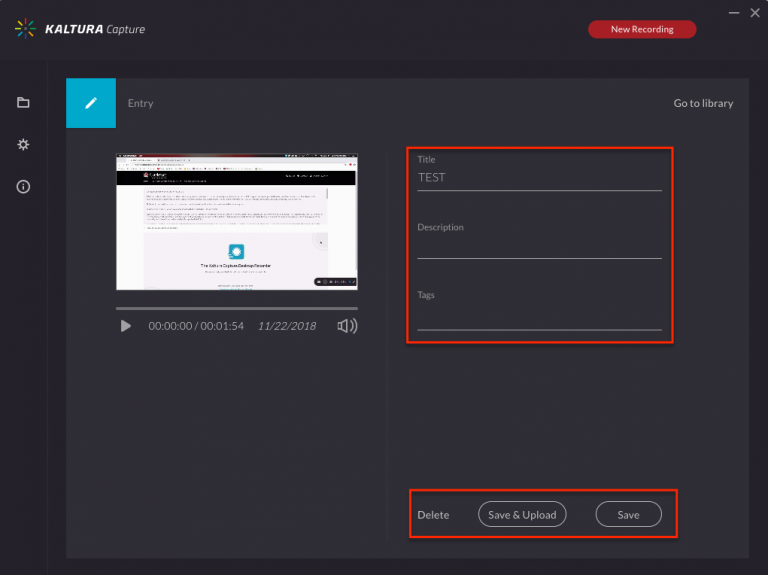
- After you stop your recording you will be directed to the Entry page where you need to enter the following information:
- Title of the recording
- Description
- Tags
- Select one of the following options:
- Delete to delete your entry.
- Save and Upload to upload to MediaSpace.
- Save to save to your local library only. You will be able to upload to MediaSpace at a later time.
- New recording to do another recording (you will be prompted with a confirmation that you indeed want to leave without saving your previous recording).
- An upload progress bar is displayed and a successful upload message appears when the upload is complete.
NOTES:
- By default, an uploaded media item is set as private – only the owner of the media can access and view it. You need to either publish your media to share it or embed it into cuLearn or embed it into D2L Brightspace.
- When you save a recording without uploading to MediaSpace, you will be taken to your Kaltura library and have the options to upload or delete your media.
- If you are experiencing issues uploading your Kaltura Personal Capture recording to MediaSpace, pleases visit our Where to Get Help support page.
Kaltura Capture will not show the webcam as you record
Kaltura Capture will not show the webcam as you record your desktop. Kaltura Capture requires that you set up the screen recording options before you begin recording. You can configure and preview your webcam at this time. During the recording, though, your webcam will not appear on screen. Additionally, you will not have the option to toggle the webcam on and off as you record during dual source recordings. A dual source recording is when a user selects more than one source to record simultaneously. One example of a dual source recording would be if the user selected their desktop and their webcam to be recorded at the same time.
Even though Kaltura integrates the two visual sources after it’s done encoding the video, the viewer can always decide between which different view to watch. In other words, your audience can decide between different viewing experiences as they watch the recoding. For more information on Kaltura’s video player, please visit our Video Player support site.
Recording Tips
- Do a test recording a few days in advance of when you need it. This ensures you have sufficient time for troubleshooting in the event that your computer, Internet, or technical skills require extra attention.
- Conduct a short test recording each and every time you sit down to record.
- Exit any unnecessary applications and browser tabs. These all use RAM that may be required by the recording application.
- Turn computer notifications off, limit background noise, and silence anything that rings, hums, or ticks.
Upload Later
It is possible to choose to save your Kaltura Personal Capture videos locally to your computer and wait to upload them at a later date or time. It’s always best to ensure you have good internet connectivity when uploading your videos. When you choose Save instead of Save and Upload, your videos are saved to your computer and kept in your library (within the Capture application).
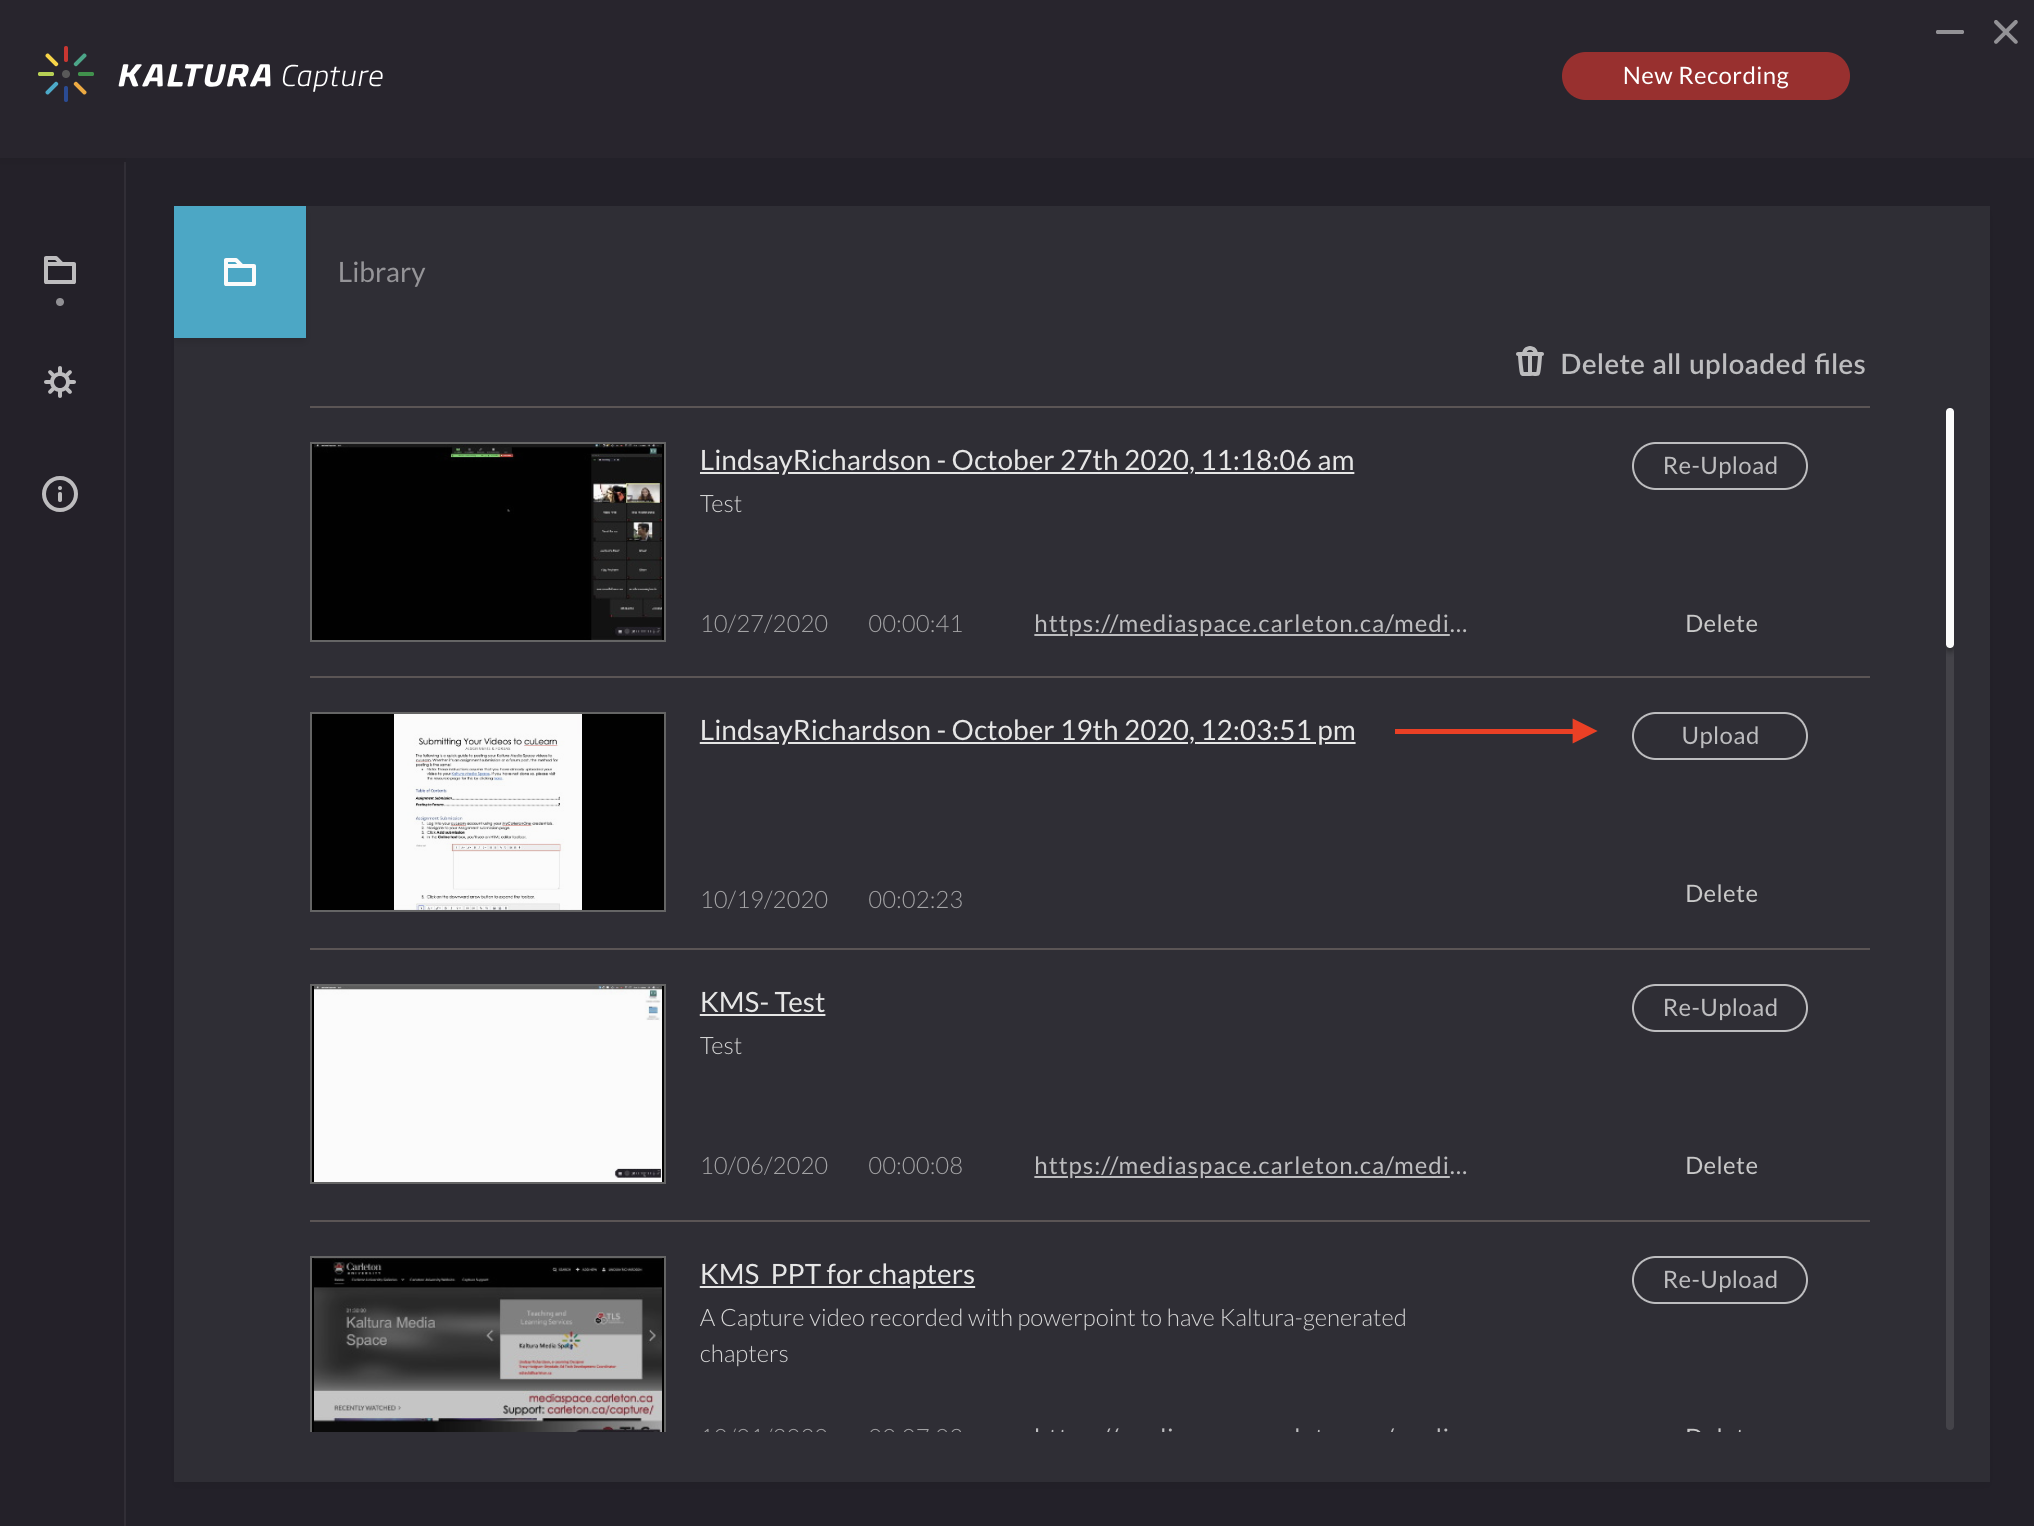
When you’re ready to upload your video to your MediaSpace, follow these instructions:
- Launch Kaltura Personal Capture.
- Click Manage

- Click the Upload button next to the video you wish to upload.
Find Personal Capture Recordings on your Computer
Mac users
Video Tutorial: How to Manually Upload Raw Video Files (Mac)
- From the OSX Finder, click Go and select Go to Folder. Enter ~/Library/Preferences/Kaltura/Capture
Alternately, you can use the Search feature (Command+Spacebar) instead and enter the same ~/Library/Preferences/Kaltura/Capture - Locate your recording in the Recordings folder.
- Upload your recording to MediaSpace by Adding New Media
Windows users
Video Tutorial: How to Manually Upload Raw Video Files (Windows)
- Right click on the Kaltura Capture icon on your desktop.
- Right click on the icon and select Properties.
- Open file location and go up one folder to the Capture folder, or simply go to: C:\Users\<username>\AppData\Local\Kaltura\Capture\