Cisco AnyConnect 4.1 supports Linux Red Hat 6, 7 & Ubuntu 12.04 (LTS), and 14.04 (LTS) (64-bit only).
Multifactor authentication (MFA) is required when using the Cisco AnyConnect Security Mobility Client. Read more.
By default Students do not get VPN access, any Student requiring VPN access will need to request access
* Note: The Connection Server address is cuvpn.carleton.ca/mfa
Installing VPN for Linux
Note: The following installation procedure was tested on Ubuntu 14.04 with Firefox.
- Go to: https://cuvpn.carleton.ca/mfa and login with your MC1 Username and Password.
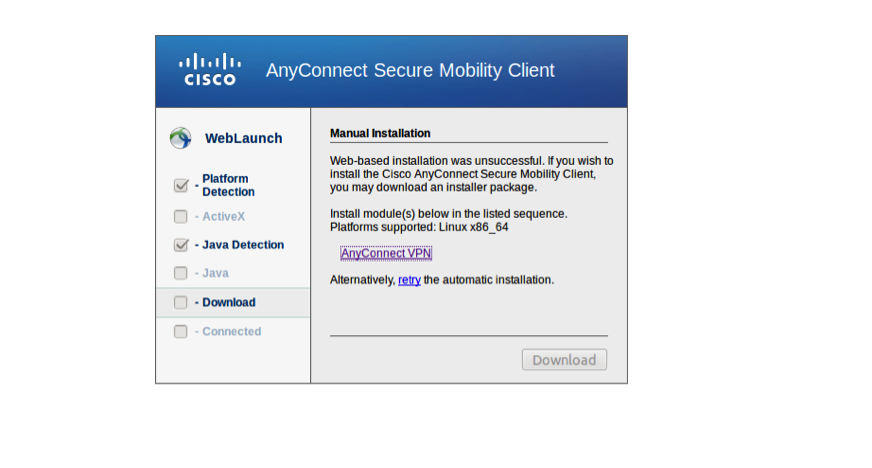
- The WebLaunch will detect the version of Java you have installed and attempt to automatically install Cisco AnyConnect Security Mobility Client. If failed, below screen will appear, and click AnyConnect VPN to download the client.

- Under the heading What should Firefox do with this file? Select Save File, then the OK button
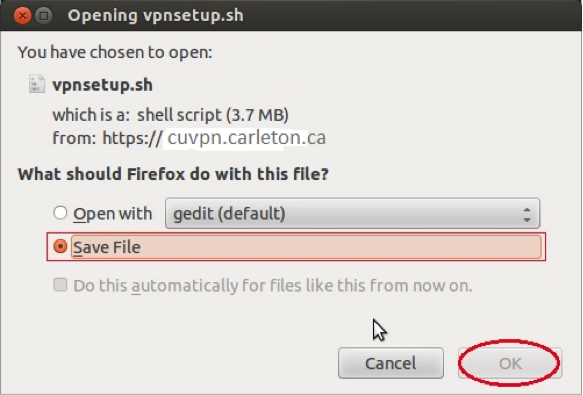
- Exe installation scripts can be found in: /opt/cisco/anyconnect/bin/vpnui
- Run the script sh to have the Cisco AnyConnect Secure Mobility Client setup.

Using the Cisco AnyConnect Security Mobility Client
Multifactor authentication (MFA) is required when using the Cisco AnyConnect Security Mobility Client.
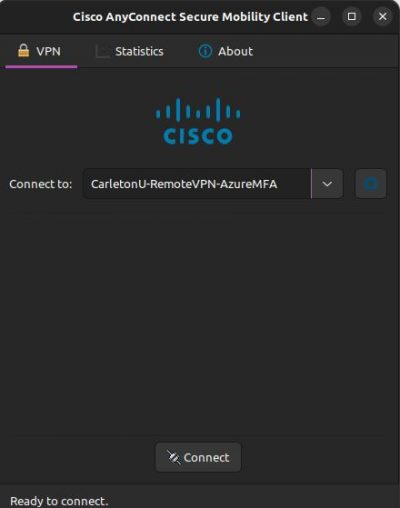
- To use the VPN Service with MFA, go to Applications -> Internet ->Cisco AnyConnect Secure Mobility Client and launch the client.
2.Select the CarletonU-RemoteVPN-MicrosoftMFA profile from the drop down menu, if you do not see this option or it fails to connect, type cuvpn.carleton.ca/mfa and press ‘Connect’.
3. You will be redirected to this login page.
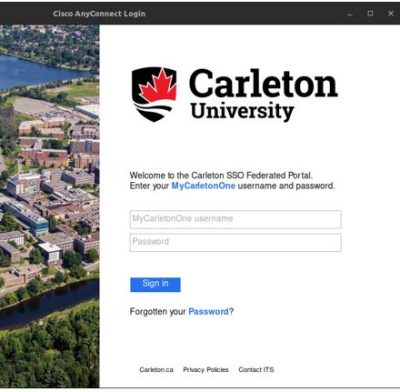
-
- In the Username field, enter your MyCarletonOne (MC1) account (do not include @cunet.carleton.ca.)
- In the Password field, enter your MC1 password.
4. You will be prompted to complete your second factor of authentication. Please see the following for assistance:
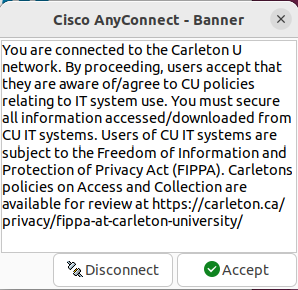
5. You will be presented with the policy and privacy acknowledgement to accept before establishing the connection. Once connected you should have access to all the same resources allowed to you. Click Accept to proceed.
Please contact the ITS Service Desk if you would like any assistance.