

The projector in HP5151 is a Sony laser projector with sound and can be accessed via an HDMI cable or through the network using Sony’s Projector Station for Network Presentations software.
How to turn on the projector using the in-lab HDMI Cable
- Connect your laptop to the HDMI cable (on the center desk)
- Locate the projector controls on the wall in HP5151 close to the light switch
- Press the On/Off switch to turn the projector On
- Select input; keep pressing input until ‘Input B’ is selected
- You should now be connected
- Please turn the projector off after using it
There are instances when you have to tell your laptop to output to the HDMI port using one of the Function (Fn) keys.
How to connect to the projector using the Network
You can connect to the projector via the network, and it can screen-cast your desktop. It’s possible that 8 people can connect to the projector at the same time and share the projector screen.
- Install the Sony VPL-PWZ10 software (only for Mac and Windows 10)
- Locate the projector patch panel and turn the projector on
- Select projector input ‘Network’. On the screen, it will list the IP address that can be used to connect.
- Launch the Sony software: Projector Station for Network Presentations – LAN Mode – set IP address
- Please turn the projector off after using it
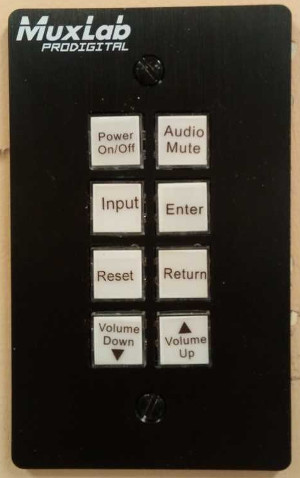
Projector Controls
- The projector can be controlled via the patch panel
- Power On/Off: turns the projector on and off
- Input: select the input source. For the in-lab HDMI cable, choose Input B
- Audio controls: Mute/Vol+/Vol-
Projector Specs
- Model: Sony VPL-PWZ10
- Type: Laser
- Max Display Resolution: 1,920 x 1,200
- Sound: Yes
- Light Output: 5,000 lumens
- Contrast Ratio: 500,000:1
- Connection: HDMI, VGA and Network
Need Help?
Contact the SCS Tech Staff for Assistance.