SCS Nextcloud Documentation
What can Nextcloud do?
Nextcloud clients
Helpful Tips to get started
Special Folders
Sharing a File (link)
Circles (Group Sharing)
Link Sharing Options
Pico CMS
External storage back-ends
How to connect your SCS Linux account
What can Nextcloud do?
- Access NextCloud remote storage using a web browser via the Nextcloud Login URLs, or via Nextcloud clients; this storage is similar to Google Drive, Dropbox, OneDrive, etc
- View and edit common document files in your browser
- Share files and documents
- Sync files automatically to your devices using one of the Nextcloud clients
- Concurrently access and modify documents with other users
- Simple website hosting using Pico CMS
- Mount storage from you other SCS Accounts so you can make all your SCS data accessible in one place
- Several useful apps: Deck, Talk, Calendar, Tasks, and Polls
- Carleton hosted server – your files are actually stored at the School of Computer Science, not off-campus or out of the country
Nextcloud clients
You can connect to Nextcloud via the browser, or you can install a dedicated client for your device. Here are your choices:
- Website Browser (Firefox, Chrome, more…)
- Desktop (Windows, macOS, or Linux)
- iOS
- Android
Nextcloud Clients Download links
Once you download the client, you will be able to sync your files to your local device.
Once you start your client, you can configure it as follows:
- Start Nextcloud client
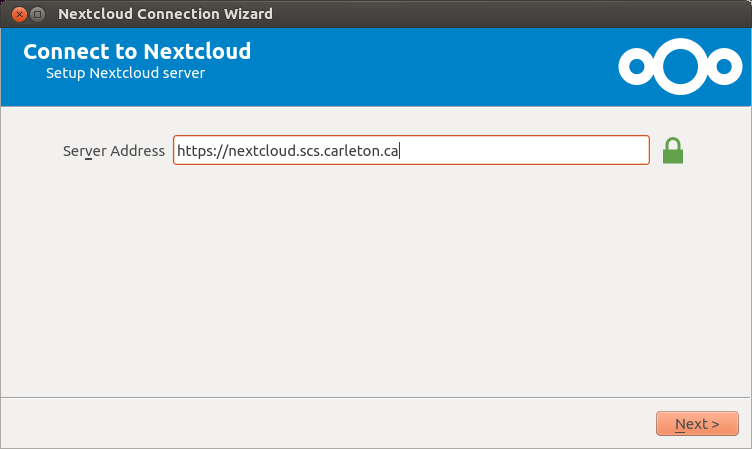
- The server address is nextcloud.scs.carleton.ca for faculty and staff, and share.scs.carleton.ca for students
- Enter your login credentials
Helpful Tips to get started
- to enter a folder or open a file, click on the name, NOT the icon
- to see information about a folder or a file if you want to share it, click on the icon
- you can right-click on the name or the icon or on the … for file or folder operations
- new files or folders can be created by clicking on the circle with the +
- you can drag and drop files using your browser
- to logout, click on the circle in the upper right and select logout
Special Folders
By default, you will see a number of folders in your account:
- folder Additional Storage allows access to SCS Linux and SCS Windows (network Z: drive) storage.
- folder School contains R/O (Read-Only) files and folders that can be updated by Faculty and course TA’s to share files with you
- folder Documentation contains Nextcloud related links and user manuals
You can NOT share files located inside the Additional Storage folder. You can copy or move a file to the top folder and share them from there.
Sharing a File (link)
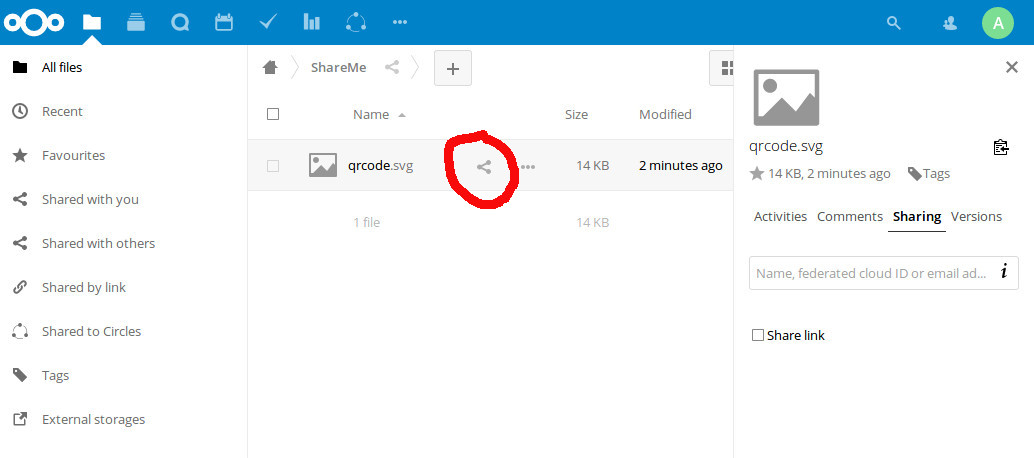
To share a file, you need to:
- Log in to Nextcloud
- Select an existing file or upload a file
- Click on the ‘share’ icon (figure 1)
- Click the ‘Share link’ selection box
- Select the sharing options that you like
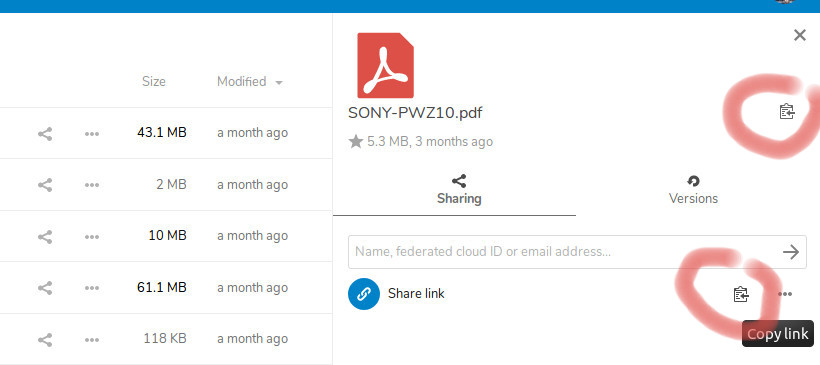
- Send the user the ‘share link’ (select the copy link icon – figure 2)
Circles (Group Sharing)
Note you can also share by group or circle if you want to share with more than 1 person.
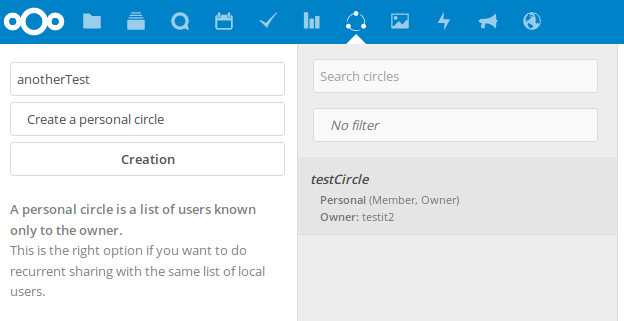
You can change the way groups can view and manage your data using these circles options (figure 3):
- A Personal Circle is a list of users known only to yourself. Use this if you want to send a message or share things repeatedly with the same group of people.
- Hidden Circle is an open group that can be protected by a password. Select this circle to create a community not displayed as a Public Circle.
- A Private Circle requires an invitation or a confirmation from an admin. This is the best circle if you are looking for privacy when sharing your files or your ideas.
- A Public Circle is an open group visible to anyone that dares to join. Your circle will be visible to everyone and everyone will be able to join the circle.
Link Sharing Options
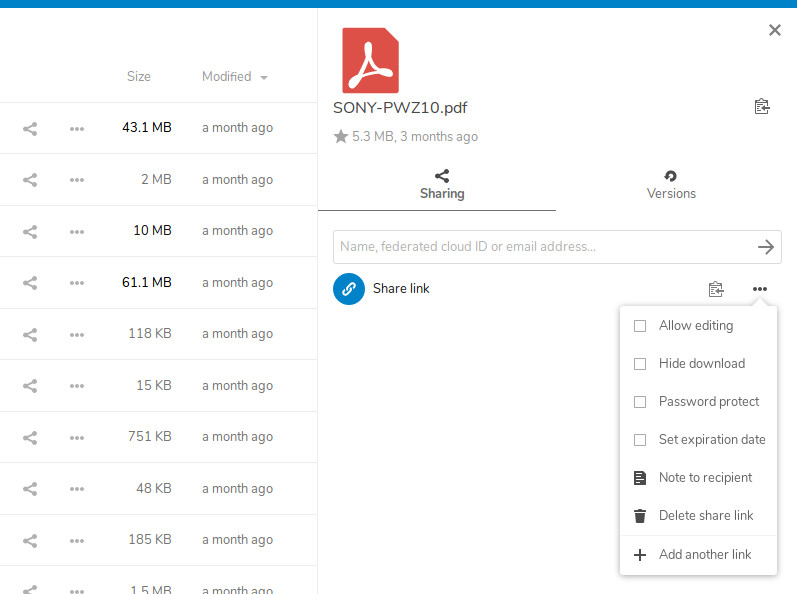
If you share the folder or file using a link, then the link can have the following options (figure 4):
- Allow editing
- Hide download
- Password protected
- Set expiration date
You can also:
- add a Note to the recipient
- delete the share link
- Add another link
for your files.
Pico CMS
Pico CMS is a flat-file, markdown, content management system that can host webpages within Nextcloud.
What is?
Flat-file – meaning there is no database back end all content is contained in files and directories
Markdown – instead of HTML Pico uses Markdown, which is an intuitive plain text formatted language often used in Wiki’s
Content Management System (CMS) – software that manages your website content
Nextcloud
To get started using Pico CMS:
- log in to Nextcloud and choose Settings (top right-hand corner click on your account initial), then look at the left-hand side column and find Pico CMS.
- you will see a section called Create a new website. Fill out the form and click “create a new website”.
- a new entry will appear in the “Your current websites” section
- you have the option of changing the theme from “default” to “SCS”
- you can access your website URL using the current settings URL for your site
A number of files and start up directories are then copied to your Nextcloud files folder. There are sample files included that can get you started. The theme allows you to organize files into folders, and those folders automatically are linked in the header of your website.
External storage back-ends
You can connect storage from several different sources. If you wish to set up another external mount, please contact the SCS Tech staff. Here are some of the options:
- Amazon S3
- FTP/FTPS
- Nextcloud
- OpenStack Object Storage
- SFTP
- SMB/CIFS
- WebDAV
How to connect your SCS Linux account
- Click on your top right-hand icon and select settings
- Click on External Storage on the left-hand side menu
- Under ‘Folder Name’, type descriptive title like ‘Linux Home’.
- Add Storage drop-down, select SFTP.
- Under ‘External Storages’, select ‘Username and password’ (see figure1)
- Host field enter ‘localhost’
- Root field – leave as default
- Username – enter your linux account username
- Password – enter your linux account password
- Password – enter your linux account password
- Select checkmark to save
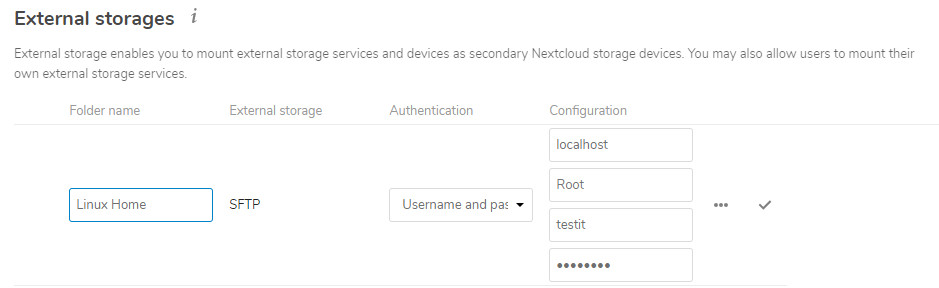
Once you save, navigate to your storages links, and you will find your new linux account link there:
- Click on the Nextcloud icon top left-hand corner.
- Then the menu will have an ‘External Storages’ link.
- Click on your ‘new’ Linux Home storage