- Change Your Notification Settings
- Turn off Submission Notifications
- Create Quicklinks to Student Portfolios
- Exporting Your Portfolio
Change Your Notification Settings
1. In the top right corner of your dashboard page, click Settings.

2. Select the Notifications tab.

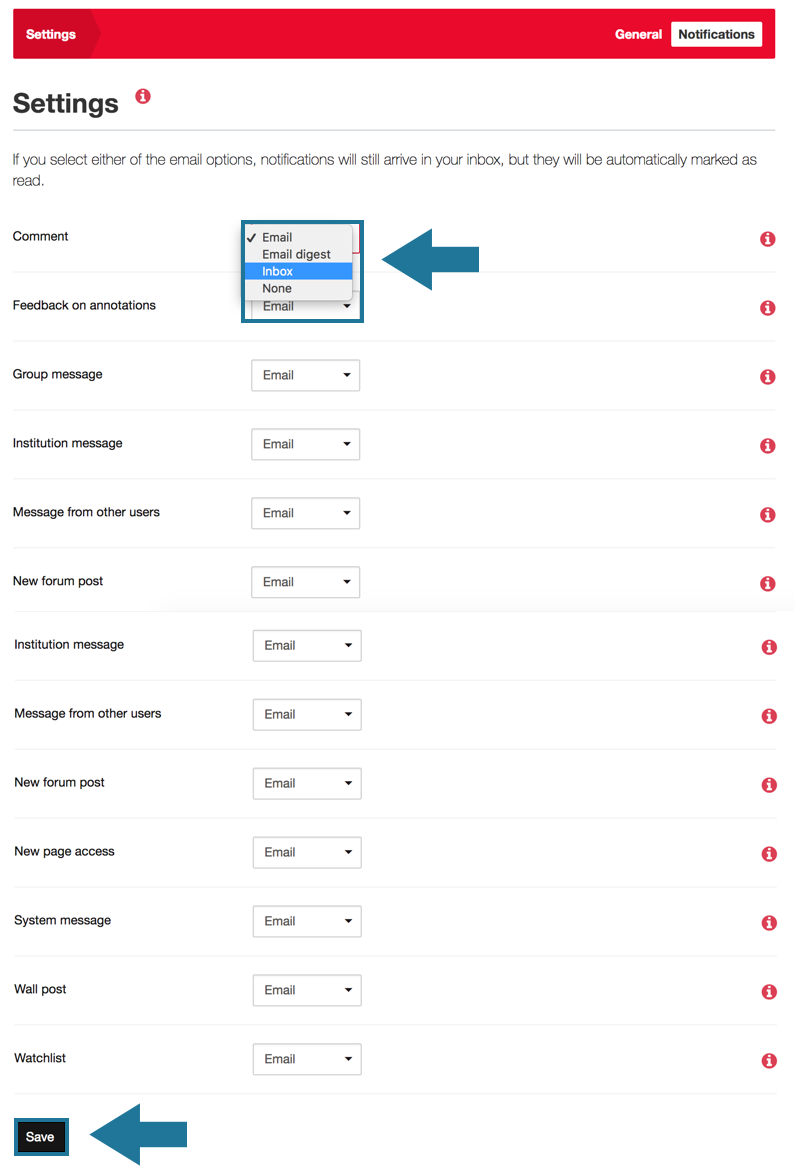
3. Using the drop down menus, choose the notification options on the specific activities you would like to change notifications for. See the Mahara User Guide for a complete description of each of the notifications (See below).
Note: You cannot opt out of receiving notifications. If you would like to change your notifications so that you do not receive emails to your Carleton email address, change the option to “Inbox”. The “Inbox” setting will send the notifications to your cuPortfolio inbox and not your Carleton email.
4. Press Save.
Turn off Submission Notifications
The instructions below will show you how to change your cuPortfolio account settings so that you will not be sent an email notification when a student has submitted a page in a course group in cuPortfolio. Changing these notification settings will also change notifications for other group activities such as notifications for users requesting to join a group.
1. Click Settings at the top right hand corner of the Dashboard Page.
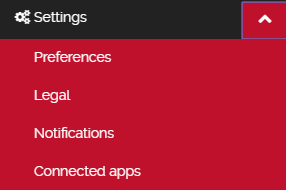
2. Click Notifications.

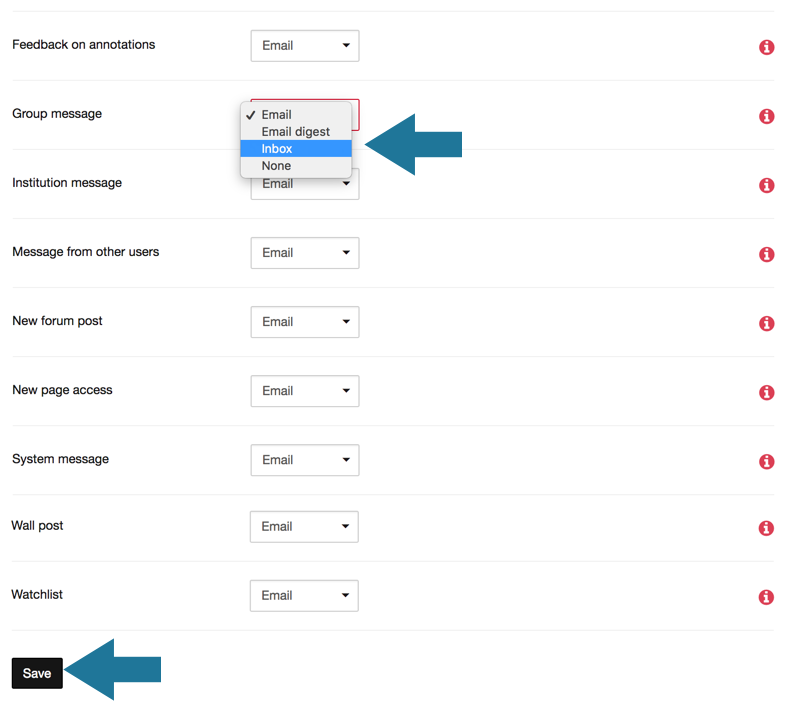
3. Change the notification setting for Group message to Inbox.
Note: You cannot opt out of receiving notifications. If you would like to change your notifications so that you do not receive emails to your Carleton email address, change the option to Inbox. The Inbox setting will send the notifications to your cuPortfolio inbox and not your Carleton email.
4. Click Save.
Create Quicklinks to Student Portfolios
These instructions are for instructors using cuPortfolio. Customizing your Dashboard to have quick links to your students’ ePortfolios will make reviewing portfolios fast and more convenient.
Note: you will first have to make sure that your students have shared their portfolios with you in order to add the quick links to your dashboard.
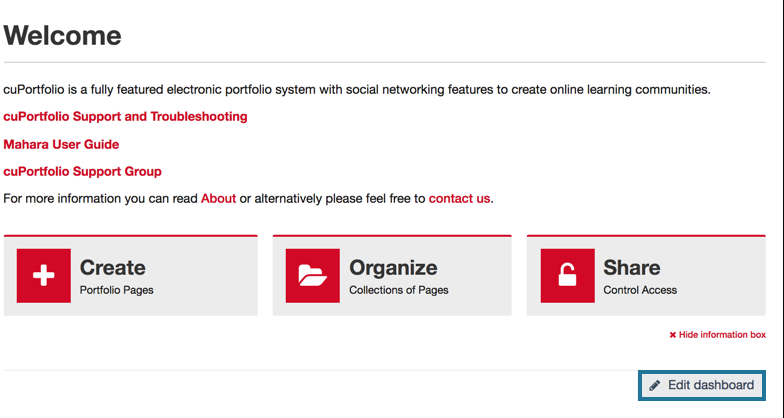
1. On your Dashboard, click Edit dashboard.
2. Add a Text box.

3. Add your class list
a) Change the title of the block to your course code or whatever you would prefer to call it.
b) Insert your students’ names in the text block (you can get the course list on Brightspace).
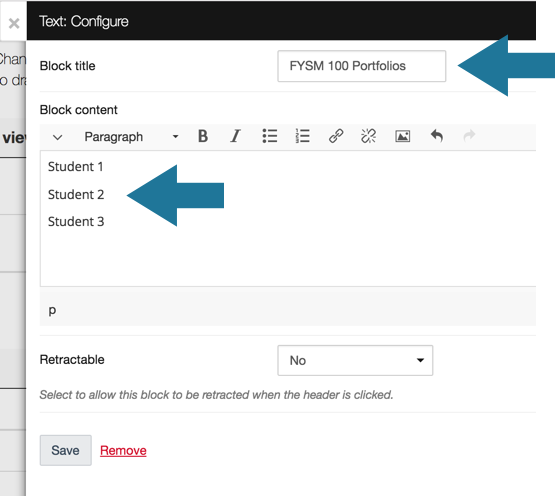
4. Hyperlink each student’s name to their portfolio. To hyperlink:
a. Highlight the name of a student.
b. Click on the hyperlink button.
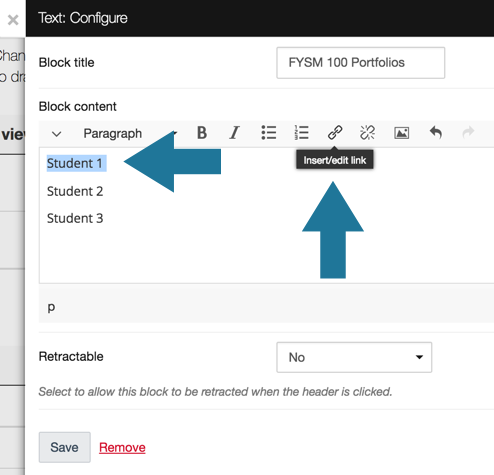
c. Paste the URL for the student’s ePortfolio in the Url box. If you are not sure where to find your students’ ePortfolios, follow the instructions on Finding Portfolios That Have Been Shared with You.
d. Choose the target. If you choose “none”, when you click on the name of the student’s name, the portfolio will open directly in the window/tab. If you choose “New window”, it will open in a new tab on your browser so that your dashboard page stays open on the previous tab.
e. Press Ok.
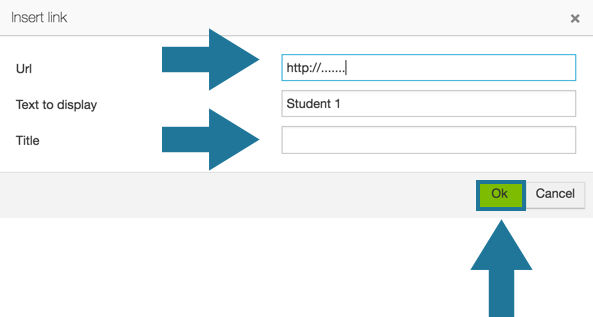
5. Repeat step 5 for each student.
6. Click Save.
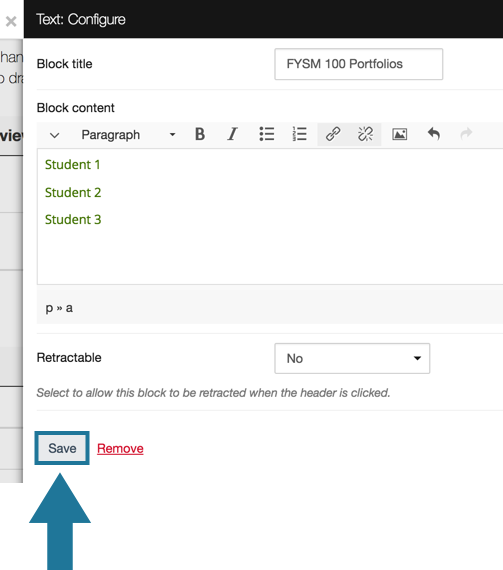
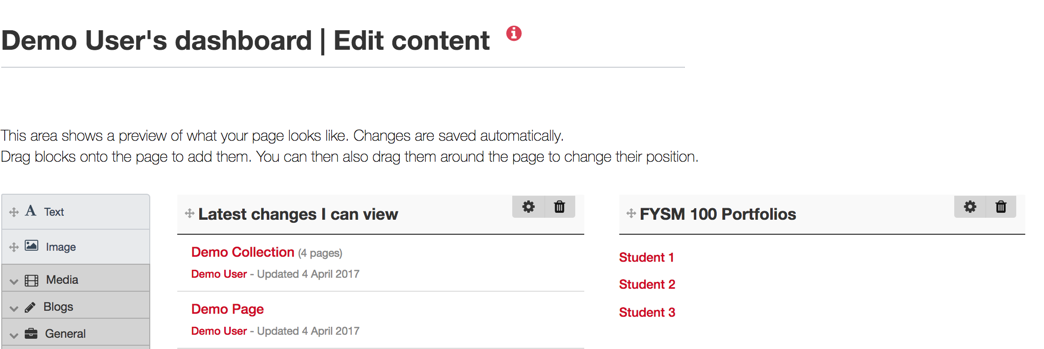
7. When you return to your Dashboard, you will see the hyperlinks listed.
Exporting Your Portfolio
1. On the Dashboard page, hover your mouse over Portfolio.
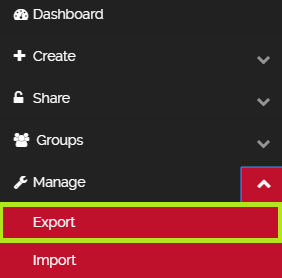
2. You have the choice to export your portfolio content as a Standalone HTML webiste or a Leap2A file. It is recommended that you export both versions so that you have more than one option when importing your portfolio content to another site.
- Leap2A is the best option if you wanted to quickly transfer your portfolio without losing content and formatting. In order to import this type of file, you must have an account with a Leap2A compliant system. It is recommended that you import your portfolio content to a free Mahara site such as Portfoliocommunities or FolioSpaces. For instructions on how to import your Leap2A file into one of these systems, visit the Mahara User Guide instructions on how to Import.
- Standalone HTML website is the best option if you wanted to use your cuPortfolio content on a personal website that is not powered by Mahara. It saves a zip file on to your computer. There is an index.html file in the folder. If you click on this file, it will open up a webpage in your browser. This webpage will not look the same as what your portfolio looks like in cuPortfolio. You will see basic text and formatting details that you can copy and transfer to another website.
3. Choose if you would like to export some or all of your data. If you choose “Just some of my pages” or “Just some of my collections”, you will need to select which pieces you would like to export.
4. Click Generate export
5. Save the file on to your computer. Use this file when importing to a new system.
Was this page helpful?
no one has found this useful yet.