Zoom is fully integrated into Brightspace allowing you to create and manage meeting links directly within your course. To begin using Zoom in Brightspace, you need to add Zoom to a module or sub-module as a content item. Adding the Zoom integration allows you to see a Zoom dashboard inside your course where you’ll be able to schedule meetings, manage existing meetings, retrieve recordings, and customize your links. See the instructions below for instructions on adding and managing Zoom in Brightspace.
Adding Zoom to a Brightspace Course
This section will explain how to add the Zoom plug-in to a module or sub-module in your Brightspace course. To learn how to add a new module in Brightspace, see Adding Modules and Sub-Modules.
- Log in to Brightspace with your MyCarletonOne credentials.
- On the Brightspace homepage, locate your course in one of the following ways:
-
- Click on the course tile under the My Courses widget.
- Click the Course Selector Grid
 and select the course from the drop-down menu. If you are enrolled in more than 20 courses, you can search for the course name using the search bar.
-
- In the navbar, click Content.

- In the Table of Contents sidebar, click the module
 where you would like to add Zoom to your course.
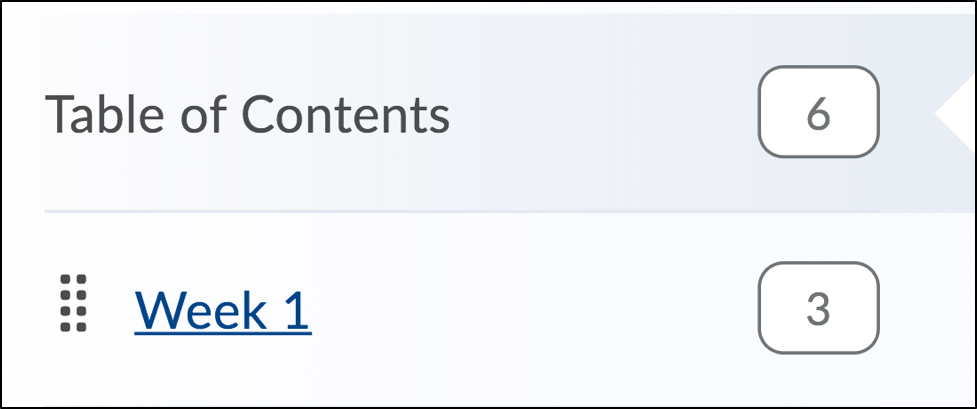
- Click the Existing Activities button.
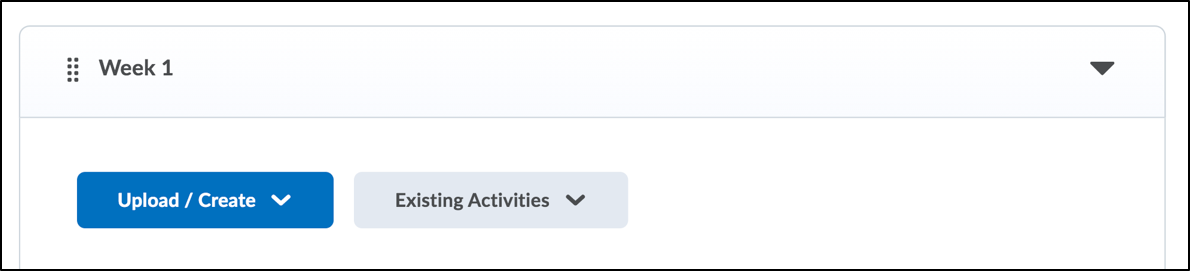
- In the drop-down menu, select External Learning Tools.
- In the Add Activity window, select Zoom. A Zoom content item will be added to the module.
- Click the Zoom link in your module.You will be taken to a page with the message “Would you like the following app to operate using your account?”.

- Click Accept. Zoom has now been added to your Brightspace course. You will see your Zoom plug-in dashboard where you can schedule a new meeting or select the appropriate tab to access upcoming meetings, previous meetings, your personal meeting room, and cloud recordings.
Configuring a Zoom Content Item
This section will explain how use the Edit Properties in Place feature to configure your Zoom content item in Brightspace.
- Locate your Zoom content item in a course module.
- Click the drop-down arrow
 and select Edit properties in place.
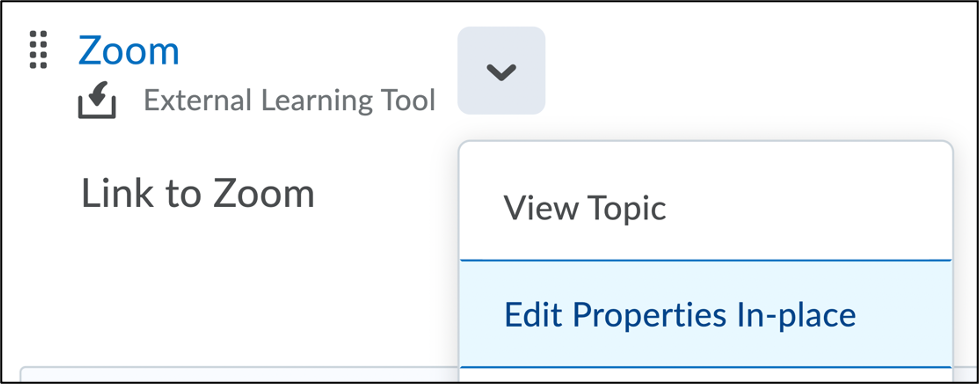
- You will now be able to edit and configure your Zoom content item.
Editing the Zoom content item title
-
-
- Click Zoom in your Brightspace course module/submodule.
- In the title field, enter a title.
- Click outside the text box or click Enter/Return on your keyboard to save your changes.
-
Editing the Zoom content item description
-
-
- Click Link to Zoom… in your Brightspace course module/submodule. The HTML editor will appear where you can enter text, images, or other content.
- Type a description in the HTML Editor. This is a good area to provide instructions for students about your Zoom sessions.
- Click Update to save your changes. Your Zoom description should now be available in your module/submodule.
- Click Link to Zoom… in your Brightspace course module/submodule. The HTML editor will appear where you can enter text, images, or other content.
-
Zoom Support
Zoom Support at Carleton
 Visit theTLS Support Portal
Hours of Operation: 8:30 am – 4:30 pm, Monday-Friday (excluding university holidays).
Zoom Support for Students
Student support for educational technology applications is provided by the ITS service desk. Student-specific Zoom resources can also be found on the Carleton Online website.
Zoom’s Official Support
 Visit support.zoom.com for instructions, video tutorials, FAQs, and more. For quick support from Zoom’s technical experts, submit a support request.
Phone: +1.888.799.9666 ext. 2.
Chat: Go to zoom.com and click the Chat icon ![]() in the lower-right corner to chat with Zoom’s virtual assistant.
in the lower-right corner to chat with Zoom’s virtual assistant.