Connecting to an Instance Using the Openstack Console
This article explains how to connect to an openstack web console using a web browser.
Table of Contents
Openstack Console – Security Warning
SECURITY WARNING: It is important to remember than ANY user logged into an openstack project can view the console for any openstack instance, so make sure you set a strong password, and only use the console when the other options below do not work:
- Connect remotely (ssh terminal – putty) – video | text
Connect remotely to the instance using an ssh terminal (examples uses the putty ssh tool) - Connect remotely (desktop – x2go) – video | text
Connect remotely to the instance using a remote desktop tool (examples uses the x2go tool)
Other openstack project users can observe activities taking place on the console. It is no different if they were watching over your shoulder on a real computer screen connected to your instance. Once you have logged into the console, other users can use your account, opening applications, running commands, etc.
Connect to an OpenStack Instance Using the OpenStack Console
See a demo video of these instructions here: Connect via Openstack Console (Video)
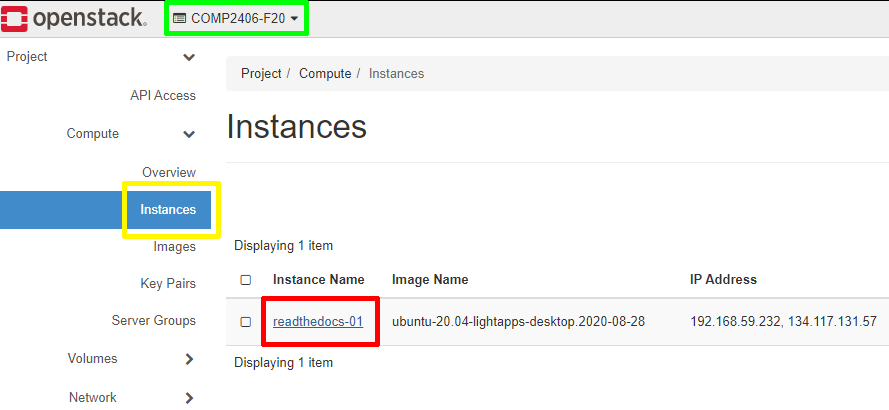
Step 1 – Go into your instance details page
- Make sure you are in your course project (green box in the image below)
- Click on the instances’ tab (Yellow Box in the image below)
- Click on instances’ link (red box in the image below)
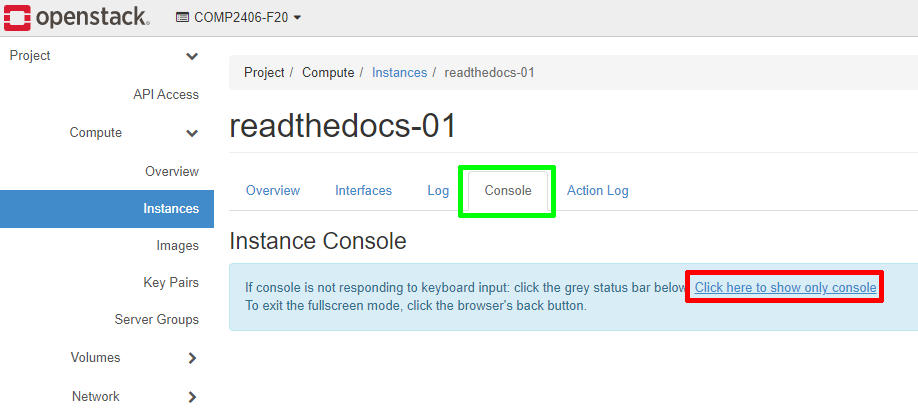
Step 2 – Open the console
- In the instances details page, click on the Console tab (green box in the image below)
- Click on the link Click here to show only console (red box in the image below)
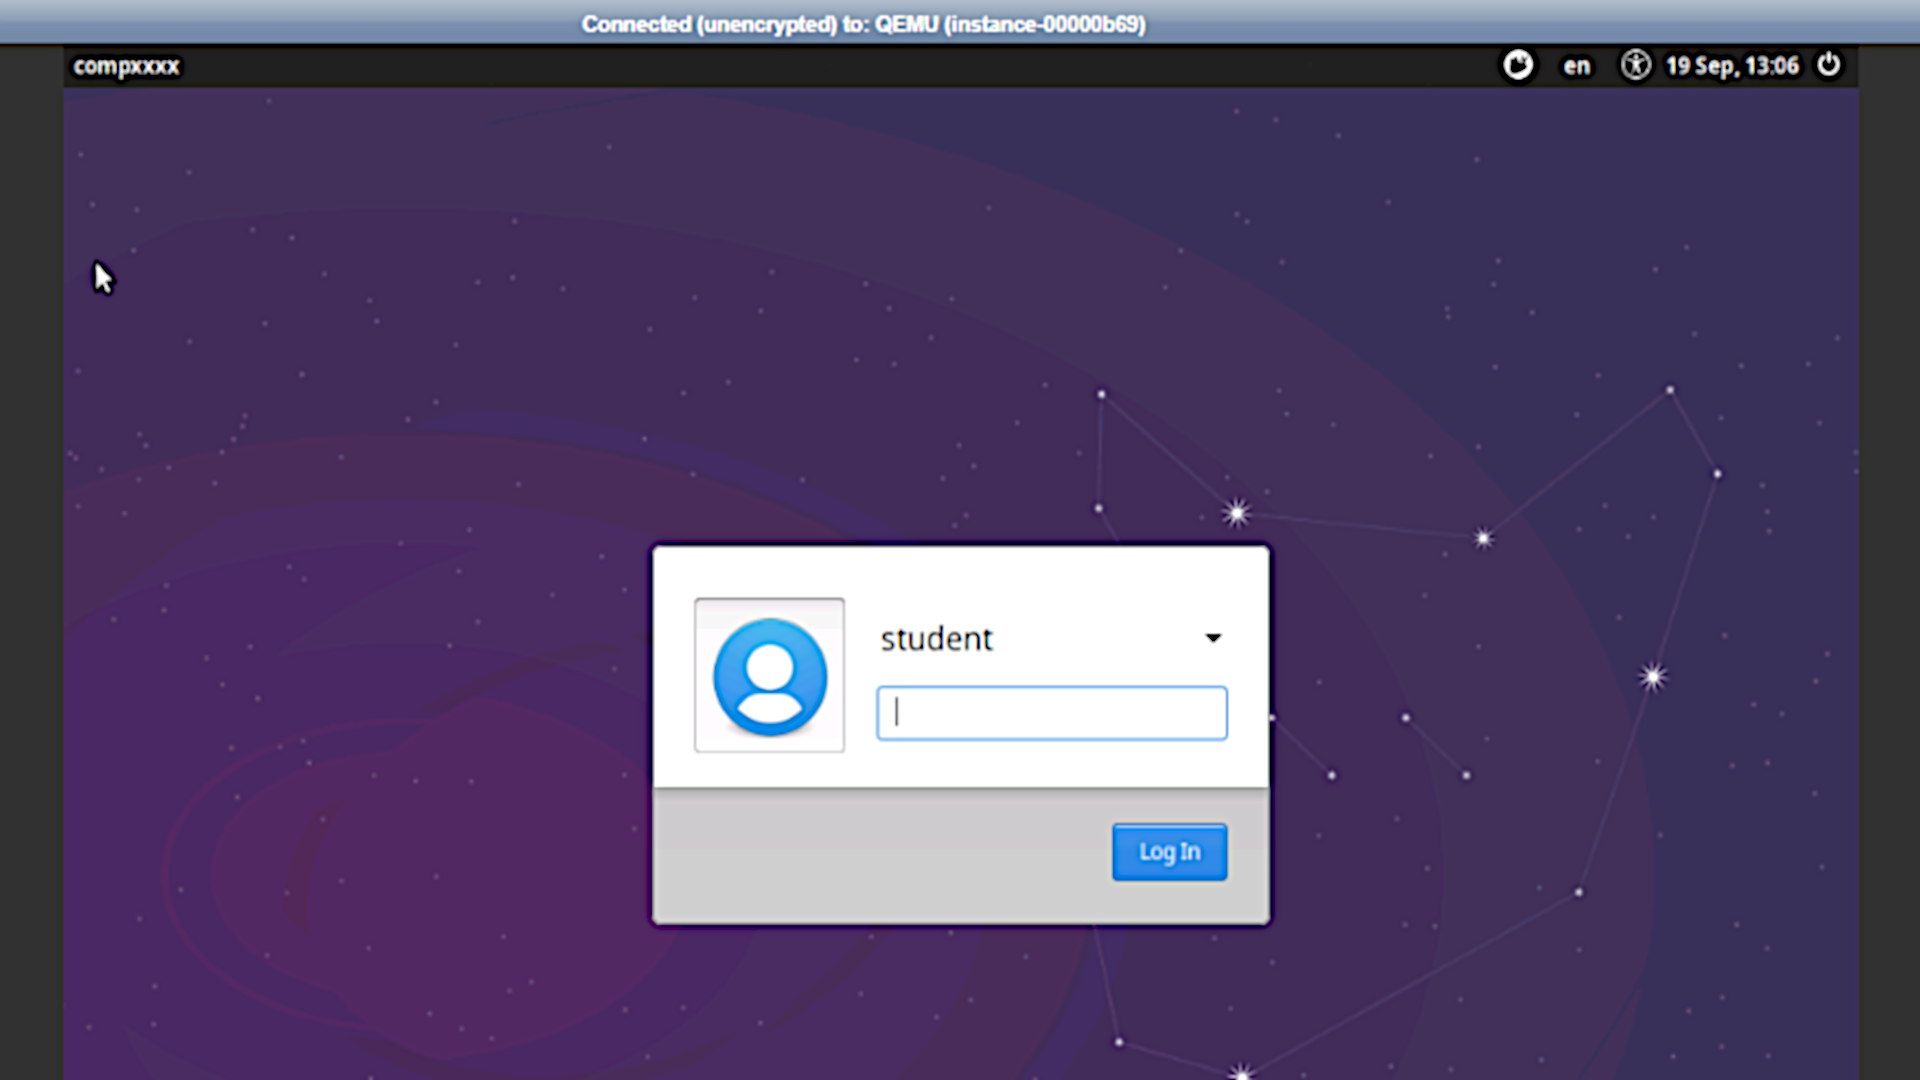
Step 3 – Login to the Instance
-
Login Credentials: Most of our OpenStack images share the same default credentials:
username: student
password: studentIMPORTANT: New images since (2022/2023) force a password change on the first login.
First Login Scenarios:- TurboVNC WARNING: TurboVNC does NOT support first login password changes, so your first login must use another login tool below
- vscode WARNING: vscode does NOT support first login password changes, so your first login must use another login tool below
- ssh terminal (putty, etc) first login: When you login, you will be redirect to a change password prompt. You will then have to enter the current password (student) again, and then enter your new password twice. When you change your password, it will then log you out and you have to login again with that new password
- x2go first login: When you login, you will be redirect to a change password prompt. You will then have to enter the current password (student) again, and then enter your new password twice. When you change your password, it will then prompt you to click reconnect, at which point you can login again using the new password
- openstack web console first login: When you login, you will be redirect to a change password prompt. You will then have to enter the current password (student) again, and then enter your new password twice. In this case, you stay connected. The next time you login, you will need the new password
WARNING: If you are using an older image (pre-2022) that does not enforce an ssh key or a password change, then we strongly encourage you to immediately change your password or setup an ssh key!
- You will now be on the console screen and you can login using your account