HP5345: SCS Seminar Room
HP5345 is a small seminar room with seating up to 40 people used exclusively for school use. It’s a flexible space that can be reconfigured for your event.
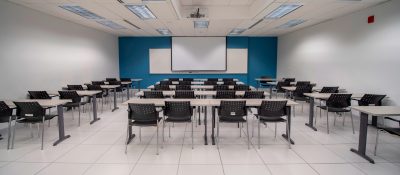
-
- Projector
- In-room PC connected to the projector
- projector screen
- wall mounted monitor
- audio
- cameras for hybrid events
- microphones
- whiteboards
- seating for 40 people
- sink and mini fridge
Be prepared
- The seminar room has an in-room PC or you can connect your own device
- Reservations are required for: wireless mic’s & the meeting owl
- We strongly recommend testing the AV set up prior to your event
- How to set-up a hybrid event
Projector & In-room PC
-
- Use the Wireless keyboard, wireless mouse and monitor to connect to the PC. You can login using CUNET or use the generic account for guests.
- On the walls ‘Projector Controls’ turn the projector ‘On‘ (wait a minute)
- On the walls ‘Projector Controls’ select HDMI 2 – PC
- The PC should now be displayed on the projector
-
Connect your laptop using the HDMI cable connected at the bottom
- Log into your laptop
- Connect the HDMI cable from your laptop to the wall jack labelled HDMI 1 / Laptop (at the bottom near the power. There is usually a cable there connected and fed into the lectern)
- On the walls ‘Projector Controls’ turn the projector ‘on’ (wait a minute)
- On the walls ‘Projector Controls’ select HDMI 1
- Your Laptop’s screen should now be displayed on the projector
-
You can connect to the projector using:
- In-room PC (HDMI 2 / You can use your CUNET account to login)
- HDMI 1 – used to connect a laptop to the projector
- USB-C (you will need an adaptor to connect to HDMI)
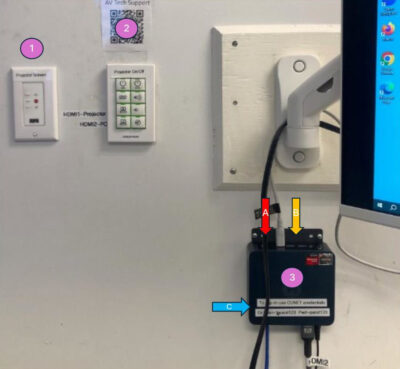

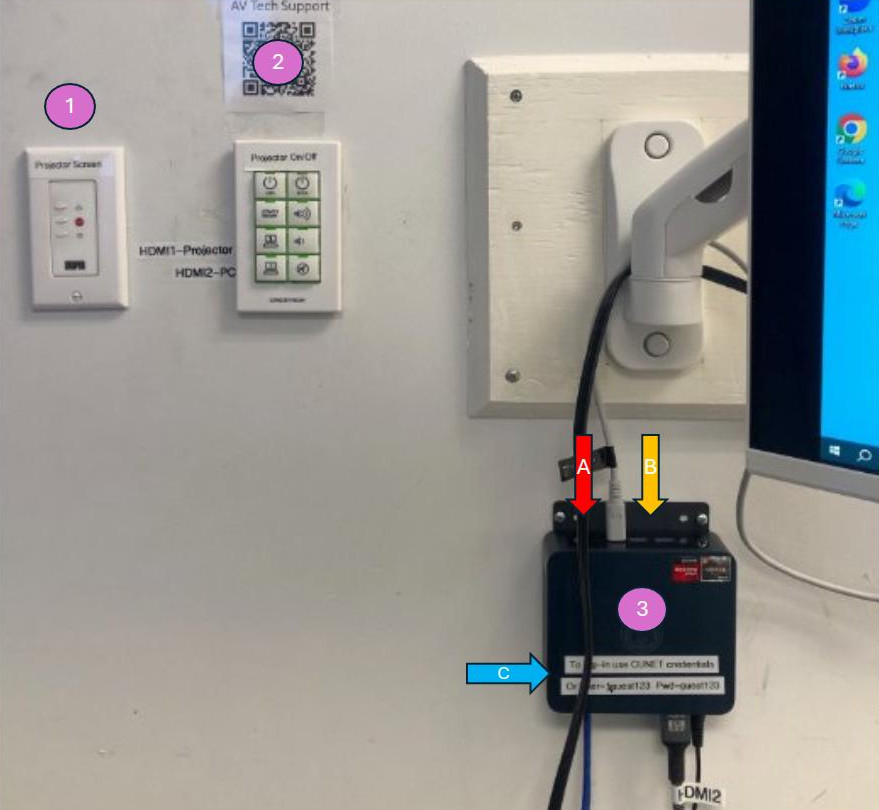
1. Projector Screen (Label 1)
- Lower or raise the projector screen

2. Projector Controls (Label 2)
- You can turn the projector on by pressing On
- Press HDMI 1 if you are using your own device like a laptop and you are using the HDMI cable labelled HDMI 1.
- Press HDMI 2 if you want to use the in-room PC
- You can also adjust the HDMI sound volume using the volume controls
- When are finished using the projector please turn it off by pressing Off

3. In-room Computer/PC (Label 3)
This is the in-room computer:
- the monitor, wireless keyboard and mouse are connected to the PC – make sure to switch on the wireless mouse (bottom switch on the mouse)
- you can log into the PC using your ITS CUNET account. For visitors they can use the local account and password. See blue arrow C
- The yellow arrow B indicates where you can attach a thumb-drive
- In case the PC is powered off you can turn it on using the red power button located at the red arrow A
Testing the AV setup for a presentation
- Test your presentation (play slides etc.)
- Test audio: play audio file or play youTube (if applicable) [Audio]
- Test WiFi: play youTube video (if applicable) [Internet connection]
- Test Teams/Zoom(if applicable) [Video/Mic]
Troubleshooting Tips
- Projector is on and HDMI1 is selected and my laptop can’t output to the projector.
- Solution (Apple): Try Command + F1 first because on many Mac laptops, that toggles display mirroring, so the projector should show exactly what appears on the Mac’s built-in screen.
- Solution (Windows): Use Windows key + P to bring up Windows 11’s display-projection menu, then choose Duplicate for the projector to show the same image as the laptop. Most laptops have a Fn-key external-display shortcut for Dell it is Fn-F8 for example (look at laptop keyboard icon)
- My slideshow is working but the projector turns off after a short timeout period.
- Solution (Apple): Apple menu → System Settings → Lock Screen. Change settings: “Turn display off on battery when inactive” and “Turn display off on power adapter when inactive”.
- Solution (Windows): Settings → System → Power & battery. Set Screen, sleep, and hibernate timeouts to ‘Never‘.
You can connect and use the seminar rooms laser projector:
- The projector can be turned on and off using the wall mounted controls
- the screen can be moved up and down using the wall mounted controls
- connect your laptop using the HDMI 1 cable at the front of the room
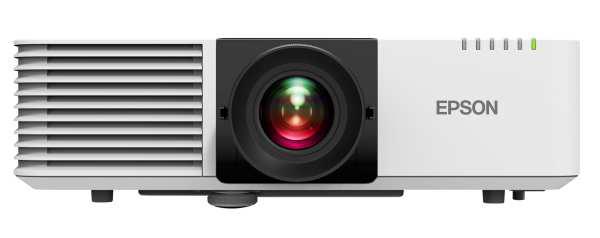
-
EPSON Powerlite L530U specifications:
- Type: Laser projector
- Brightness: 5,200 lumens
- Connection: HDMI cable (front right hand side of the room)
- Resolution: 1,920 x 1,200
- Max Data Resolution: 4096 x 2160 (DCI 4K)
- Video modes: 720p, 1080i, 1080p/60, 1080p/24, 1080p/30, 1080p/50, 2160p/24, 2160p/60, 480p, 480i
- Aspect ratio: 16:10 (WUXGA)
Cameras
-
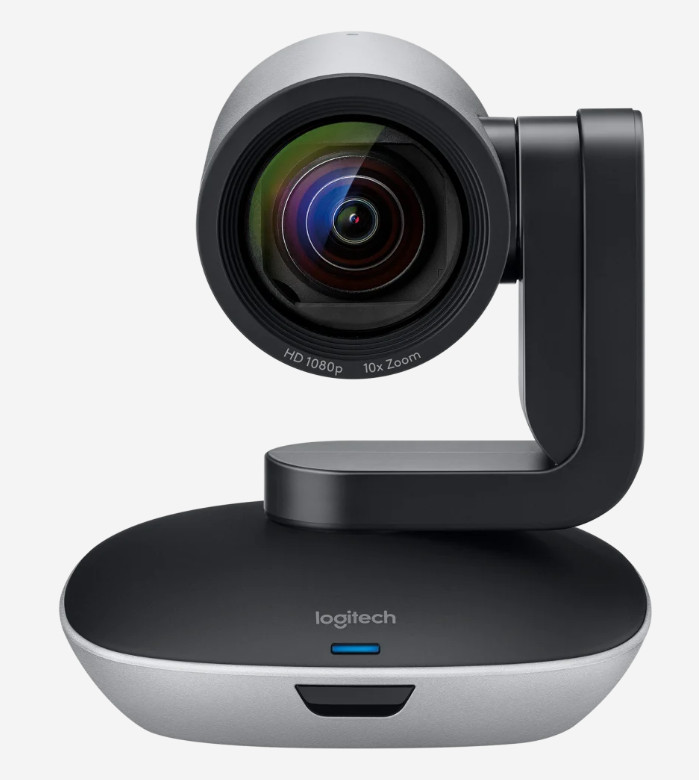
This is your standard back of the room lecturing camera. It is best suited for presentations at the front of the room and also captures the presentation screen.
- The Logitech PTZ Pro 2 is connected to the in-room computer
- We recomend that you use a wireless microphone in conjunction with this camera.
-
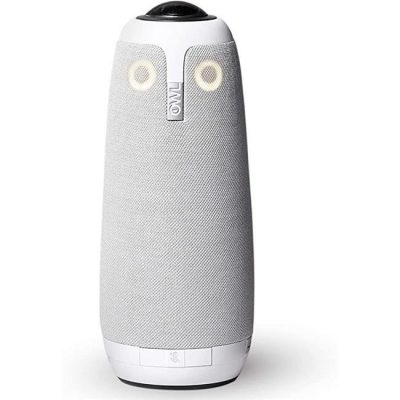
The School of Computer Science has two Owl conferencing camera’s that can be signed out and can be used in the seminar room.
- You can sign out an owl camera in the main office HP5302 or with the SCS Tech Staff
Here are some features of the owl camera:
- The Owl requires clear line of sight for the camera an microphone to function properly. If you can see the owl usually that is adequate.
- The Owl will automatically focus (video + mic) on participants that are speaking
- In-room chatter and cross-talk will be broadcast automatically
- When you talk for the first time during the meeting it may take 5-10 seconds for the Owl to learn your position and adjust the microphone array accordingly. This could mean the view is not framed properly and temporary sound quality issues. The Owl will learn where people are in the room and these issues are typically resolved automatically.
- Owl’s are not suitable for participants that are moving – suitable for sitting participants
- More info about hybrid events
Dual Owl set-up
Dual Owl setup works well for large meetings and the Owl’s will automatically switch between them according to proximity to the person that is speaking. Dual Owl’s require to be ‘paired’ in order to work together seamlessly.
-
The seminar room webcam is an Obsbot pan and tilt webcam. It is strongly advised to learn and test the Obsbot camera setup in advance of your event.
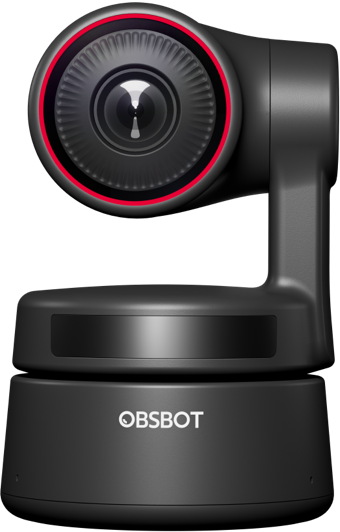
Features and usage:
- the camera can be set to track and follow you at the front of the room [Find out more]
- the camera can be gesture controlled: fixed, tracking and zoom [see two gestures below][Face Tracking]
- The Obsbot mic only has a range of ~2 meters. This camera setup works well using an optional Bluetooth clip-on microphone

The camera can track your face. Raise your hand (5 fingers), to either side not in front of you, and if your gesture is detected the camera BLUE led will light up (acknowledges). <See gesture images>
- You can raise your hand again it will stop tracking, look for blue led acknowledgement on the camera.
- It will toggle back and forth between tracking and not tracking.
- If you raise your hand too long then it may toggle, look for blue LED acknowledgement, then lower your hand
Obsbot Tiny 4k camera
- Max video resolution: 4K@30fps or 1080p/60 fps
- Max resolutions: 3840×2160
- Zoom: 4x
- Pan and tilt camera
Microphones
-
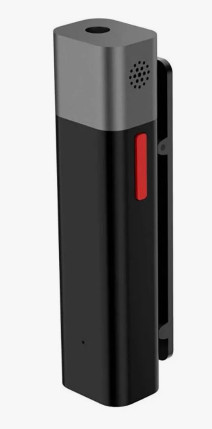
For hybrid lectures we recomend a wireless ‘lapel’ mic.
- ideal for presenters that are moving
- on the computer go to Bluetooth settings and pair the device
- on Zoom/Teams select it as your microphone. We have 2 types: Sabrent or Rodes.
- We have an optional 2 presenter mic available upon request.
- sign it out with the Tech Staff
-
The Owl Conferencing camera has an integrated microphone array.
- There is a microphone array built into the Obsbot camera. It will ‘learn’ seated participants locations and improve meeting mic quality over time.
- If not automatically selected in Zooms/Teams choose: ‘Owl Microphone’
- Avoid Feedback: Ask in-room participants to mute their mic’s and turn off their sound
- The owl also has an integrated speaker.
-
- The Obsbot mic is integrated into the camera
- In Zoom/Teams choose the ‘Obsbot microphone’
- Ideal for presenters that remain close to the camera/lectern
- Range of the mic is ~2 meters
Tech Support
-
Tech support is available during Business hours in rooms HP5161-67.
Some things we can help with:
- Lapel (wireless mic) and video conferencing Owl signouts
- AV support: connecting to the equipment
- Loaning of HDMI and USB cables and adapters
https://carleton.ca/scs/tech-support/contact-it-support/contact-the-scs-tech-staff-visitors/