- Edit a Module
- Edit a Topic Item (Assignment, Quiz, etc.)
- Bulk Edit Topic Items Within a Module or Within the Table of Contents
- Reorder Modules or Topic Items
- Related Support Pages
Modules and topic items (Quizzes, Assignments, Files, etc.) can be edited in the content area of your course. 
- Edit a Module – Change your module title, edit or add a description, edit or add dates, delete a module, hide a module, add or edit release conditions, enable completion tracking.
- Edit a Topic Item – Change your topic title, edit or add a description, edit or add dates, delete a topic, hide a topic, add or edit release conditions, enable completion tracking.
- Bulk Edit Topic Items – Make all topic items editable within a module to bulk edit your content.
- Reorder Modules or Topic Items – Move or reorder your modules in the Table of Contents or reorder the topics within a module.
NOTE: To add a new module or submodule, see the Adding Modules and Sub-modules page.
Edit a Module
- Sign into Brightspace using your MyCarletonOne credentials.
- On the Brightspace homepage, locate your course in one of the following ways:
- Select the course tile under the My Courses widget.
- Select the Course Selector Grid
 and select the course from the drop-down menu. If you are enrolled in more than 20 courses, you can search for the course name using the search bar.
- In the navbar, select Content.

- In the left sidebar under Table of Contents, select the module/week section you want to edit. Alternatively, you can go down the Table of Contents page to locate the module/sub-module you want to edit.
You have the following options for editing a module:
Edit a Module Title
- Select the module title, then type your new title.
- Select outside the text box or select enter on your keyboard to save your changes.
Edit or Add a Module Description
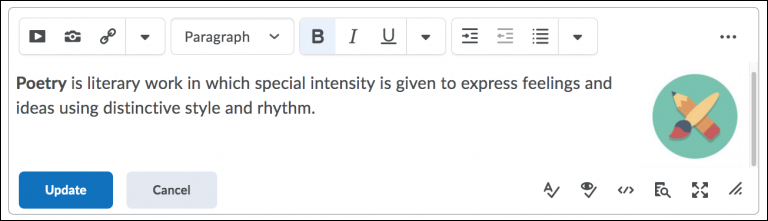
- Select the existing module description or select Add a description…
- Enter your description in the html editor.
- Select Update.
Edit or Add Module Dates
- Select the existing dates or select Add dates and restrictions… to enter a Start Date, Due Date or End Date.
- Start Dates specify when a student can view or access module content.
- Due Dates specify when a student should complete materials in a module. The due date will appear in the course Calendar and students will be able to access module content after the date has passed.
- End Dates restrict access to modules and remove all access once the end date has passed.
- Select outside the text box or select enter on your keyboard to save your changes.
Delete a Module
- Select the arrow
 to the right of your module title.
 - In the drop-down menu, select Delete Module.
- You will be prompted to choose one of the following options:
d. Select Delete.
Hide a Module
-
-
- Select the eye icon
 on the top-right side of your module page to access the visibility toggle. The toggle will appear greyed out with a crossed out eye icon when hidden
 , and blue with an open eye icon when visible
- Select the eye icon
-
Add or Edit Release Conditions
-
-
- See the Creating Release Conditions page for more instructions.
-
Add or Edit Completion Tracking
-
-
- See the Setting up Completion Tracking page for instructions.
-
Edit a Topic Item (Assignment, Quiz, etc.)
You can easily edit a topic using the Edit Properties in Place feature.
-
-
- Log in to Brightspace using your MyCarletonOne credentials.
- On the Brightspace homepage, locate your course in one of the following ways:
- Select the course tile under the My Courses widget.
- Select the Course Selector Grid and select the course from the drop-down menu. If you are enrolled in more than 20 courses, you can search for the course name using the search bar.
- In the navbar, select Content.
- In the left sidebar under Table of Contents, select the module/week section you want to edit. Alternatively, you can go down the Table of Contents page to locate the module/sub-module you want to edit.
- Locate the topic item you want to edit, then select the arrow to the right of the topic title.
- In the drop-down menu, select Edit Properties in Place. The topic is now editable within your Table of Contents.
-
NOTE: You can also select view topic to access the settings page where you initially configured the topic.
Edit a Topic Title
-
-
- Locate the topic item you want to edit, then select the arrow to the right of the topic title.
- In the drop-down menu, select Edit Properties in Place. The topic is now editable within your Table of Contents.
- Select the topic title, then type your new title. Select outside the text box or select enter on your keyboard to save your changes.
- Locate the topic item you want to edit, then select the arrow
-
Edit or Add Topic Dates
-
-
- Locate the topic item you want to edit, then select the arrow to the right of the topic title.
- In the drop-down menu, select Edit Properties in Place. The topic is now editable within your Table of Contents.
- Select the existing dates or select Add dates and restrictions… to enter a Start Date, Due Date or End Date. Select outside the text box or select enter on your keyboard to save your changes.
- Start Dates specify when a student can view or access the topic content.
- Due Dates specify when a student should complete the topic. The due date will appear in the course Calendar and students will be able to access the topic content after the date has passed.
- End Dates restrict access to the topic and remove all access once the end date has passed.
- Locate the topic item you want to edit, then select the arrow
-
Delete a Topic
-
-
- Locate the topic item you want to edit, then select the arrow to the right of the topic title.
- In the drop-down menu, select Edit Properties in Place. The topic is now editable within your Table of Contents.
- Select the trash can icon
 , then choose whether to remove from the Content view only or permanently delete from the course.
- Locate the topic item you want to edit, then select the arrow
-
Hide a Topic
-
-
- Locate the topic item you want to edit, then select the arrow to the right of the topic title.
- In the drop-down menu, select Edit Properties in Place. The topic is now editable within your Table of Contents.
- Select the eye icon to access the visibility toggle. The toggle will appear greyed out with a crossed out eye icon when hidden, and blue with an open eye icon when visible
- Locate the topic item you want to edit, then select the arrow
-
Add or Edit Release Conditions
-
-
- Locate the topic item you want to edit, then select the arrow to the right of the topic title.
- In the drop-down menu, select Edit Properties in Place. The topic is now editable within your Table of Contents.
- Select Create to add a new release condition or Browse to add an existing release condition. See the Creating Release Conditions page for more instructions.
- Locate the topic item you want to edit, then select the arrow
-
Add or Edit Completion Tracking
-
-
- Locate the topic item you want to edit, then select the arrow to the right of the topic title.
- In the drop-down menu, select Edit Properties in Place. The topic is now editable within your Table of Contents.
- Select the double dash icon
 to enable completion tracking or the checkmark icon
  to the existing completion tracking settings for a topic. See the Setting up Completion Tracking page for instructions.
- Locate the topic item you want to edit, then select the arrow
-
Bulk Edit Topic Items Within a Module or Within the Table of Contents
NOTE: Only topics within a module can be bulk edited. Modules must be edited individually.
-
-
- Log in to Brightspace using your MyCarletonOne credentials.
- On the Brightspace homepage, locate your course in one of the following ways:
- Select the course tile under the My Courses widget.
- Select the Course Selector Grid and select the course from the drop-down menu. If you are enrolled in more than 20 courses, you can search for the course name using the search bar.
- In the navbar, select Content.
- Select Table of Contents in the left sidebar. You can now choose to bulk edit either from the Table of Contents or from within a specific module.
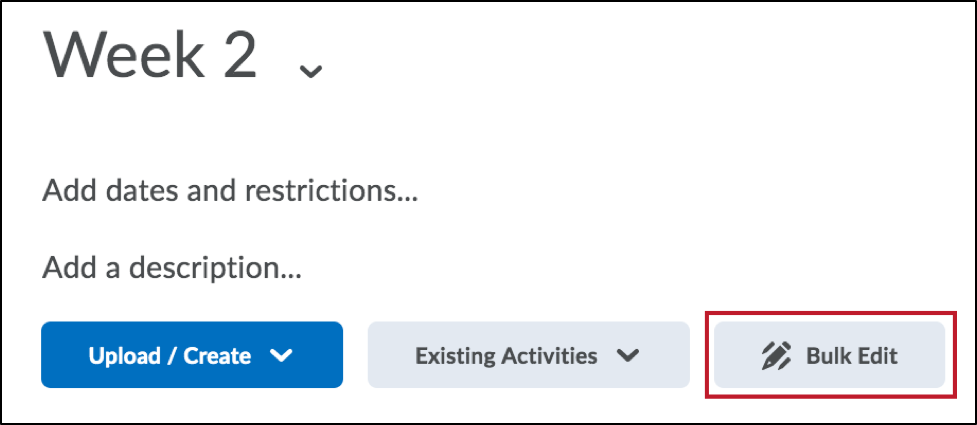
- To bulk edit via the Table of Contents, select Bulk Edit at the top of the page under the Table of Contents title.
- To bulk edit within a module, select the Module title in the Table of Contents menu, then select Bulk Edit when the module opens in the right panel.
- You can now edit the following:
- Edit a Topic Title – Select the module title, then type your new title. Select outside the text box or select enter on your keyboard to save your changes.
- Edit or Add Dates – Select the existing dates or select Add dates and restrictions… to enter a Start Date, Due Date or End Date. Select outside the text box or select enter on your keyboard to save your changes.
- Delete a Topic – Select the trash can icon , then choose whether to remove from the Content view only or permanently delete from the course.
- Hide a Topic – Select the eye icon to access the visibility toggle. The toggle will appear greyed out with a crossed out eye icon when hidden, and blue with an open eye icon when visible
- Select Done Editing when you are finished making your changes.

-
Reorder Modules or Topic Items
-
-
- Log in to Brightspace using your MyCarletonOne credentials.
- On the Brightspace homepage, locate your course in one of the following ways:
- Select the course tile under the My Courses widget.
- Select the Course Selector Grid and select the course from the drop-down menu. If you are enrolled in more than 20 courses, you can search for the course name using the search bar.
- In the navbar, select Content.
- In the left sidebar under Table of Contents, select the module/week section that holds the content you want to edit. Alternatively, you can go down the Table of Contents page to locate the module/sub-module you want to edit.
- Move a Module or Submodule in one of the following ways:
- Under Table of Contents in the sidebar, select and drag the module or sub-module using the move icon
- Select the arrow
 next to your module or sub-module title to expand the actions menu, then select one of the following options:
- Move Up – Move a module or sub-module up one place in the Table of Contents menu.
- Move Down – Move a module or sub-module down one place in the Table of Contents menu.
- Move To – Move a sub-module to a different module within your course, or move a module into another module (this will convert the module into a sub-module).
- Under Table of Contents in the sidebar, select and drag the module or sub-module using the move icon
- To move a topic within a module:
- Select and drag the topic (Quiz, Assignment, etc.) using the move icon
- Select and drag the topic (Quiz, Assignment, etc.) using the move icon
-
Related Support Pages
Was this page helpful?
1690
cbb1c73d42
1 Person found this useful
Still need help? Contact us