- Create a Video Note
- Reuse a Video Note
- Video Note Automatic Captioning
- Accessing Brightspace Media Library
Video Notes are useful if you wish to add personalized interaction in your course. It is a simple and easy way to record quick videos using your computer’s webcam. Video notes can be used to provide feedback and give instructions to students in different parts of the course. Video notes can be added in HTML text editors, which are found in course activities such as announcements, course details, modules and sub-modules‘ descriptions, pages, discussions and assignment instructions.
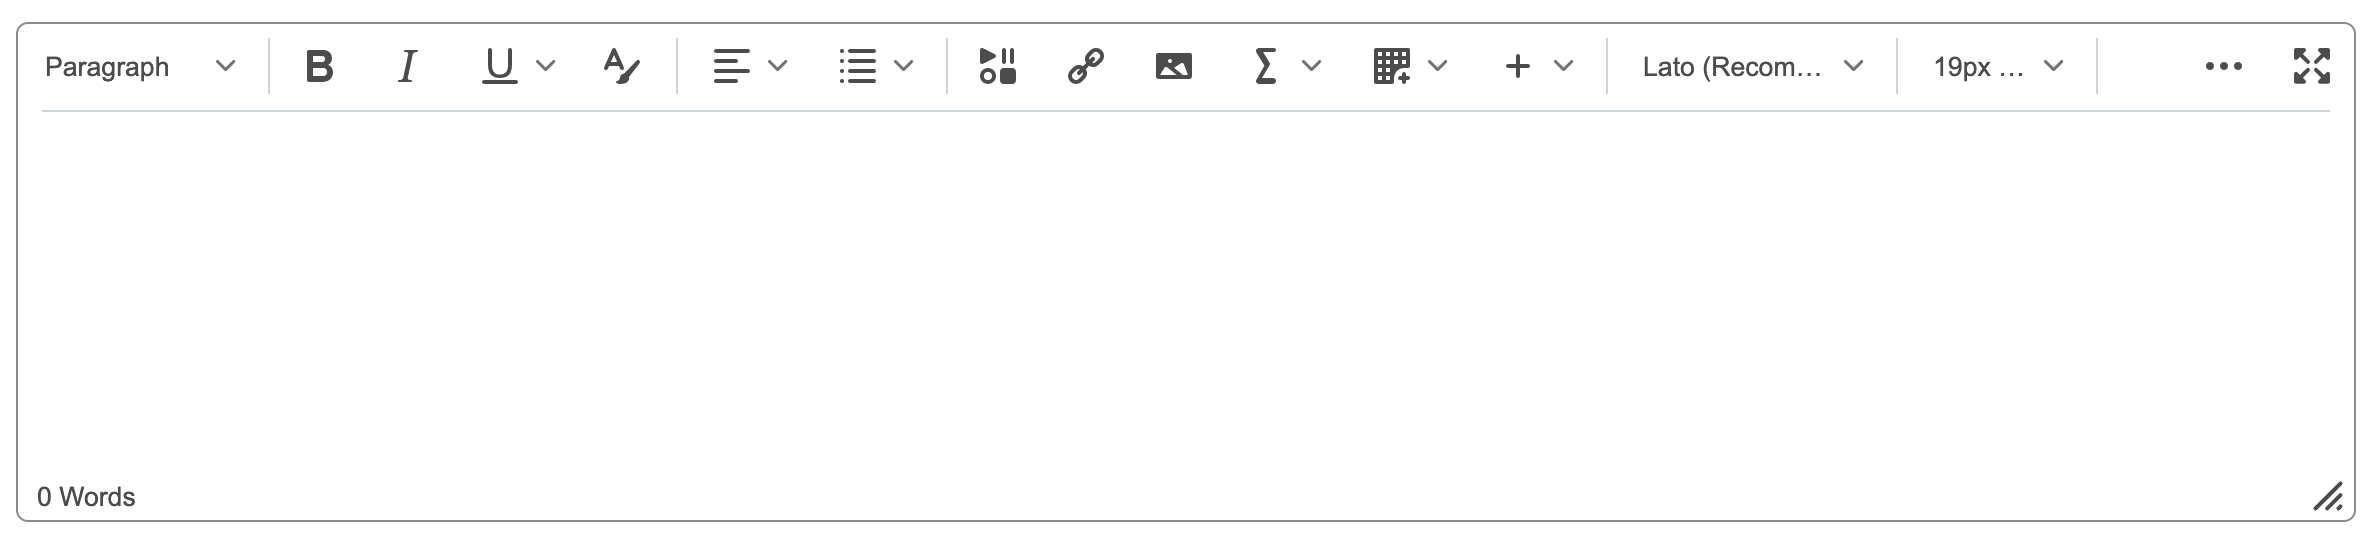
Example of an HTML editor in D2L Brightspace:
| NOTE: Video notes last up to six months and then are automatically removed from the server. They are not saved in your MediaSpace. Therefore, it is not recommended for the recording of lectures, and should be used more for things happening in the current course cohort. |
Instructors can use Video Notes to:
- Add a video description to a module
- Provide assignment feedback
- Provide feedback in the gradebook
- Create a course announcement
Create a Video Note
- Log into Brightspace with your MyCarletonOne credentials.
- On the Brightspace homepage, locate your course in one of the following ways:
- Select the course tile under the My Courses widget.
- Select the Course Selector Grid
 and select the course from the drop-down menu. If you are enrolled in more than 20 courses, you can search for the course name using the search bar.
- In the navbar, select Content.
- Under Table of Contents in the left sidebar, select the module you want to add a video note to.
- Select Upload/Create.

- In the drop-down menu, select Create a File.
- In the HTML text editor toolbar, select the Insert stuff icon.

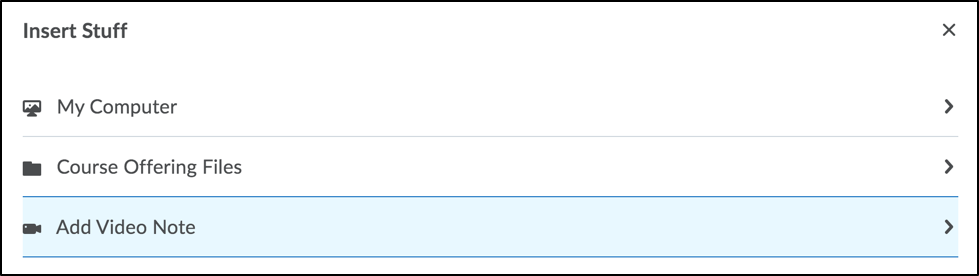
- An Insert stuff window will open. Select Add Video Note
 from the list of options.
- Select the New Recording button to begin recording.
- Select Stop Recording when you are done recording your message.
- If you are satisfied with your recording, select Next.
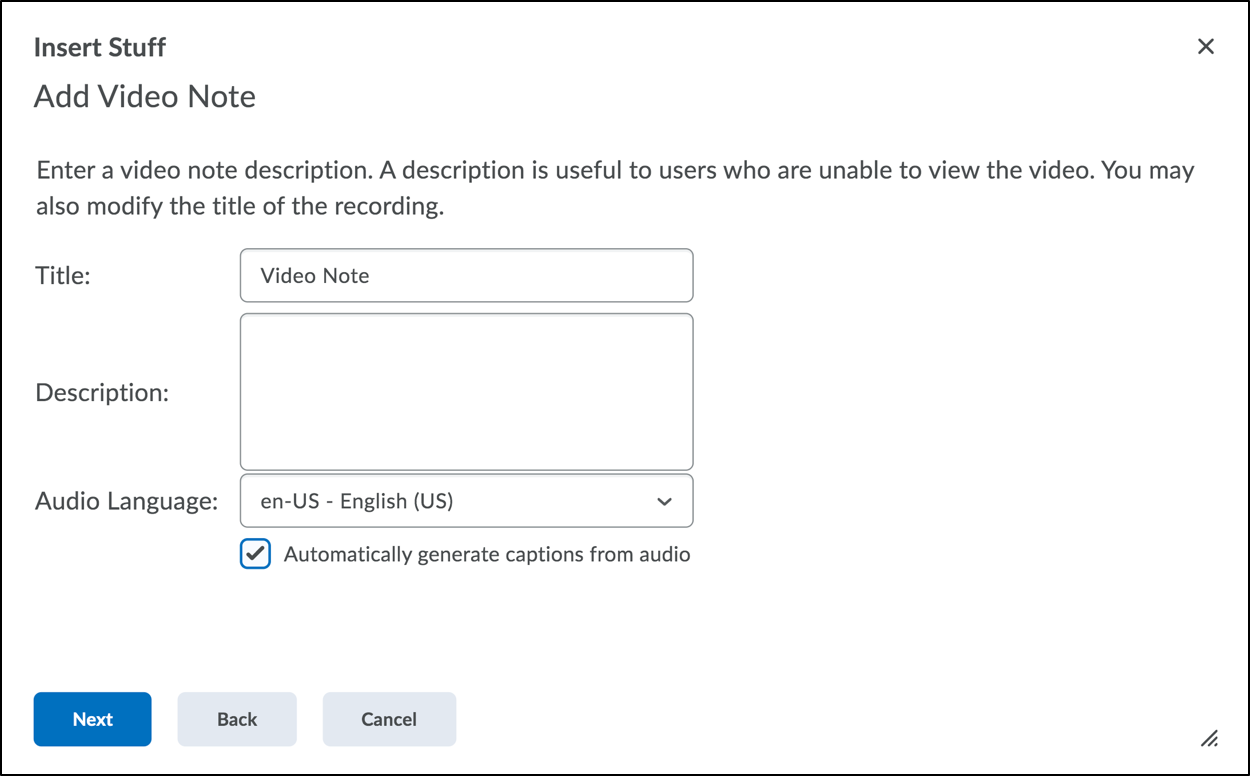
- Customize the following details:
- A title and description for your video
- Select an audio language for your video from the drop–down menu.
NOTE: To add automated closed captions to your video note, check the box ‘Automatically generate captions from audio’.
- Select Next.
- A preview window will appear. If you are satisfied with your video, select Insert.
- You will now see your media in the HTML text editor. Save the HTML page you have just inserted the video to.
Reuse a Video Note
- Log into Brightspace with your MyCarletonOne credentials.
- On the Brightspace homepage, locate your course in one of the following ways:
- Select the course tile under the My Courses widget.
- Select the Course Selector Grid and select the course from the drop-down menu. If you are enrolled in more than 20 courses, you can search for the course name using the search bar.
- In the navbar, select Content.
- Under Table of Contents in the left sidebar, select the module you want to add a video note to.
- Select Upload/Create.
- In the drop-down menu, select Create a File.
- In the HTML text editor toolbar, select the Insert stuff icon.
- An Insert stuff window will open. Select Video Note Search.
- Type the name of the video you wish to make available in this area.
- Select Search.
- From the options that display, select the one you wish to reuse. The video note you select will display highlighted in blue.
- Select Next.
- Preview your video and select Insert.
- Select Update or Save at the bottom of the screen.
Video Note Automatic Captioning
Video Note can automatically transcribe recordings and caption videos without the need to manually create and upload a .vvt file.
| NOTE: You also have the option to manually create an upload a closed caption .vvt file. For instructions, see Add Closed Captions to a Video Note. |
You can enable automatic caption in the Add Video Note window once you have recorded a video note. In order to add automated closed captions to your video note, you need to select an audio language from the drop-down menu and the Automatically generate captions from audio checkbox.
Captions can be created in the following languages:
- US English (en-US)
- British English (en-GB)
- Canadian French (fr-CA)
- German (de-DE)
- Brazilian Portuguese (pt-BR)
- Korean (ko-KR)
- Italian (it-IT)
- Spanish (es-MX) – If not available, US Spanish (es-US) is used
- Modern Standard Arabic (ar-SA)
- Chinese Mandarin – Mainland (zh-CN)
- Russian (ru-RU)
- Japanese (ja-JP)
- Turkish (tr-TR)
- Dutch (nl-NL)
Accessing Brightspace Media Library
- Log into Brightspace with your MyCarletonOne credentials.
- Select the Gear Icon in the top right of the screen.

- Select Media Library.
You are now able to Add media to the Media Library, or to Search the Media Library.
Adding Media to Brightspace Media Library
- Log into Brightspace with your MyCarletonOne credentials.
- Select the Gear Icon in the top right of the screen.
- Select Media Library.
- Select the Add drop-down menu.
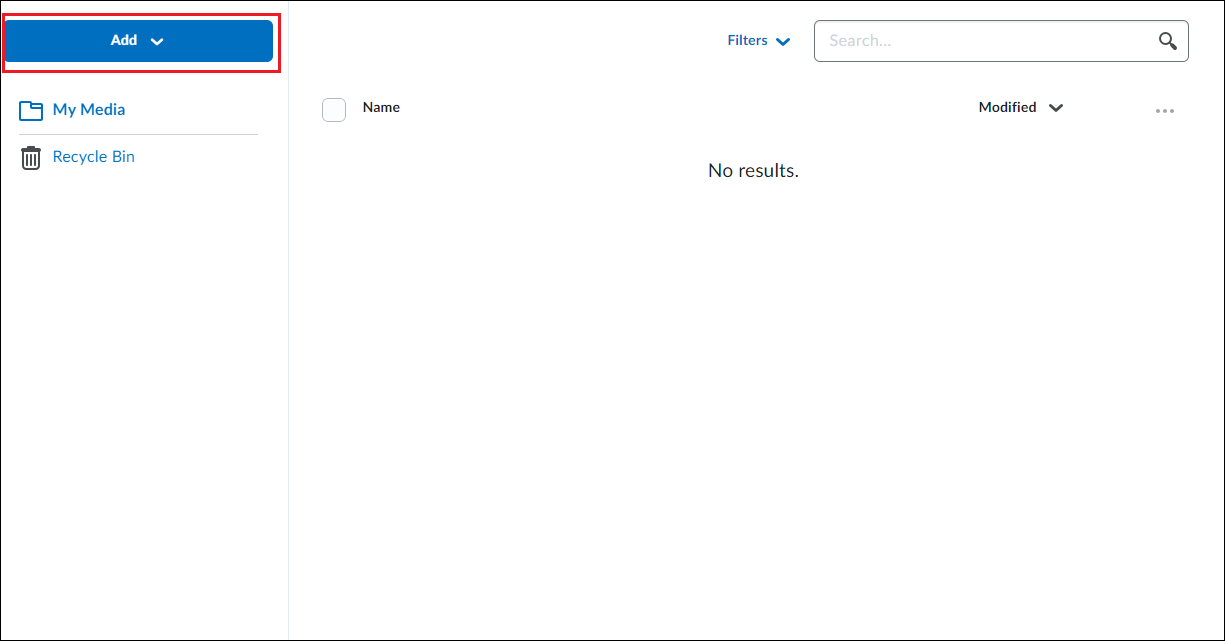
- Select Upload to upload a media file stored on your device
- Select Record Webcam to record a video using your device camera.
- Once you have selected or recorded your media file you can edit it using the built in editor.
| NOTE: Editing media in the Brightspace Media Library is destructive. This means that any changes you make to a media file will replace previous versions of the file. |
Searching the Brightspace Media Library
- Log into Brightspace with your MyCarletonOne credentials.
- Select the Gear Icon in the top right of the screen.
- Select Media Library.
- Enter your search keywords into the Search Bar.
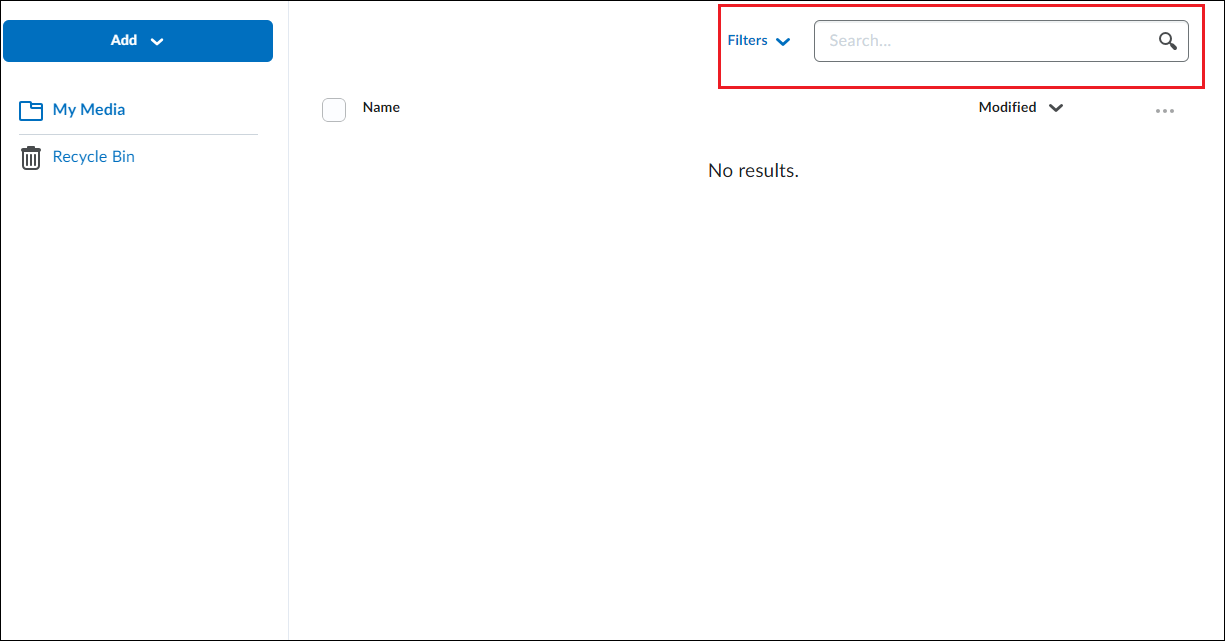
| NOTE: You can use the Filter drop down menu to narrow the search results. |
Additional Information on Brightspace Media Library
For additional information on how to use the Brightspace Media Library, see the D2L Brightspace Media Library Support Resource on the Brightspace Community Site.
Was this page helpful?
1 Person found this useful
Still need help? Contact us