- Adding an Intelligent Agent
- Performing a Practice Run
- Running an Intelligent Agent Manually
- Adding an Intelligent Agent Category
- Categorizing Intelligent Agents
- Editing Intelligent Agent Categories
- Deleting Intelligent Agent Categories
- Using Replace Strings for Intelligent Agents
- Enabling or Disabling an Intelligent Agent
- Deleting an Intelligent Agent
- Duplicating an Intelligent Agent
- Editing an Intelligent Agent
- Bulk Editing Intelligent Agents
- Exporting the Results of an Intelligent Agent Run
- Changing an Intelligent Agent’s Email Settings
Intelligent Agents is a tool within D2L Brightspace that allows instructors to gain insight into their course. For example, instructors may wish to determine who has or hasn’t submitted an assignment. These agents can also send customizable messages to individual students when they fulfill a particular task in D2L Brightspace. For example, an instructor may choose to set an intelligent agent to let a student know when they have missed a deadline on an assignment. Intelligent Agents can help boost engagement with students and help instructors monitor course activity.
Intelligent Agents can also be used to build data reports on student behaviour. For more information on how to build these reports, please see our support site Using Intelligent Agents to Create Data Reports.
For more information about using Intelligent Agents in Brightspace, see the D2L documentation on Using intelligent Agents.
| NOTE: Intelligent agents can be imported, exported, and copied between courses. Imported Intelligent Agents will be inactive and must be manually enabled. The import/copy function will replicate all associated settings and restrictions except for Release Conditions, which require the additional “Release Conditions” option to be selected. If these Release Conditions are related to the Classlist (e.g., course enrolment, group enrolment, etc.), these conditions will not become associated with the new course when copied. Double check and adjust your settings before activating any Intelligent Agents. For more information, visit our support site Import/Export/Copy Components. |
Adding an Intelligent Agent
- Log into Brightspace with your MyCarletonOne credentials.
- On the Brightspace homepage, locate your course in one of the following ways:
- Select the course tile under the My Courses widget.
- Select the Course Selector Grid
 and select the course from the drop-down menu. If you are enrolled in more than 20 courses, you can search for the course name using the search bar.
- In the navbar, select Tools.

- In the drop-down menu, select Intelligent Agents.
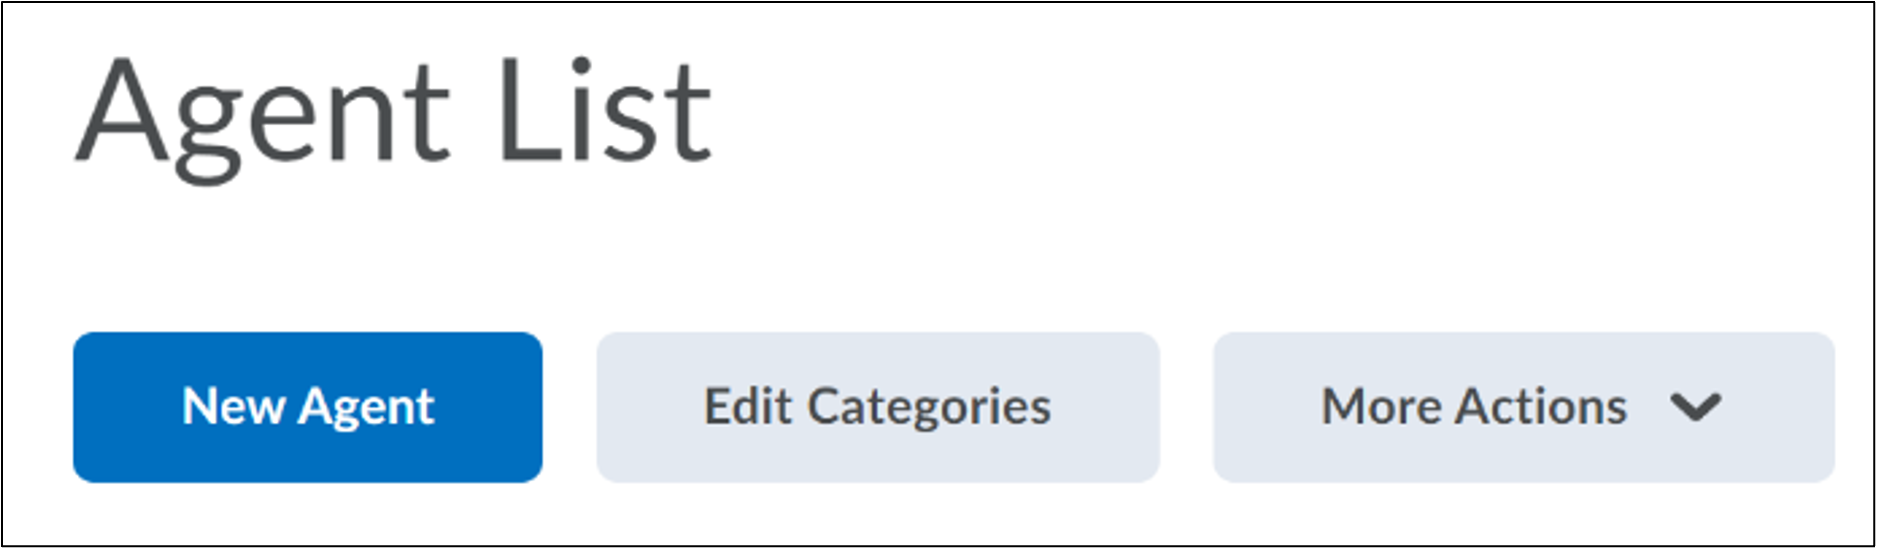
- Under Agent List, select New Agent.
- Give the new agent an Agent Name (e.g., “Login Activity”, as in the image below). You can also choose to add a Description of the Agent and to assign it to a Category for organizing your Agent List page.
NOTE: This description is for your own use and will not be revealed to the students. 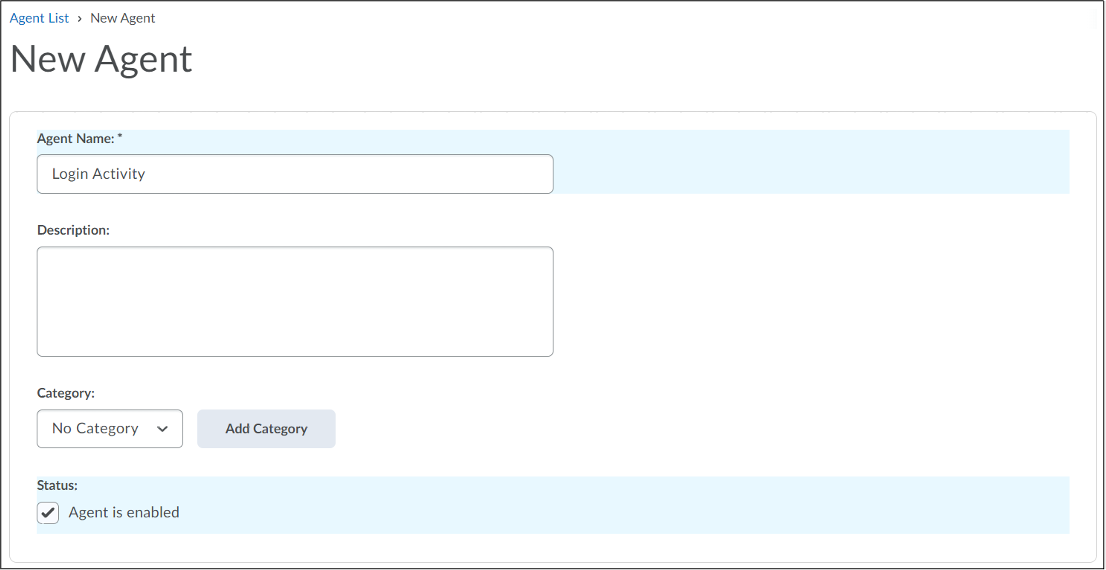
- Under Status, select Agent is enabled if you want to put the Agent into effect right away.
- On the New Agent page you can set the conditions that need to be met by students before an email is sent by the intelligent agent, as well as when and how often the system will check that there are students who meet these conditions. You have the following settings options:
- Scheduling: If you want to set up your agent to run automatically, select an option from the Frequency drop-down menu. Depending on the Frequency type, new options will appear below the menu to program a date range (Start/End Dates), time of day (Scheduled Time), and rate of recurrence (Repeats Every) for the intelligent agent, among other frequency-specific options.
NOTE: : If the No Schedule option is selected, you will need to manually run the intelligent agent. TIP: Create a schedule for your agent within the start and end dates of your course so that students are not receiving notifications during holiday periods or after the course has finished. - Criteria: Customize the settings below as they apply to your agent.
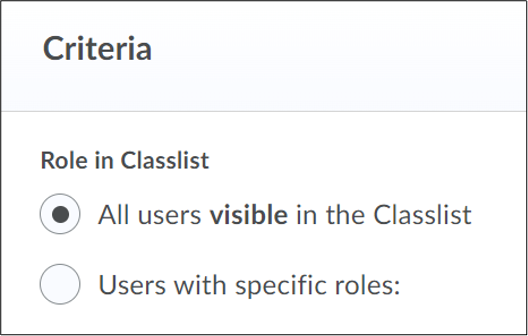
- Role in Classlist. Select one of the following options:
- All users visible in the Classlist: Choose this option if you want to email anyone enrolled in the course, regardless of role type.
- Users with specific roles: Choose this option if you want to isolate which role types will receive an email. For example, if you select the Learner role, the intelligent agent will be restricted to students enrolled in your course, and TAs or Instructors will not receive automated emails.
- Role in Classlist. Select one of the following options:
- Take Action on Activity. Optional conditions the student must meet to receive a notification.
- Scheduling: If you want to set up your agent to run automatically, select an option from the Frequency drop-down menu. Depending on the Frequency type, new options will appear below the menu to program a date range (Start/End Dates), time of day (Scheduled Time), and rate of recurrence (Repeats Every) for the intelligent agent, among other frequency-specific options.
| NOTE: If you are simply creating an Agent as a placeholder, this area of the settings can be left blank for the moment. However, in order for the Agent to work you must identify conditions for it to evaluate. Otherwise, when the Agent runs for the first time it will produce an error and be automatically disabled. |
-
-
- Login Activity: This option refers to whether the student has logged into Brightspace LMS, not your course specifically. Enter the number of days since the student last logged into Brightspace before they receive an agent email.
- Course Activity: This option refers to whether the student has accessed your course page in Brightspace. Enter the number of days a student can be inactive/active before they receive an agent email.
- Release Conditions: Select this option if you want the intelligent agent to run only when the student meets certain requirements (e.g., student belongs to Group A, student receives 80% or greater on Quiz 3, etc). Select the Browse button to search for a Release Condition you have already created. Select the Create button to program a new one. For more information about using Release Conditions in Brightspace, refer to our support site on Creating Release Conditions.
- Actions. Customize the following settings as they apply to your agent.
- Repetition: This setting determines how many emails an agent might send to users who satisfy its criteria. Choose one of the following options:
- Take action only the first time the agent’s criteria are satisfied for a user: When you select this setting, all users that satisfy the agent’s criteria receive only one email no matter how many times the agent is evaluated. This is the recommended setting if you are sending automated emails to students to avoid sending repeated emails.
- Take action every time the agent is evaluated and the agent’s criteria are satisfied for a user: When you select this setting, the agent sends an email to all users that satisfy its criteria every time the agent is evaluated.
- Send an email: Select this option only if you want you or your students to receive an email when the criteria are satisfied. Use the email fields below to enter your message and add any attachments. Enter the recipient names in the To, Cc, and Bcc You can also enter a replace string. (For instructions, refer to our support site on Creating Replace Strings within the Intelligent Agent Tool.) Fill in the email fields as follows:
- To: Enter your own email address if you wish to receive email updates from the agent. Use the replace string {InitiatingUser} to have Brightspace autofill the applicable student’s email address.
NOTE: Select What special email addresses can I use? to see more replace strings for the To, Cc and Bcc fields. - Use the Subject and Message email fields to enter your message. Optional: Use replace strings to personalize the message, such as to autofill the student’s name or the course address. See Creating Replace Strings within the Intelligent Agent Tool for more information.
NOTE: The replace strings used in an intelligent agent are different from those used elsewhere in Brightspace. Select What replace strings can I use in the subject and message? to see the entire list of replace strings. Copy and paste the replace strings directly from that list to be sure they will work properly. - Select Upload to attach a file from your computer, Choose Existing to select an item from your course files, or Record to create and attach a video or audio message
- To: Enter your own email address if you wish to receive email updates from the agent. Use the replace string {InitiatingUser} to have Brightspace autofill the applicable student’s email address.
- Repetition: This setting determines how many emails an agent might send to users who satisfy its criteria. Choose one of the following options:
-
- Select Save and Close when finished.
Your Intelligent Agents will now appear on the Agent List. You can also see the date and time when they last sent reminders, and to how many users.
See the video tutorial below for an overview of creating an intelligent agent:
| TIP: Perform a Practice Run to view the results of an agent without sending automatic emails to your students. |
Performing a Practice Run
You can perform a practice run to view the results of an intelligent agent without notifying your students.
- Log into Brightspace with your MyCarletonOne credentials.
- On the Brightspace homepage, locate your course in one of the following ways:
- Select the course tile under the My Courses widget.
- Select the Course Selector Grid and select the course from the drop-down menu. If you are enrolled in more than 20 courses, you can search for the course name using the search bar.
- In the navbar, select Tools.
- In the drop-down menu, select Intelligent Agents.
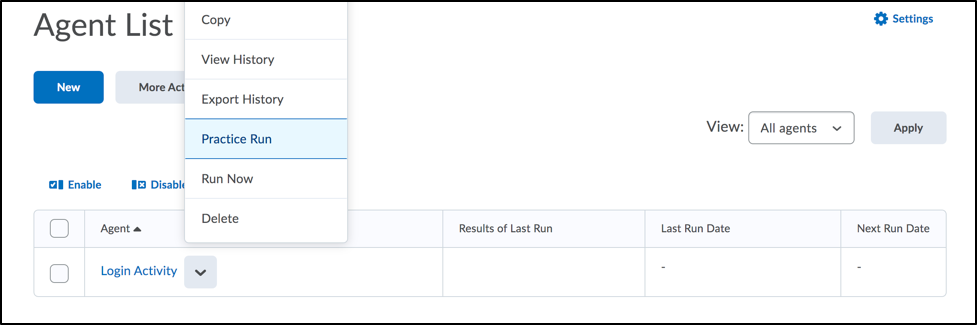
- Locate the agent name in the Agent table and select the downward arrow
 to expand the actions menu.
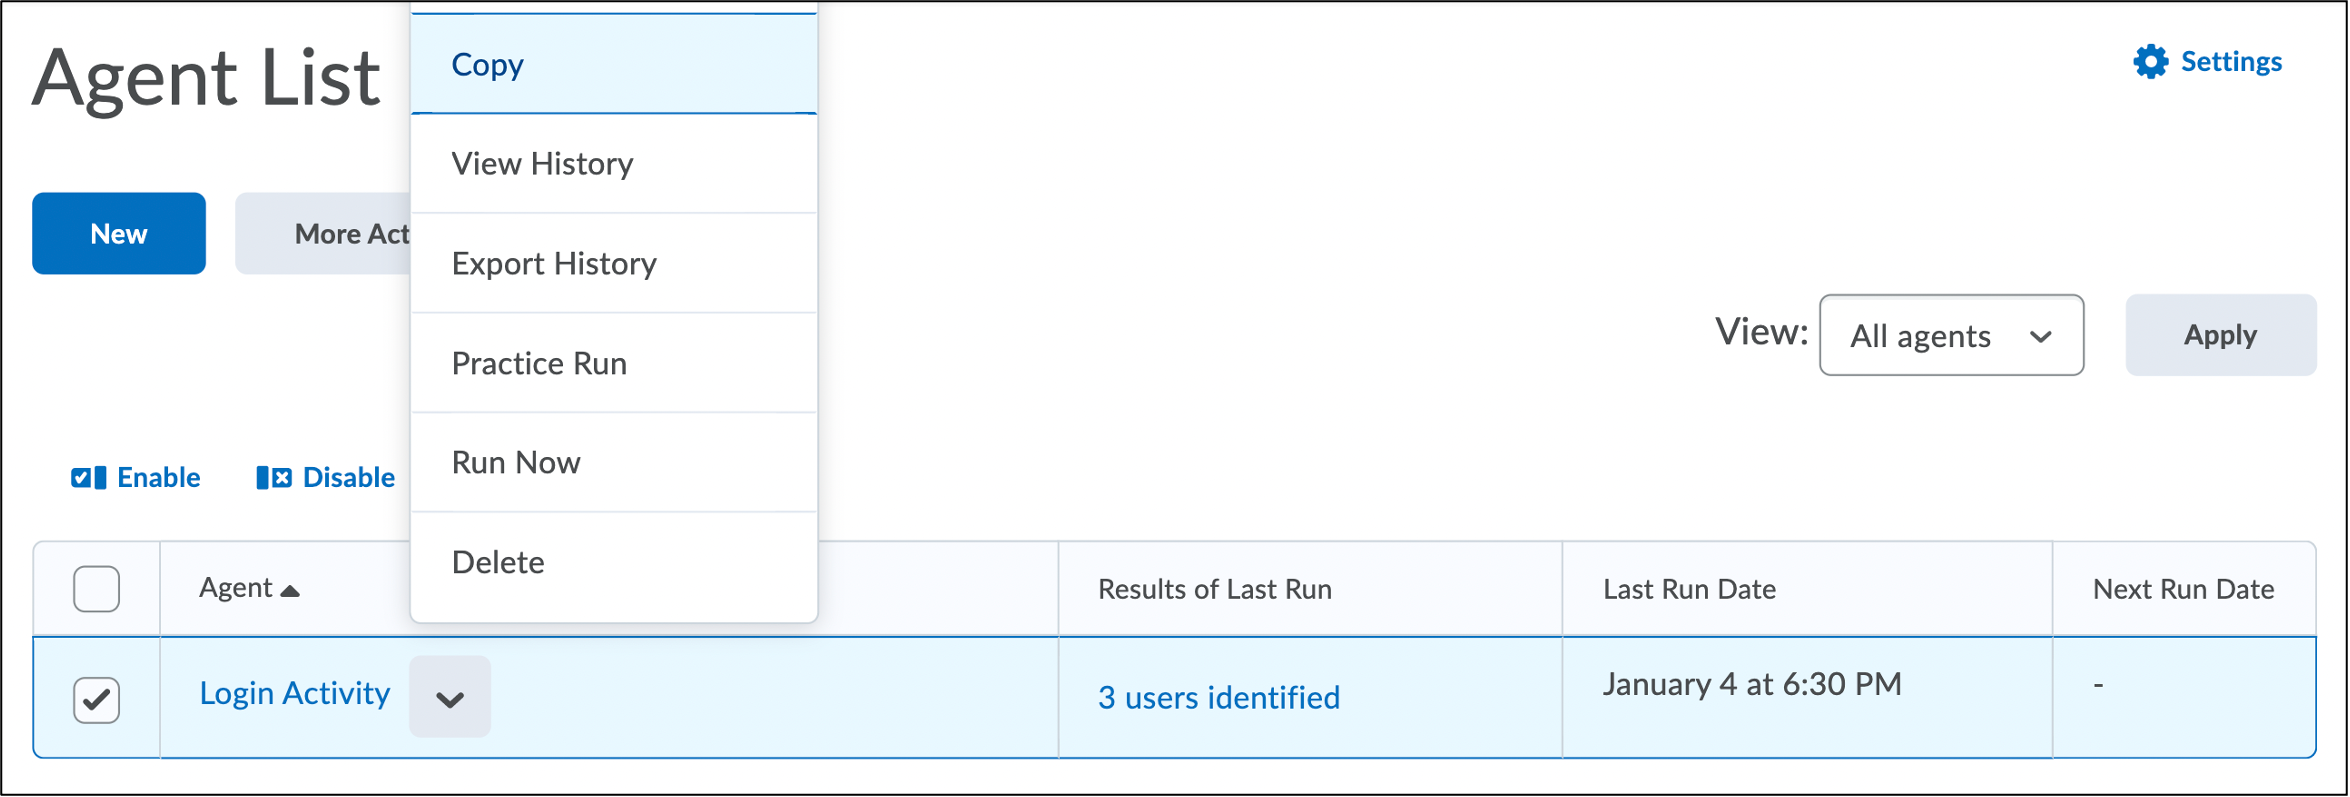
 - In the menu, select Practice Run.
- You will be prompted in a pop-up window to confirm that you want to complete a practice run. Select Run.
NOTE: Processing time varies based on server load and the priority of other scheduled agents. - You will see a Practice Run Agent Confirmation page confirming that your request has been submitted. An email will be sent to your @cunet.carleton.ca email when the request is completed and you will then be able to view the practice run results.
- Select Done to return to the Agent List page.
- On the Agent List page, locate the agent name and select …users identified in the Results of Last Run column to view your results report.
See the video tutorial below for an overview of performing a practice run:
Running an Intelligent Agent Manually
Agents are typically set up to run automatically as long as you have enabled a schedule in your agent settings. You also have the option to manually run the agent if no schedule has been set.
- Log into Brightspace with your MyCarletonOne credentials.
- On the Brightspace homepage, locate your course in one of the following ways:
- Select the course tile under the My Courses widget.
- Select the Course Selector Grid and select the course from the drop-down menu. If you are enrolled in more than 20 courses, you can search for the course name using the search bar.
- In the navbar, select Tools.
- In the drop-down menu, select Intelligent Agents.
- Locate the agent name in the Agent table and select the downward arrow to expand the actions menu.
- In the menu, select Run Now.
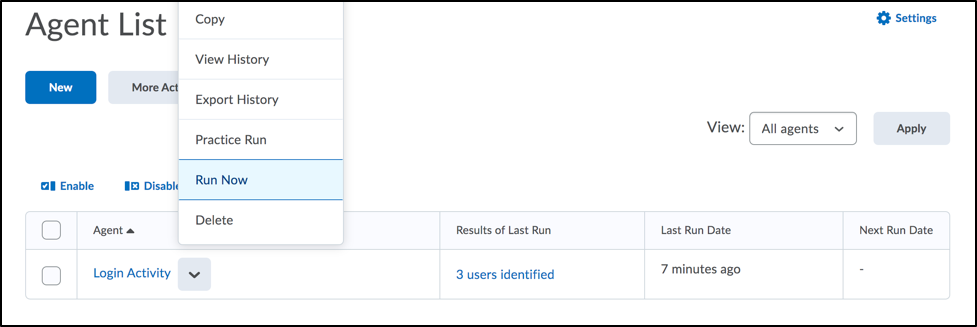
- A pop-up window will appear prompting you to confirm that you want to manually run the intelligent agent. Select Run.
- You will see a Manual Run Agent Confirmation page confirming that your request has been submitted. An email will be sent to your @cunet.carleton.ca email when the request is completed.
- Select Done to return to the Agent List page and view your results.
- On the Agent List page, locate the agent name and select …users identified in the Results of Last Run column to view your results report.
See the video tutorial below for an overview of how to manually run an intelligent agent:
Adding an Intelligent Agent Category
Categories are useful for organizing and sorting your Intelligent Agents.
To add an Intelligent agent:
- Log into Brightspace with your MyCarletonOne credentials.
- On the Brightspace homepage, locate your course in one of the following ways:
- Select the course tile under the My Courses widget.
- Select the Course Selector Grid and select the course from the drop-down menu. If you are enrolled in more than 20 courses, you can search for the course name using the search bar.
- In the navbar, select Tools.
- In the drop-down menu, select Intelligent Agents.
- Select Edit Categories.
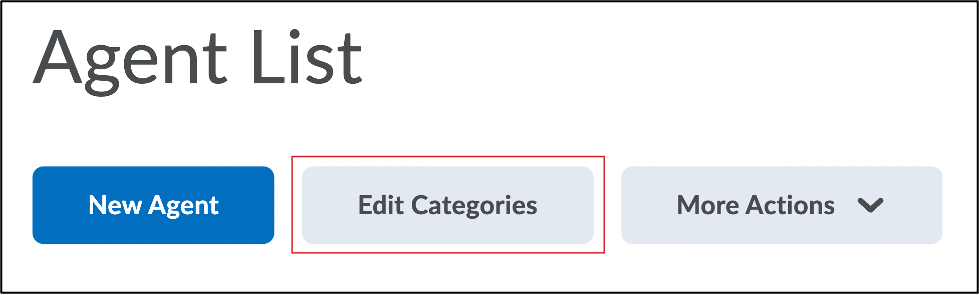
- Select Add Category.
- In the Create Category pop-up window, enter a Name for the category.
- Select Create.
Categorizing Intelligent Agents
Once you have created an Intelligent Agents category, you are able to categorize your existing Intelligent Agents.
| TIP: You can use the Bulk Edit feature to categorize multiple intelligent agents simultaneously. |
To categorize an Intelligent Agent:
- Log into Brightspace with your MyCarletonOne credentials.
- On the Brightspace homepage, locate your course in one of the following ways:
- Select the course tile under the My Courses widget.
- Select the Course Selector Grid and select the course from the drop-down menu. If you are enrolled in more than 20 courses, you can search for the course name using the search bar.
- In the navbar, select Tools.
- In the drop-down menu, select Intelligent Agents.
- Select the arrow next to an Intelligent Agent and select Edit from the drop-down.
- Under Category, select a category from the drop-down menu.
- Select Save and Close.
Editing Intelligent Agent Categories
- Log into Brightspace with your MyCarletonOne credentials.
- On the Brightspace homepage, locate your course in one of the following ways:
-
- Select the course tile under the My Courses widget.
- Select the Course Selector Grid and select the course from the drop-down menu. If you are enrolled in more than 20 courses, you can search for the course name using the search bar.
- In the navbar, select Tools.
- In the drop-down menu, select Intelligent Agents.
- Select Edit Categories.
- You will be taken to the Edit Categories page.
- To edit a category name – Select a category name and then type the new name. Select outside the text box or select the Enter key on your keyboard to save your changes.
- To edit the Sort Order – Select a number under the Sort Order column to adjust the order of the category list. (Type 1 for the category that will appear first in the list, 2 for the category that will be listed second, etc.)
Deleting Intelligent Agent Categories
- Log into Brightspace with your MyCarletonOne credentials.
- On the Brightspace homepage, locate your course in one of the following ways:
- Select the course tile under the My Courses widget.
- Select the Course Selector Grid and select the course from the drop-down menu. If you are enrolled in more than 20 courses, you can search for the course name using the search bar.
- In the navbar, select Tools.
- In the drop-down menu, select Intelligent Agents.
- Select Edit Categories.
- You will be taken to the Edit Categories page. Select the checkbox to select the category you wish to delete.
- Select the Delete Categories icon (trash can).

- You will be prompted to confirm that you want to delete the selected categories. Select Yes.
Using Replace Strings for Intelligent Agents
See Creating Replace Strings within the Intelligent Agents Tool for more information.
Enabling or Disabling an Intelligent Agent
Intelligent Agents can be enabled or disabled. If an agent is disabled, it will not run automatically, even if a schedule has been set.
- Log into Brightspace with your MyCarletonOne credentials.
- On the Brightspace homepage, locate your course in one of the following ways:
- Select the course tile under the My Courses widget.
- Select the Course Selector Grid and select the course from the drop-down menu. If you are enrolled in more than 20 courses, you can search for the course name using the search bar.
- In the navbar, select Tools.
- In the drop-down menu, select Intelligent Agents.
- Select the checkbox next to the Intelligent Agent(s) you wish to enable/disable.
- Select Enable or Disable.

- A disabled agent will be marked with the disabled icon
 . An enabled agent will have no icon.
Deleting an Intelligent Agent
- Log into Brightspace with your MyCarletonOne credentials.
- On the Brightspace homepage, locate your course in one of the following ways:
- Select the course tile under the My Courses widget.
- Select the Course Selector Grid and select the course from the drop-down menu. If you are enrolled in more than 20 courses, you can search for the course name using the search bar.
- In the navbar, select Tools.
- In the drop-down menu, select Intelligent Agents.
- Select the checkbox next to the Intelligent Agent(s) you wish to delete.
- Select Delete.

- Select Ok in the confirmation pop-up.
- The agent is now deleted.
Duplicating an Intelligent Agent
- Log into Brightspace with your MyCarletonOne credentials.
- On the Brightspace homepage, locate your course in one of the following ways:
- Select the course tile under the My Courses widget.
- Select the Course Selector Grid and select the course from the drop-down menu. If you are enrolled in more than 20 courses, you can search for the course name using the search bar.
- In the navbar, select Tools.
- In the drop-down menu, select Intelligent Agents.
- Select the downward arrow next to the Intelligent Agent you wish to duplicate.
- Select Copy.
- A copy of the agent has now been created, and will appear at the bottom of the list. The copied agent will be disabled by default.
Editing an Intelligent Agent
- Log into Brightspace with your MyCarletonOne credentials.
- On the Brightspace homepage, locate your course in one of the following ways:
- Select the course tile under the My Courses widget.
- Select the Course Selector Grid and select the course from the drop-down menu. If you are enrolled in more than 20 courses, you can search for the course name using the search bar.
- In the navbar, select Tools.
- In the drop-down menu, select Intelligent Agents.
- Select the agent’s name to open the Edit Agent page.
- Make any necessary changes.
- Select Save and Close.
- Select Ok in the confirmation pop-up. The changes are saved.
| NOTE: Changes to an agent will only apply to future runs of the intelligent agent. It will not alter the results of any previous runs. |
Bulk Editing Intelligent Agents
You can edit multiple Intelligent Agents simultaneously with the Bulk Editing feature. Using Bulk Edit, you can edit agent names, categories, and enable/disable agents.
- Log into Brightspace with your MyCarletonOne credentials.
- On the Brightspace homepage, locate your course in one of the following ways:
- Select the course tile under the My Courses widget.
- Select the Course Selector Grid and select the course from the drop-down menu. If you are enrolled in more than 20 courses, you can search for the course name using the search bar.
- In the Navbar, select Tools.
- In the drop-down menu, select Intelligent Agents.
- Select the agents you wish to edit by selecting the checkbox next to the agent’s name. If you want to edit the dates for all agents, select the top checkbox next to Agent.
- Select Bulk Edit.

- You can now edit the following on the Agent Bulk Edit page:
- Edit an Agent Name – Select the agent name and then type your new title.
- Edit an Agent Category – Select a category from the drop-down menu in the Category column.
- Enable or Disable an Agent – Select the toggle in the Enabled column to enable/disable an agent. The toggle will appear blue
 when enabled and grey
  when disabled.
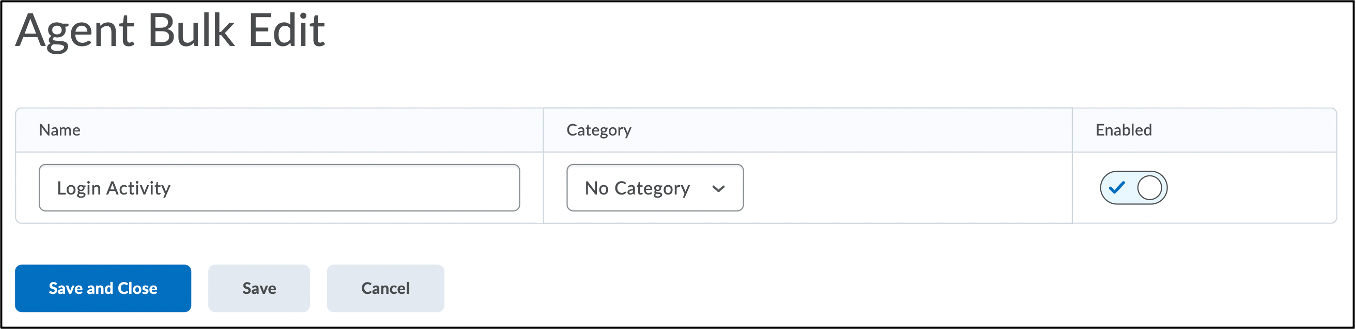
- When you are finished editing, select Save and Close.
Exporting the Results of an Intelligent Agent Run
The list of users identified by an intelligent agent’s run can be downloaded in a .csv file. This can be helpful when managing large classes to generate a list of students that meet set criteria (determined by release conditions, if needed).
- Log into Brightspace with your MyCarletonOne credentials.
- On the Brightspace homepage, locate your course in one of the following ways:
- Select the course tile under the My Courses widget.
- Select the Course Selector Grid and select the course from the drop-down menu. If you are enrolled in more than 20 courses, you can search for the course name using the search bar.
- In the navbar, select Tools.
- In the drop-down menu, select Intelligent Agents.
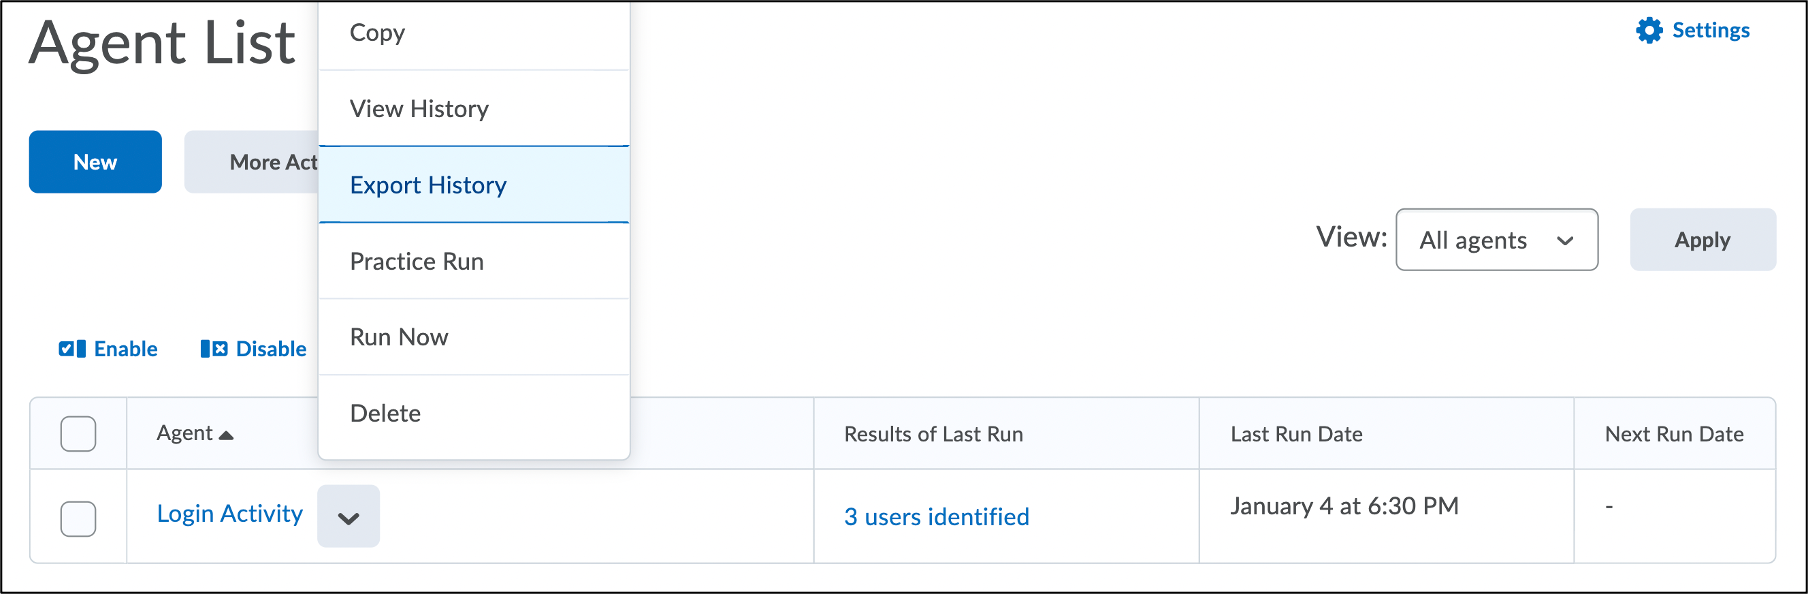
- Select the action menu (arrow) next to the Intelligent Agent you wish to export.
- Select Export History.
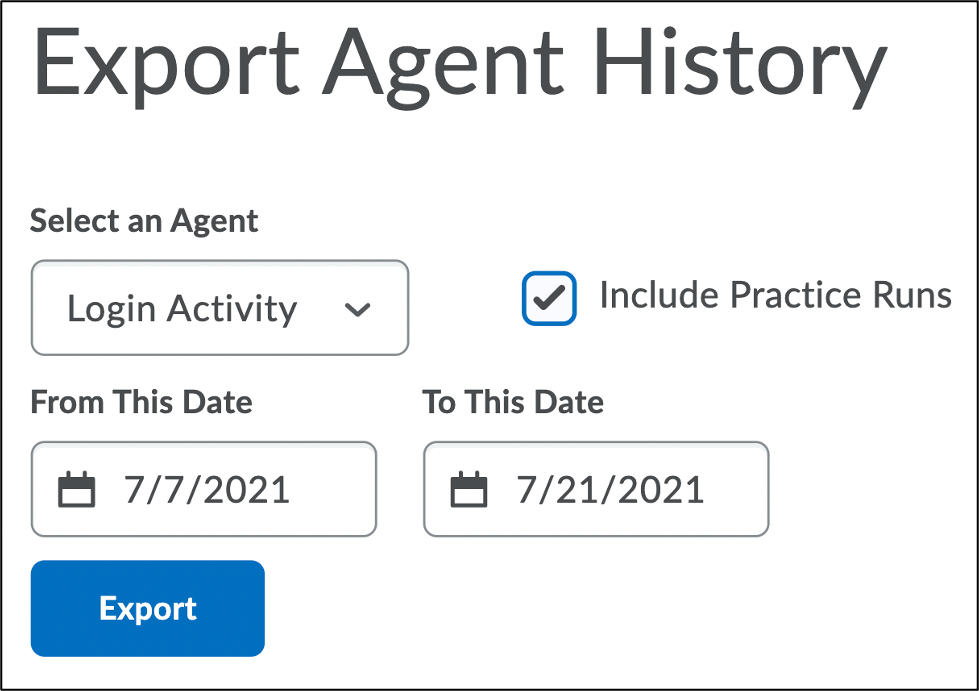
- Select the Include Practice Runs checkbox to include the results from practice runs.
- Select the From This Date and To This Date selection boxes to set the date range to export.
- Select Export. Depending on the server load and size of the file, the page may load for a few minutes.
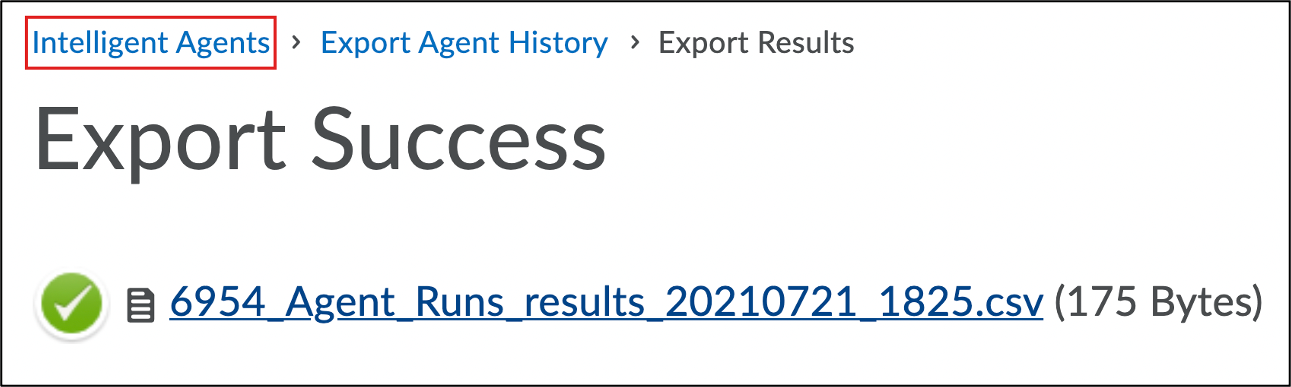
- Select the name of the file to download the .csv file.
- Select Intelligent Agents in the breadcrumb trail to return to the intelligent agent tool page.
| NOTE: The .csv file is only available in one format and may include additional information not relevant to your needs. Perform a practice run and export the agent history early on in your course to ensure the file suits your needs. |
Changing an Intelligent Agent’s Email Settings
By Default, emails that are sent by Intelligent Agents will come from a ‘no-reply’ named account. The reply-to email address is noreply@brightspace.carleton.ca. However, these settings can be changed to match the course instructor’s email account.
- Log into Brightspace with your MyCarletonOne credentials.
- On the Brightspace homepage, locate your course in one of the following ways:
- Select the course tile under the My Courses widget.
- Select the Course Selector Grid and select the course from the drop-down menu. If you are enrolled in more than 20 courses, you can search for the course name using the search bar.
- In the navbar, select Tools.
- In the drop-down menu, select Intelligent Agents.
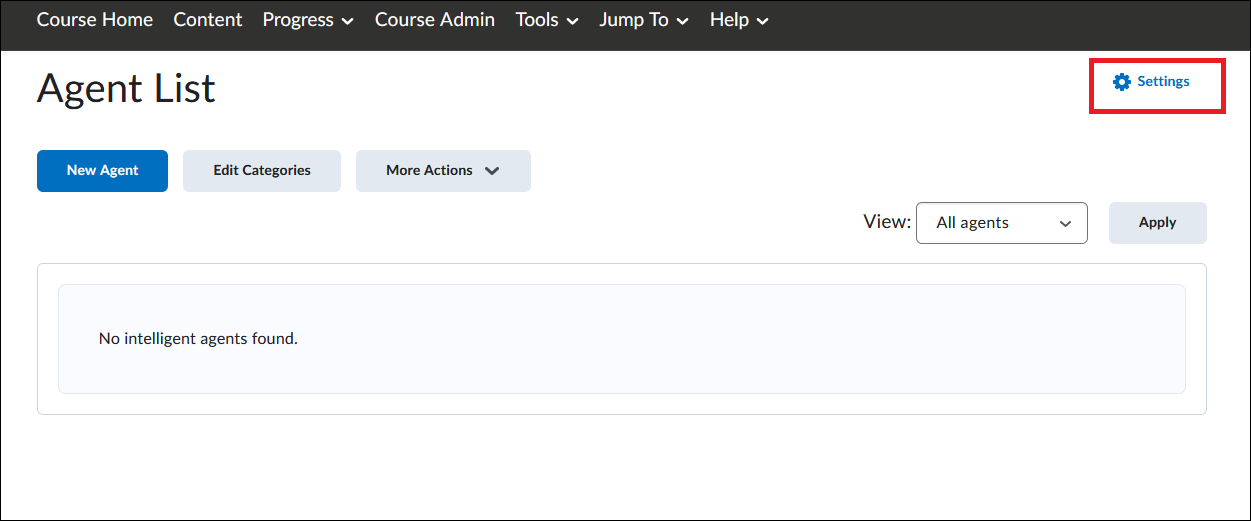
- Select the Settings icon at the top right-hand corner of the screen.
- Select the checkbox labelled Set custom values for this course.

- Enter the desired sender name in the Name that emails come from text box.
- Enter the desired @cunet.carleton.ca email address into the Reply-To address for responses text box.
- Select Save.
All automated Intelligent Agent feedback will now show as being sent from the entered name. If a student selects the ‘Reply’ button in the feedback message, the reply will now be sent to the chosen email.
Was this page helpful?
4 people found this useful
Still need help? Contact us