The checklists tool allows you to provide a list of required steps in your course. This can assist in guiding students to complete assignments, readings, and other additional tasks in a non-graded item.
Creating a checklist is a three-step process:
Create a Checklist
- Log into Brightspace with your MyCarletonOne credentials.
- On the Brightspace homepage, locate your course in one of the following ways:
- Select the course tile under the My Courses widget.
- Select the Course Selector Grid
 and select the course from the drop-down menu. If you are enrolled in more than 20 courses, you can search for the course name using the search bar.
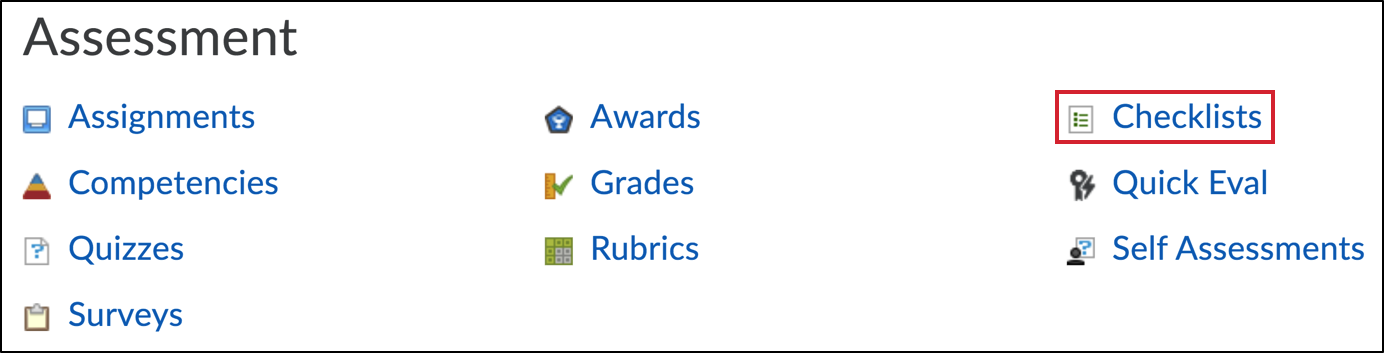
- In the navbar, select Course Admin.

- Under Assessment, select the Checklists link.
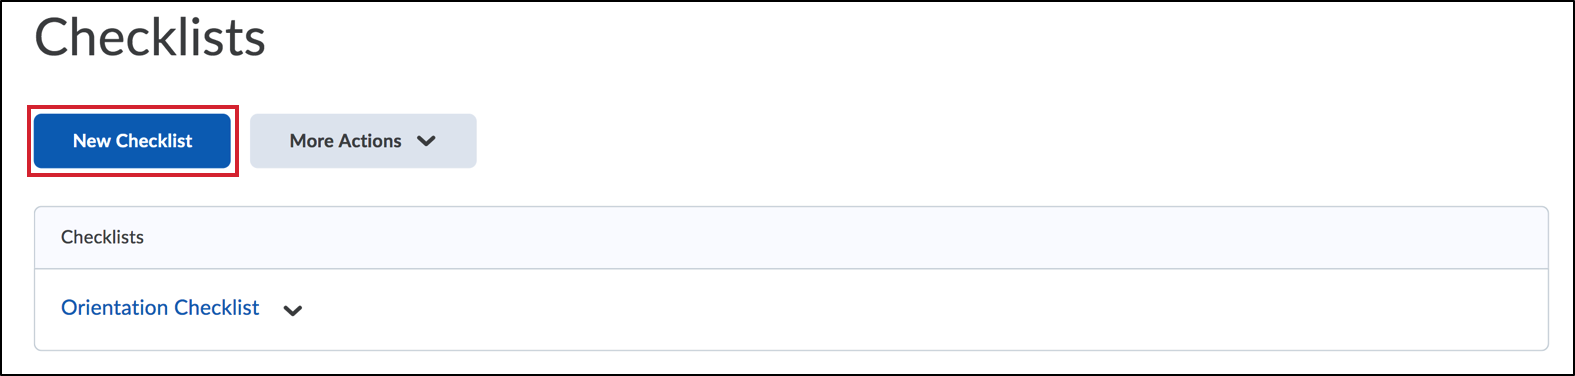
- Select the New Checklist button.
- Enter a name for your checklist.
NOTE: A description is optional. You may consider utilizing the description box to explain why students may want to use this checklist eg. Keep track of readings and assignments for week 1. - Select Save. Your checklist will be saved and you will be directed to the Edit Checklist page.
On the Edit Checklist page you can do the following:
Create a Checklist Category
| NOTE: To follow the instructions below, you first need to create a checklist or access the edit checklist page for an existing checklist. |
- On the Edit Checklist page, select the Checklist contents tab.
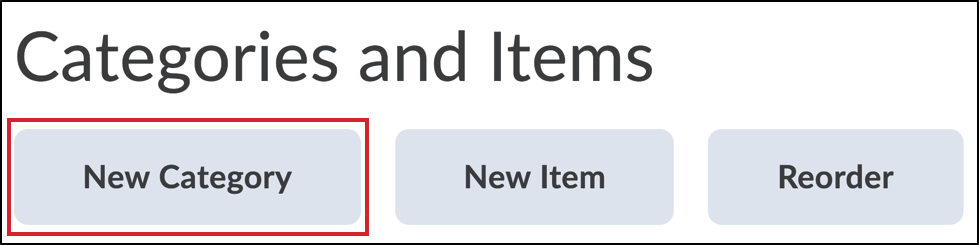
- Under the Categories and Items subheading, select New Category.
- Enter a name for the category (description optional).
- Select Save if you are finished, or Save and New if you want to create another category.
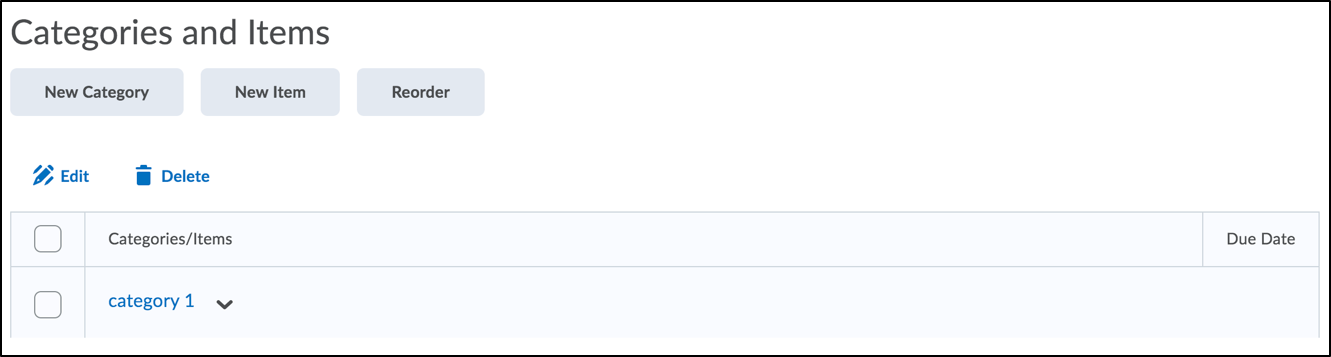
Once you have saved your category you will automatically be redirected back to the Edit Category page where you will see your categories listed under Categories and Items (see example below).
Create a Checklist Item
| NOTE: To follow the instructions below, you first need to create a checklist or access the edit checklist page for an existing checklist. |
- On the Edit Checklist page, select New Item.
- Assign a Category from the drop-down list of previously created categories or create a new category.
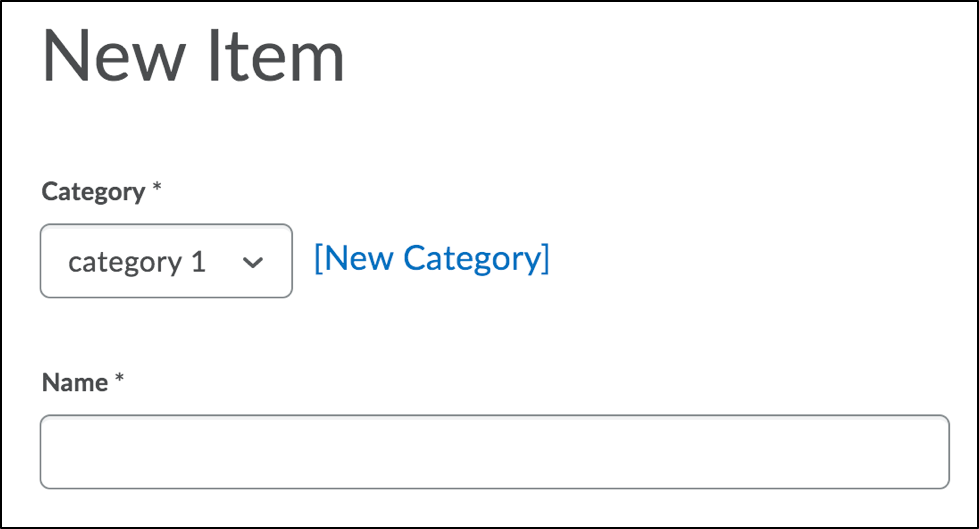
- Enter a Name for the item (description optional).
NOTE: You can link existing activities using “Insert Stuff” in the description. - If you want to set a due date for the item, select the checkbox next to Due Date and select the date.
NOTE: Select “Display in Calendar” to show the item if you want Brightspace to add the item in your students’ calendar. - Select Save or repeat steps 1-4 to add another item.
Once you have saved your category you will automatically be redirected back to the Edit Category page where you will see your item listed under your selected category (see example below). 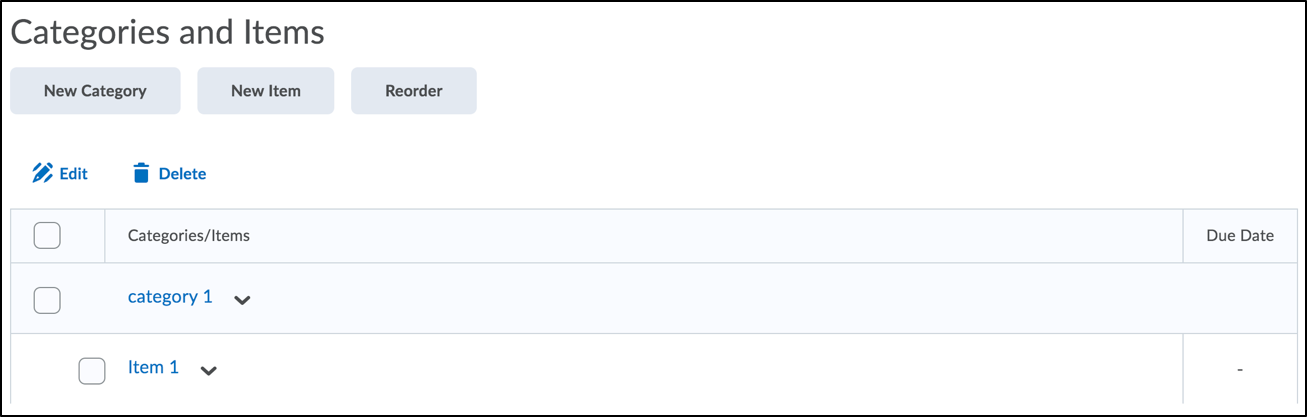
Reorder a Checklist
| NOTE: To follow the instructions below, you first need to create a checklist or access the edit checklist page for an existing checklist. |
- On the Edit Checklist page, select Reorder.
- Under Sort Order, use the drop-down menus to select the order number for your checklist categories and items.
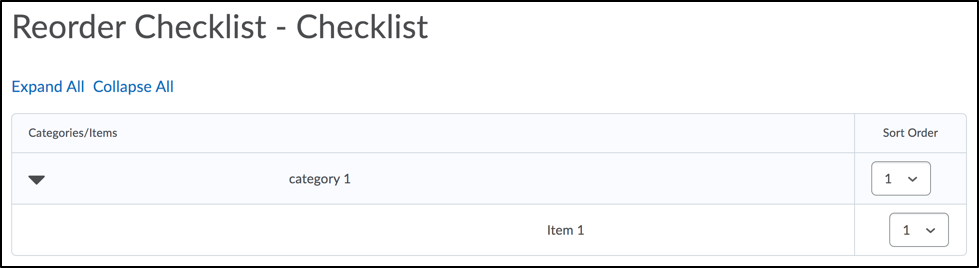
- Select Save.
Add Release Conditions
Release Conditions allow you to restrict who can access course materials, complete activities, or view a grade item based upon customized criteria. For more information on release conditions, see the Creating Release Conditions page.
| NOTE: To follow the instructions below, you first need to create a checklist or access the edit checklist page for an existing checklist. |
- On the Edit Checklist page, select the Restrictions tab.
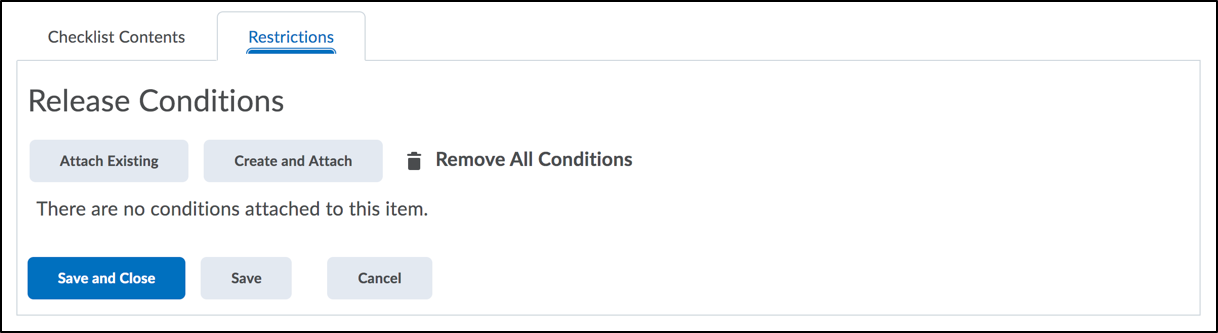
- Under Release Conditions, select one of the following:
- Attach Existing –
- Create and Attach –
Edit a Checklist
- Access the Edit Checklist page
- Edit a checklist category or item
- Delete a Checklist
- Delete an Individual Item or Category from a Checklist
Access the Edit Checklist Page
- Log into Brightspace with your MyCarletonOne credentials.
- On the Brightspace homepage, locate your course in one of the following ways:
- Select the course tile under the My Courses widget.
- Select the Course Selector Grid and select the course from the drop-down menu. If you are enrolled in more than 20 courses, you can search for the course name using the search bar.
- In the navbar, select Course Admin.
- Under Assessment, select the Checklists link.
- Select the name of the Checklist you wish to edit.
- Make your desired changes on the Edit Checklist page.
- Select Save.
Edit a Checklist Category or Item
- On the Edit Checklist page, scroll down to Categories and Items.
- Under Categories and Items, select the checkbox next to the category or item you want to edit.
- Select the Edit button above. A new window will open displaying the details of a checklist Item.
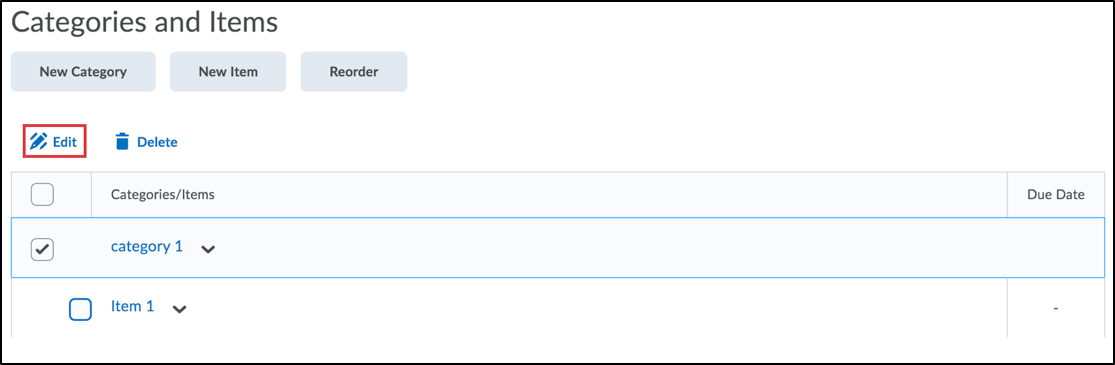
- Edit the dates, names and items as desired.
- Create or delete a Due Date from the student calendar by selecting Due Date.
NOTE: Adding a Due Date will send the student a reminder if they have their notifications on for your course. - Select Save to keep the changes.
Delete a Checklist
- On the Edit Checklist page, scroll down to Categories and Items.
- On the Edit Checklist page, select the More Actions button and select Delete.
WARNING: Deleting a checklist is permanent. Additionally, if you delete a category, you will delete all items in the category. - Select the Checklist you would like to delete by selecting on the box to the left of its name on the Delete Checklists page.
- Select the Delete Selected.
- Select Delete when the confirmation message appears.
Delete an Individual Item or Category from a Checklist
- On the Edit Checklist page, scroll down to Categories and Items.
- Under Categories and Items, select the checkbox next to the category or item you want to delete.
- Select Delete.
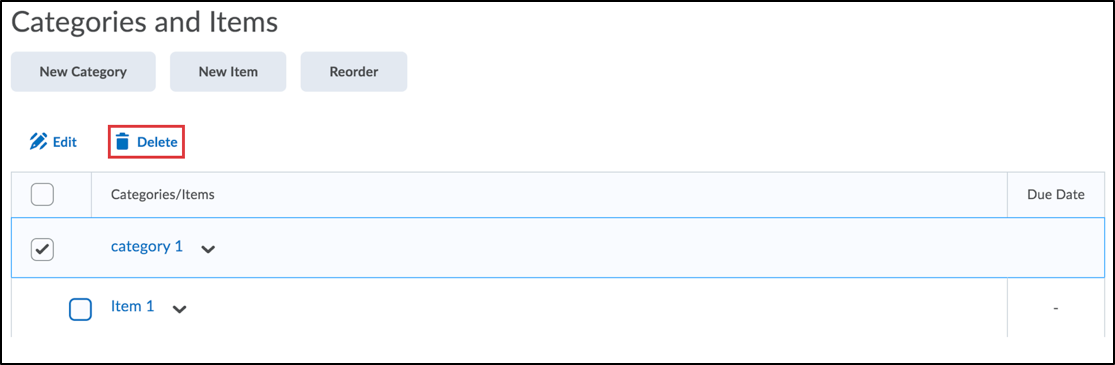
- You will be prompted to confirm that you want to Delete your category or item in a pop-up window. Select Delete to permanently delete your category or item.
Video Tutorials

Was this page helpful?
2 people found this useful
Still need help? Contact us