- Edit Start Dates, Due Dates, or End Dates
- Set a Time Limit
- Edit the Number of Quiz Attempts
- Edit the Number of Quiz Questions Per Page
- Enable Special Access for Specific Students
- Bulk Editing Quizzes
- Apply Single-Session Lock (Session Restrictions) to optimize security
Once you have created a quiz in D2L Brightspace, you can easily edit your quiz settings and adjust your quiz content.
Edit Start Dates, Due Dates, or End Dates
In Brightspace, instructors can set a quiz
- Start Date,
- End Date, and
- Due Date
A quiz Start Date is the time and date in which students are first permitted to access and start the quiz. The End Date is the last time and date in which students are permitted to start their quiz (and still have the full length of time to complete the quiz).
| NOTE: The End Date does not end the quiz automatically. |
A quiz Due Date has no impact on the quiz other than to flag the quiz as having been submitted late if students submit beyond the Due Date.
| NOTE: Unless you are using your quiz as an assignment, most quizzes do not require a Due Date. |
To Edit Start Dates, End Dates, or Due Dates:
- Log into Brightspace with your MyCarletonOne credentials.
- On the Brightspace homepage, locate your course in one of the following ways:
- Select the course tile under the My Courses widget.
- Select the Course Selector Grid
 and select the course from the drop-down menu. If you are enrolled in more than 20 courses, you can search for the course name using the search bar.
- In the navbar, select Tools and select Quizzes in the drop-down menu. Find your quiz on the Manage Quizzes page.

- Locate the quiz you want to edit and select the arrow
 next to the quiz name.
 - In the drop-down menu, select Edit.
- Select the Due Date field to edit the due date and time.
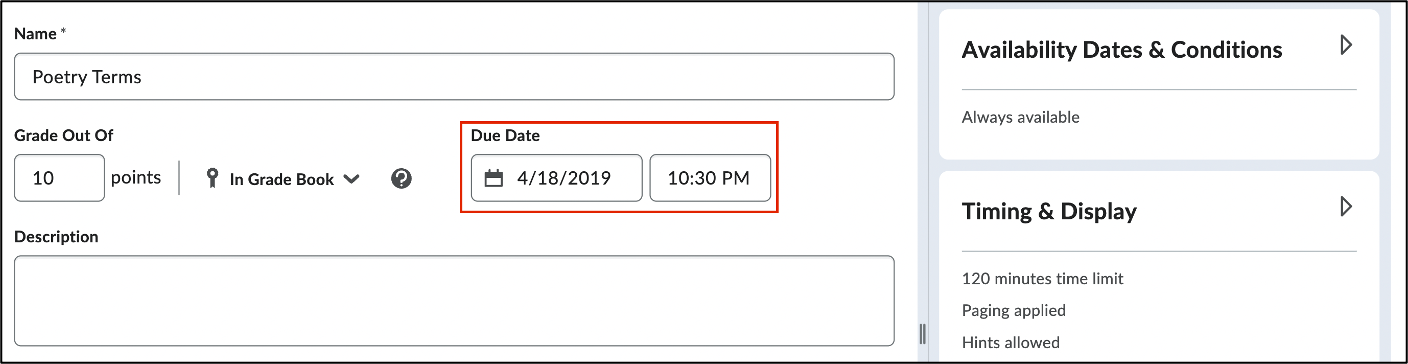
- To edit the start and end dates, select Availability Dates & Conditions.
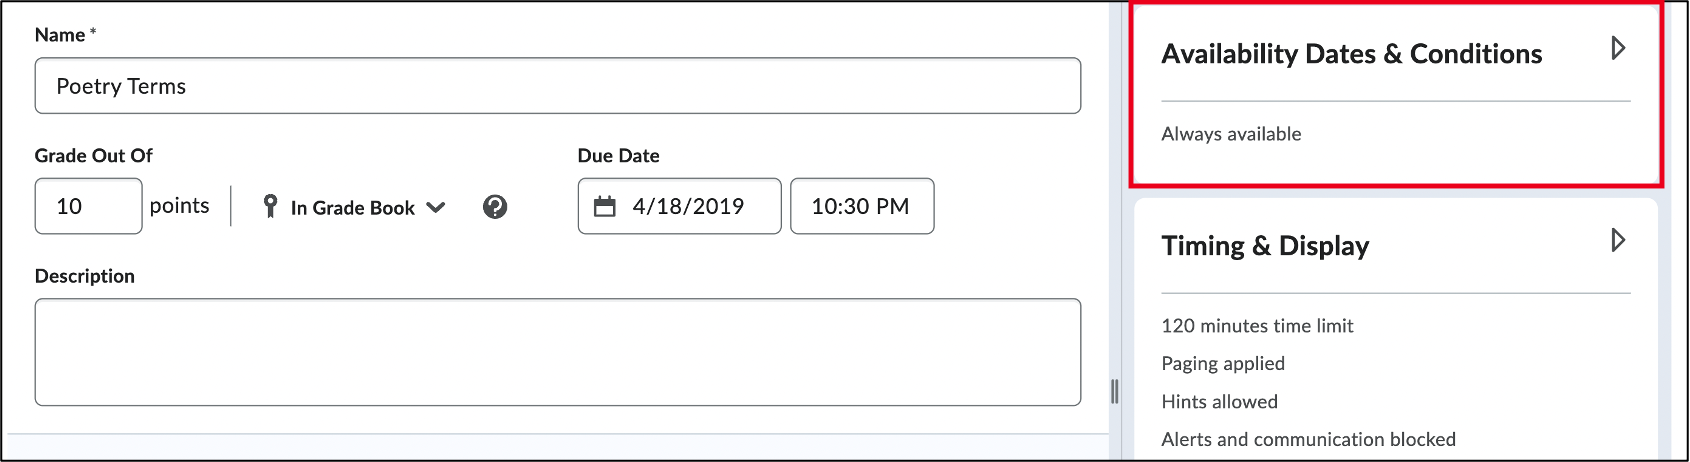
- Edit the Start Date and/or End Date. You can type the date in M/D/YYYY format or select the start or end date/time fields to select a date from the calendar or drop-down menu.
TIP: Select Add availability dates to calendar if you want your quiz dates to be visible to students in the course calendar. - Select Save and Close when you are finished editing your settings.
Set a Time Limit
- Log into Brightspace with your MyCarletonOne credentials.
- On the Brightspace homepage, locate your course in one of the following ways:
- Select the course tile under the My Courses widget.
- Select the Course Selector Grid and select the course from the drop-down menu. If you are enrolled in more than 20 courses, you can search for the course name using the search bar.
- In the navbar, select Tools and select Quizzes in the drop-down menu. Find your quiz on the Manage Quizzes page.
- Locate the quiz you want to edit and select the arrow next to the quiz name.
- In the drop-down menu, select Edit.
- On the Edit Quiz page, select Timing & Display.
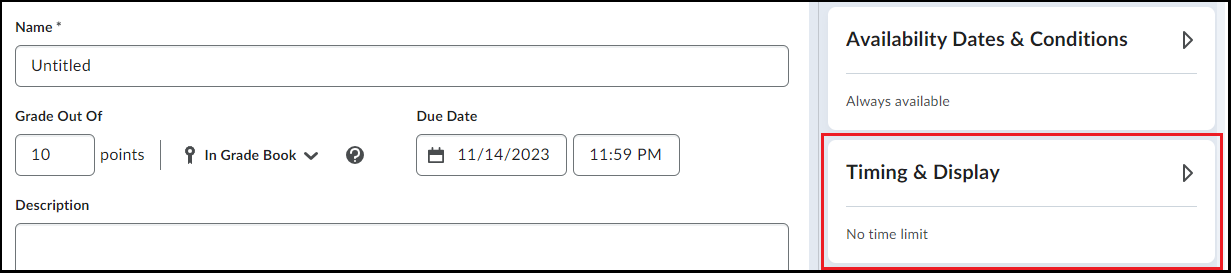
- Ensure the Set time limit checkbox is selected.
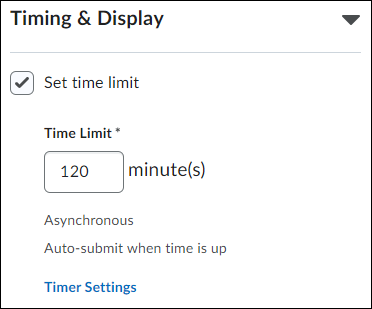
- In the Time Limit field, enter the number of minutes students are allowed to complete the quiz.
- Select Timer Settings to configure what happens when the time limit expires.
- Under Quiz Start, select the Asynchronous or Synchronous option, depending on your needs.<
NOTE: Asynchronous starts the timer when the learner launches to quiz and Synchronous starts the timer on the start date. - Under When The Time Limit Expires, select one of the three options:
- Automatically submit the quiz attempt
- Flag as “exceeded time limit” and allow the learner to continue working
- Do nothing: the time limit is not enforced
- Select OK.
- Select Save and Close when you are finished editing your settings.
Edit the Number of Quiz Attempts
- Log into Brightspace with your MyCarletonOne credentials.
- On the Brightspace homepage, locate your course in one of the following ways:
- Select the course tile under the My Courses widget.
- Select the Course Selector Grid and select the course from the drop-down menu. If you are enrolled in more than 20 courses, you can search for the course name using the search bar.
- In the navbar, select Tools.
- Select Quizzes in the drop-down menu.
- Find your quiz on the Manage Quizzes page.
- Select the arrow next to the quiz name.
- In the drop-down menu, select Edit.
- On the Edit Quiz page, select Attempts and Completion.
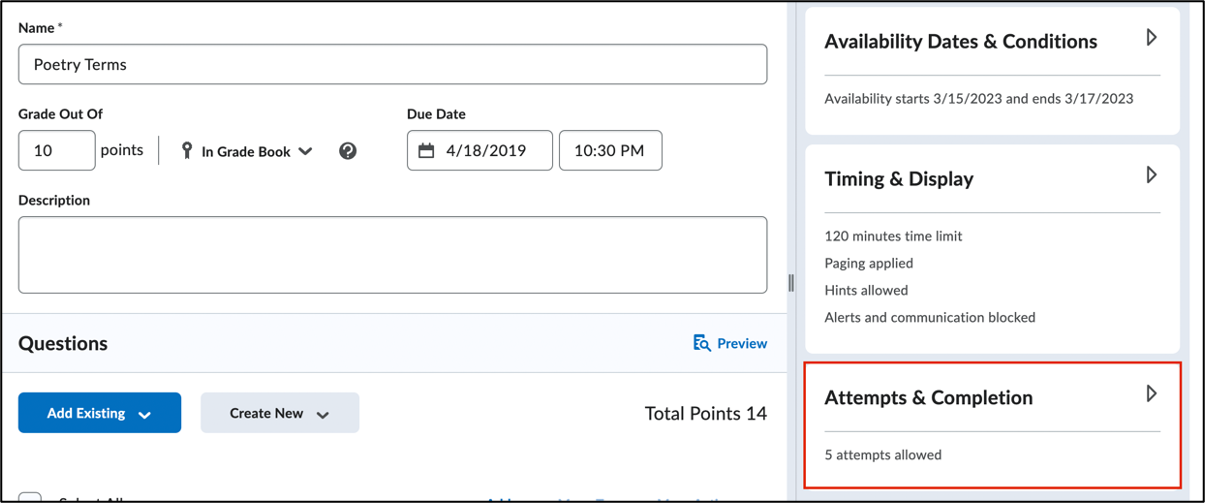
- Select Manage Attempts.
- In the Manage Attempts pop-up window, edit the following settings:
- Attempts allowed – Select a number of attempts from the drop-down menu.
- Overall grade calculation – By default, the overall grade is calculated based on the last attempt. To edit how the overall grade will be calculated, select one of the following options from the drop-down menu:
- Last Attempt
- First Attempt
- Average of all attempts
- Lowest Attempt
- Highest Attempts
- Retake Incorrect questions only – When this setting is selected, students who attempt a quiz more than once can only answer questions that were incorrect on the previous attempt. If you are using Auto-publishing, Written Response questions will be marked as 0 and included in future attempts until they are graded manually.
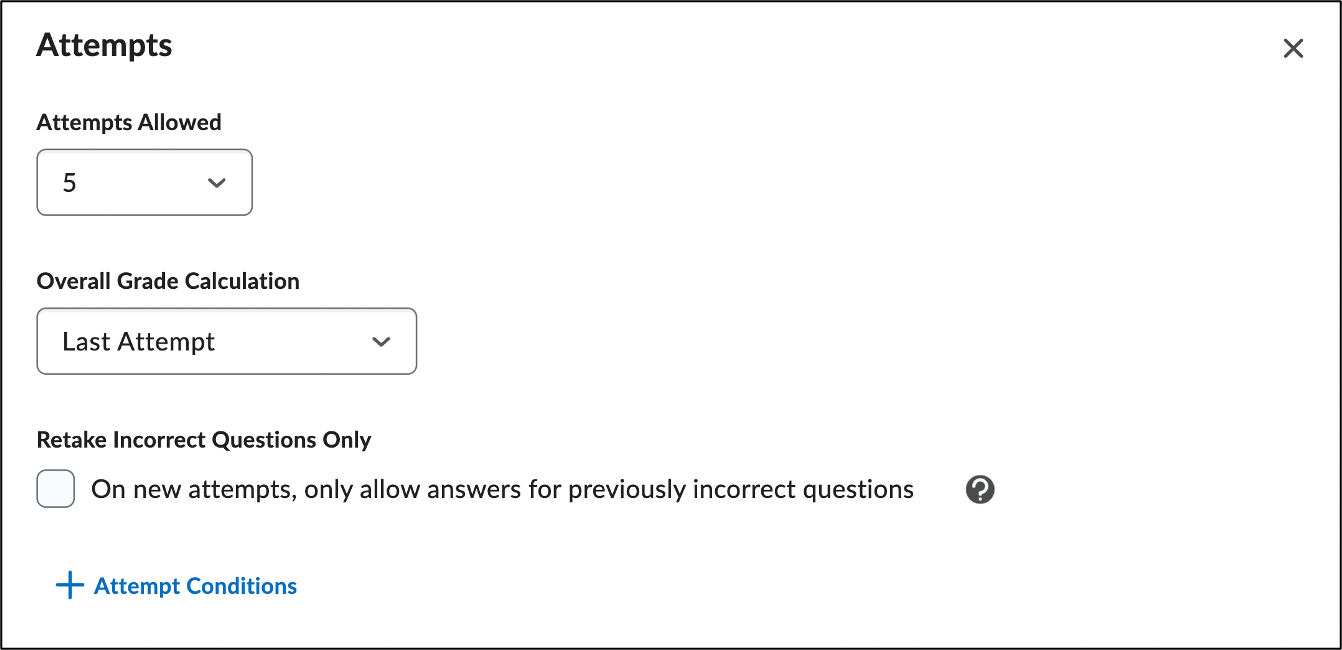
- Select OK.
- Select Save and Close when you are finished editing your settings.
Edit the Number of Quiz Questions Per Page
- Log into Brightspace with your MyCarletonOne credentials.
- On the Brightspace homepage, locate your course in one of the following ways:
- Select the course tile under the My Courses widget.
- Select the Course Selector Grid and select the course from the drop-down menu. If you are enrolled in more than 20 courses, you can search for the course name using the search bar.
- In the navbar, select Tools.
- Select Quizzes in the drop-down menu.
- Find your quiz on the Manage Quizzes page.
- Select the arrow next to the quiz name.
- In the drop-down menu, select Edit.
- On the Edit Quiz page, select Timing & Display.

- In the Paging drop-down menu, select one of the following options:
- 1 question per page.
- 5 questions per page.
- 10 questions per page.
- Add page break after each section.
- Select Save and Close when you are finished editing your settings.
Enable Special Access for Specific Students
See the Adding Special Access page for instructions.
Bulk Editing Quizzes
- Log into Brightspace with your MyCarletonOne credentials.
- On the Brightspace homepage, locate your course in one of the following ways:
- Select the course tile under the My Courses widget.
- Select the Course Selector Grid and select the course from the drop-down menu. If you are enrolled in more than 20 courses, you can search for the course name using the search bar.
- In the navbar, select Tools.

- Select Quizzes in the drop-down menu.
- Select the checkboxes next to the quizzes you want to edit.

- Select Bulk Edit above your quiz table. You will be taken to a page where you can edit the following:
- Edit quiz names under the Name column
- Move your quiz to a new quiz category or add a new category under the Quiz Category column
- Hide a quiz from students by selecting the checkboxes under the Hide from Users column
- Adjust the number of attempts allowed under the Attempts Allowed column.
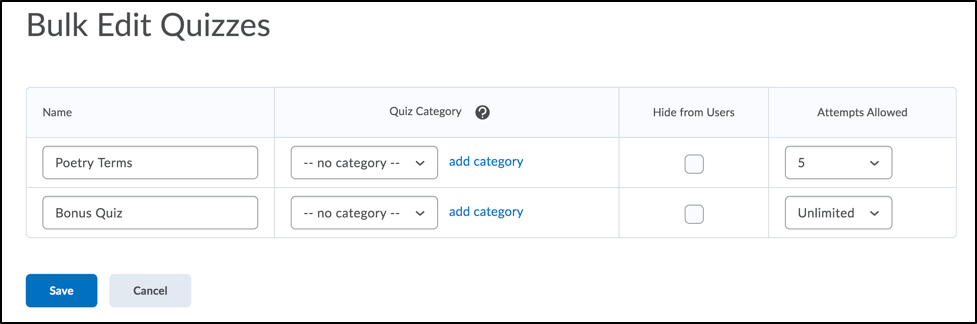
- When you are finished editing, select Save.
Apply Single-Session Lock (Session Restrictions) to optimize security
To support academic integrity during invigilated, on-campus exams, instructors can now enable a Single-Session Restriction for Brightspace quizzes. This “In-Person Quiz Tool” locks a student’s attempt to their specific device and browser the moment they begin. If a student closes their window or tries to switch devices, the attempt is immediately locked and requires an instructor to manually reopen it. Because this setting requires an instructor to be physically present to manage session resets, it is strictly recommended for in-person, proctored assessments only.

For more details, see the Single-Session Lock for in-person Quizzes webpage.
Related Support Pages
Was this page helpful?
10 people found this useful
Still need help? Contact us