- Complete the Setup Wizard
- Set up Grade Categories
- Create Grade Items
- Create or link a grade item through a Brightspace assessment tool
- Create a grade item in the Gradebook
- Verify your grade items are linked to your activity in Brightspace
- Brightspace Video Resources
- Brightspace Support
All D2L Brightspace courses come with a built-in grades tool that instructors can customize to display course grading information. Once an instructor or TA has entered and released grades in the gradebook, students can view their grades in their own individual grader reports.
You can configure the setup of your gradebook under the Manage Grades tab of your gradebook.
To setup your gradebook:
- Complete the Setup Wizard
- Set up grade Categories to group similar assessments together (ex/ Quizzes)
- Create Grade Items
Complete the Setup Wizard
The Setup Wizard is the first step in creating your gradebook. If this is your first time accessing Grades in your sandbox or course, you will automatically be directed to the seven-step Setup Wizard. You can return to the Setup Wizard at any time through the Setup Wizard tab.

The Setup Wizard allows you to:
- Establish a grading system
- Determine your final calculation method
- Identify what to do with ungraded items (i.e. assign a zero? Or ignore?)
- Choose grade scheme
- Set Display settings
TIP: While you are completing the setup wizard, you can select the question mark icons ![]() for additional information about certain settings options.
for additional information about certain settings options.
To Start the Setup Wizard
- Log into Brightspace using your MyCarletonOne credentials.
- On the Brightspace homepage, locate your course in one of the following ways:
- Select the course tile under the My Courses widget.
- Select the Course Selector Grid
 and select the course from the drop-down menu. If you are enrolled in more than 20 courses, you can search for the course name using the search bar.
- In the navbar, select Progress.

- In the drop-down menu, select Grades.
- Select the Setup Wizard tab.
- Scroll down to the bottom of the page and select Start. You will automatically be taken to step one of the seven-step Setup Wizard.
To Complete the Setup Wizard
The setup wizard has seven steps.
Step 1: Choose Grading System
- Choose one of the following grading systems to determine how your students will be evaluated:
- Weighted system: grades are calculated as a percentage of the final grade; grade items can be organized into categories.
- Points: Each grade item has a maximum point value; final grades are calculated by adding all grade items together and dividing by the total points.
-
- Formula system: allows you to create a custom formula for your gradebook.
NOTE: Weighted is the default setting for Carleton.
- Formula system: allows you to create a custom formula for your gradebook.
- Select Continue.
Step 2: Final Grade Released
- Choose one of the following options to determine how final grades will be released to students:
- Calculated Final Grade: Final grades are calculated automatically; You cannot adjust the final grades without adjusting the gradebook itself; this setting can be changed later as well
NOTE: We recommend Calculated Final Grade during the semester. If you need to adjust final grades at the end of the semester, you can enable Adjusted Final Grades at that point. Note this setting is only relevant if you release final grades to students in Brightspace.
- Adjusted final grade: Grades can be adjusted as needed.
- Calculated Final Grade: Final grades are calculated automatically; You cannot adjust the final grades without adjusting the gradebook itself; this setting can be changed later as well
- Select Continue.
Step 3: Grade Calculations
- Choose how to treat ungraded items by selecting one of the following options:
- Drop ungraded items – Items that do not have a grade inputted are not counted in the final grade.
- Treat ungraded items as 0 – Items that do not have a grade inputted are counted as 0 in the final grade.
NOTE: Treat ungraded items as 0 is the recommended setting for maximum flexibility.
- Ensure the Auto Update box is selected to keep final grades updated in the grade book.
- Select Continue.
Step 4: Choose Default Grade Scheme
- Keep the grade scheme as the percentage scheme default.
NOTE: Percentage scheme is recommended as the default. Letter grade schemes may be selected at the end of the semester to facilitate the conversion of grades to letters. Letter grades can then be exported as Excel files to be uploaded into Carleton Central..
- Select Continue.
Step 5: Managing View Display Options
- Enter the number of decimal places that will be displayed in the grade book. The number must be between 0-5.
NOTE: The number of decimal places is for the Enter Grades view only. Manage grades will still show several decimal places.
- Select Continue.
Step 6: Student View Display Options
- Customize the following Student View Display Options:
NOTE: These settings only apply if the final grade has been released to students.
- Points Grade – Grades will be displayed to students as a point value Ex. 75/100
- Weighted Grade – Grades will be displayed to students as a percentage Ex. 75%
- Grade Scheme Symbol – Grades will be displayed to students as a symbol (letter grade) Ex. B+ NOTE: Only select this option if you have set up a grade scheme
- Grade Scheme Colour – If a grade scheme has been set up, the student’s grade will have a shaded background colour that corresponds to the grade scheme symbol. Ex. a green background for an A grade.
- Decimals displayed – Enter the number of decimals used for student grade calculations. The default is 2. The number must be between 0-5.
- Characters Displayed – This setting determines how many characters of a Text grade item display on the user list. The default is 50 characters.
- Final Grade Calculation – Select this box if you want students to view their final grade calculation.
- Select Continue.
Step 7: Grades Setup Summary
- Review your Grades Setup Summary .
- Select Finish.
TIP: Select Go Back to return to previous steps and adjust any of your grade settings.
You have now set up your gradebook and can begin adding categories.
NOTE: You can change these settings by accessing the Grades tool Settings gear after you have setup your gradebook. You do not need to use the Setup Wizard again.
Set up Grade Categories
Grade categories allow you to organize and categorize the items in your gradebook. You can use categories to group assessments in your gradebook, such as assignments, quizzes, or discussions.
See the D2L video tutorial or follow the instructions below:
To Set Up a Grade Category
- Log into Brightspace using your MyCarletonOne credentials.
- On the Brightspace homepage, locate your course in one of the following ways:
- Select the course tile under the My Courses widget.
- Select the Course Selector Grid and select the course from the drop-down menu. If you are enrolled in more than 20 courses, you can search for the course name using the search bar.
- In the navbar, select Progress.
- In the drop-down menu, select Grades.
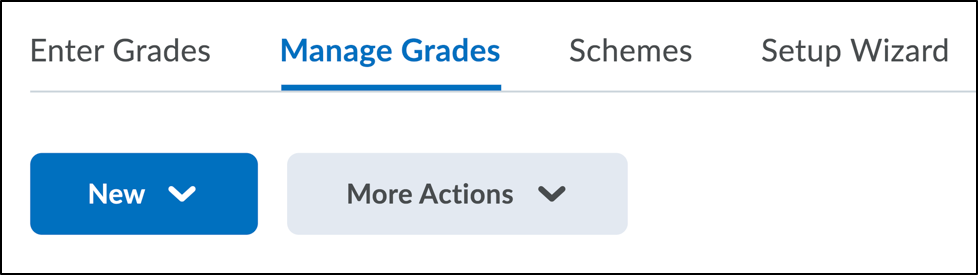
- Select the Manage Grades tab.

- Select the New button.
- In the drop-down menu, select Category.
- On the New Category page, configure your category settings under the following headings:
- General
- Enter a name for your category.
- If your Category name is complex, you can choose to add a Short Name which will appear in the grade spreadsheet.
- To add a description (optional) for the category, select Show Description to enter a description in the HTML editor.
- Grading
NOTE: The settings under the grade heading will differ depending on whether you have set up your gradebook using a weighted or points grade calculation system.
- If your gradebook is set up using a weighted system:
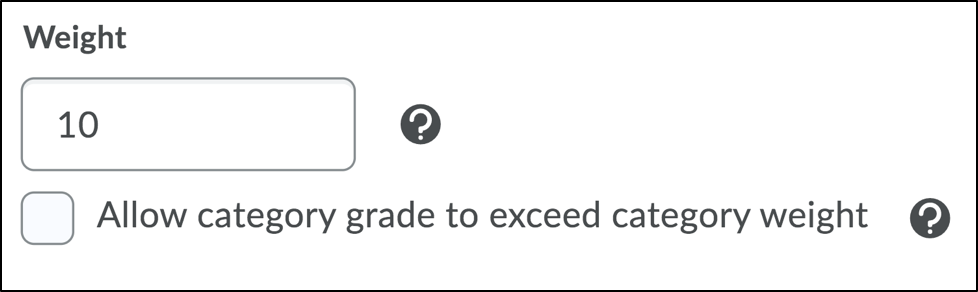
- Enter a weight for the category. Brightspace defaults to a weight of 10. Check the option of allow the category grade to exceed the category weight if needed.
- Select one of the following Distribution options:
- Manually assign weight to items in the category – Choose this option if the grade items in your category will have different weights.
- Distribute weight by points across all items in the category – Choose this option to distribute the weight according to the number of points given for each item in the category.
- Distribute weight evenly across all items – Choose this option to make all grade items in your category evenly weighted. You can enable Brightspace to automatically drop the highest or lowest grade items in the category by entering the number of non-bonus items to drop for each user (optional).
NOTE: The default is for you to manually assign weight to each item in the category.
- Enter a weight for the category. Brightspace defaults to a weight of 10. Check the option of allow the category grade to exceed the category weight if needed.
- If your gradebook is set up using a points system:
- Select Distribute points across all items.
- Enter the number of points per item.
- If your gradebook is set up using a weighted system:
- General
- Adjust any display options as desired.
- Select Save and Close.
Your grade category will now appear in blue under the “Manage Grades” tab of your gradebook (see example of an “Assignments” grade category below).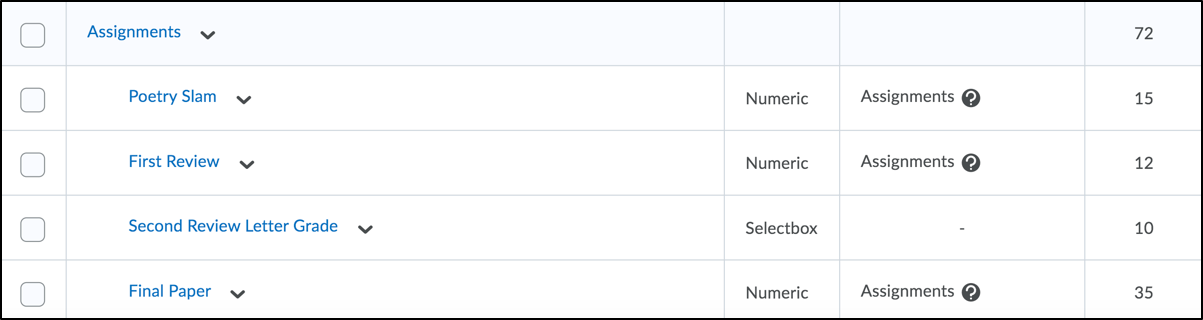
Create Grade Items
There are multiple avenues for setting up a Grade Item in Brightspace. Depending on how you choose to set up the activities and gradebook in your course, you may find that one method is more suited to your needs. Grade items can be created within the gradebook or you can create/link a gradebook item through a tool, such as an assignment, quiz, or discussion.
- How to create or link a grade item through a Brightspace assessment tool (e.g. Quiz, Assignment, Discussion)
- How to create a grade item in the gradebook
Should I create a grade item first or an assessment (e.g. Quiz, Assignment, Discussion) first?
It does not matter which is created first as long as you verify your assessments are linked in the gradebook.
See the D2L video tutorial or follow the instructions below:
Create or link a grade item through a Brightspace assessment tool
You can link grade items to Brightspace Discussion Topics, Assignments and Quizzes. Within each tool you can link to already existing grade items, or create new grade items for each assessment.
Linking a Discussion Topic to a Grade Item
You have the option to link a discussion topic to an existing grade item, or to create a new grade item within the discussion topic creation experience.
To link your Discussion topic to an existing grade item
- Log into Brightspace using your MyCarletonOne credentials.
- On the Brightspace homepage, locate your course in one of the following ways:
- Select the course tile under the My Courses widget.
- Select the Course Selector Grid and select the course from the drop-down menu. If you are enrolled in more than 20 courses, you can search for the course name using the search bar.
- In the navbar, select Tools.
- Select Discussions in the drop-down menu.
- Locate an existing discussion or create a new discussion.
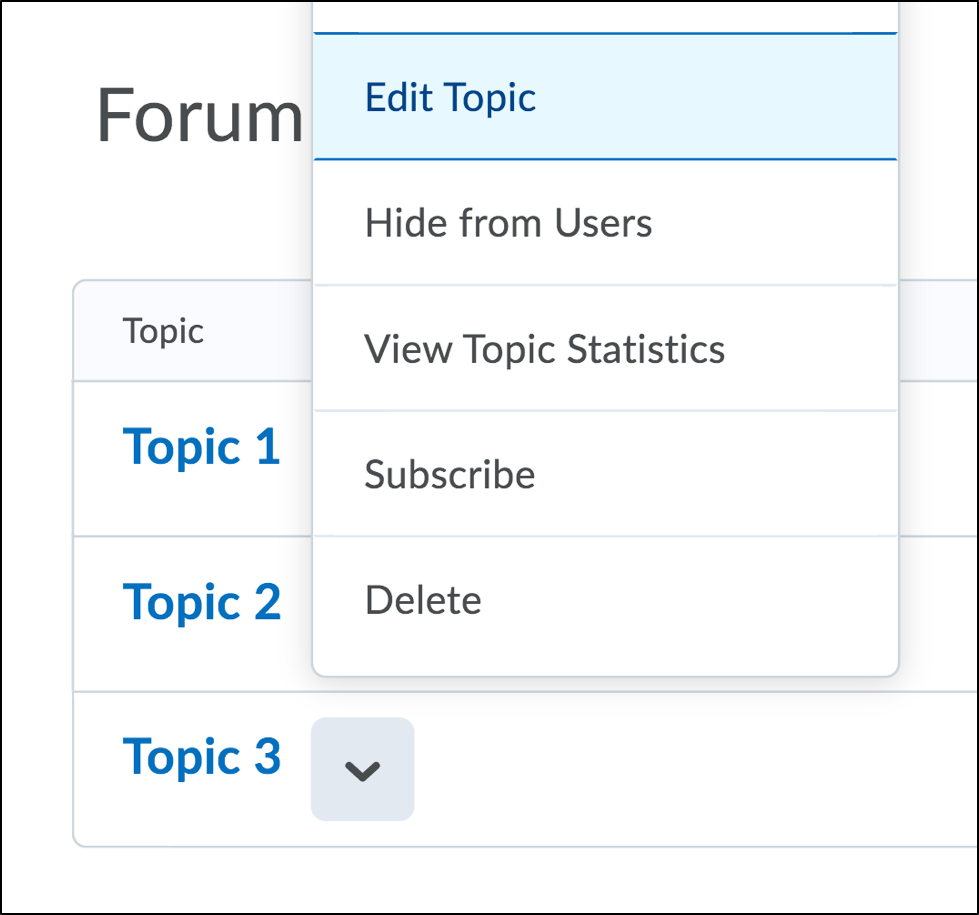
- To edit an existing discussion: Select the arrow
 next to the discussion topic you want to connect to a grade item, then select Edit Topic.
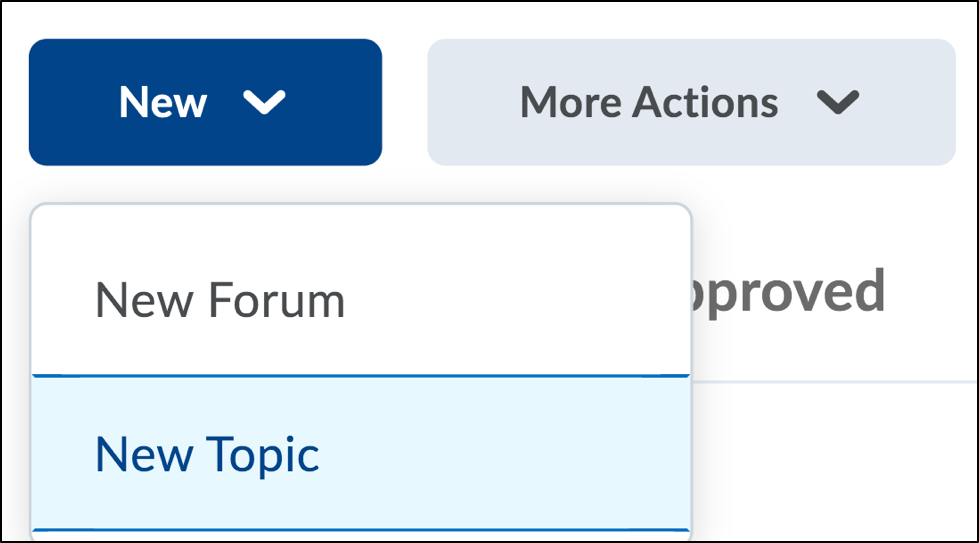
- To create a new discussion: Select the New Button, then select New Topic.
NOTE: You will need to add a Topic name before you can access grade item settings in the Assessments tab.
- To edit an existing discussion: Select the arrow
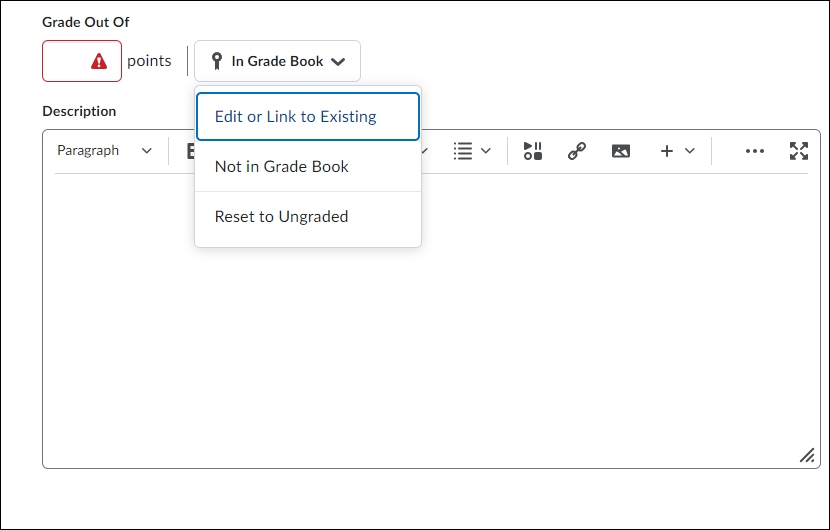
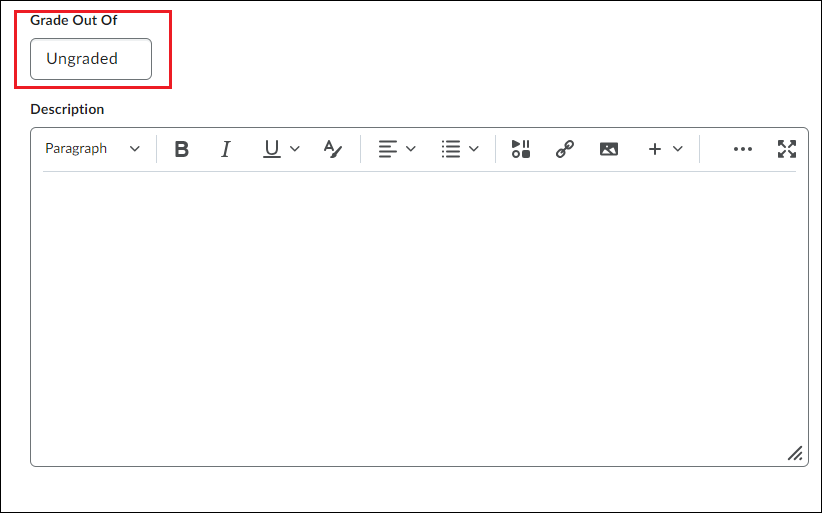
- Select the Ungraded button in the Grade Out Of menu.
- Enter the number of points for the Discussion Topic in the Grade Out Of field.
- Select the drop down menu.
- Select Edit or Link to Existing.
- Select Link to an existing grade item and select the grade item from the drop down menu.
- Select OK when you are done.
- Select Save and Close when you are finished editing your settings.
To create a new grade item within a Discussion topic
- Log into Brightspace using your MyCarletonOne credentials.
- On the Brightspace homepage, locate your course in one of the following ways:
- Select the course tile under the My Courses widget.
- Select the Course Selector Grid and select the course from the drop-down menu. If you are enrolled in more than 20 courses, you can search for the course name using the search bar.
- In the navbar, select Tools.
- Select Discussions in the drop-down menu.
- Locate an existing discussion or create a new discussion.
- To edit an existing discussion: Select the arrow next to the discussion topic you want to connect to a grade item, then select Edit Topic.
- To create a new discussion: Select the New Button, then select New Topic.
NOTE: You will need to add a Topic name before you can access grade item settings in the Assessments tab.
- To edit an existing discussion: Select the arrow
- Select the Ungraded button in the Grade Out Of menu.
- Enter the number of points for the Discussion Topic in the Grade Out Of field.
- Select the drop down menu.
- Select Edit or Link to Existing.
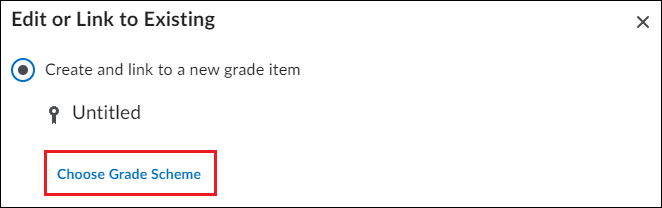
- Select Create and link to a new grade item.
NOTE: The name of the created grade item will be the same as the linked Topic.
- Select Choose Grade Scheme.
- Select the grade scheme from the drop down menu.
- Select OK.
- Select Save and Close when you are finished editing your settings.
Linking an Assignment to a grade item
You have the option to link an assignment to an existing grade item, or to create a new grade item within the assignment creation experience.
To Link your assignment to an existing grade item
- Log into Brightspace using your MyCarletonOne credentials.
- On the Brightspace homepage, locate your course in one of the following ways:
- Select the course tile under the My Courses widget.
- Select the Course Selector Grid and select the course from the drop-down menu. If you are enrolled in more than 20 courses, you can search for the course name using the search bar.
- In the navbar, select Tools.
- Select Assignment in the drop-down menu.
- Locate an existing Assignment or create a new Assignment.
- To edit an existing assignment: Select the arrow next to the assignment you want to connect to a grade item, then select Edit Assignment.
- To create a new assignment: Select New assignment.
- To edit an existing assignment: Select the arrow
- Select the Ungraded button in the Grade Out Of menu.
- Enter the number of points for the assignment in the Grade Out Of field.
- Select the drop down menu.
- Select Edit or Link to Existing.
- Select Link to an existing grade item.
- Select the grade item from the drop down menu.
- Select OK when you are done.
- Select Save and Close when you are finished editing your settings.
To create a new grade item within an Assignment
- Log into Brightspace using your MyCarletonOne credentials.
- On the Brightspace homepage, locate your course in one of the following ways:
- Select the course tile under the My Courses widget.
- Select the Course Selector Grid and select the course from the drop-down menu. If you are enrolled in more than 20 courses, you can search for the course name using the search bar.
- In the navbar, select Tools.
- Select Assignment in the drop-down menu.
- Locate an existing Assignment or create a new Assignment.
- To edit an existing assignment: Select the arrow next to the assignment you want to connect to a grade item, then select Edit Assignment.
- To create a new assignment: Select New assignment.
- To edit an existing assignment: Select the arrow
- Select the Ungraded button in the Grade Out Of menu.
- Enter the number of points for the assignment in the Grade Out Of field.
- Select the drop down menu.
- Select Edit or Link to Existing.
- Select Create and link to a new grade item.
NOTE: The name of the created grade item will be the same as the linked Assignment.
- Select Change Grade Type and Scheme.

- Under Grade Type select one of the following options :
- Numeric – Grade users by assigning a value out of a specified total number of points.
E.g., 8/10 - Selectbox – Grade users by selecting the grade scheme level that best matches their achievement.
E.g., “Very Good” or “B+”
- Numeric – Grade users by assigning a value out of a specified total number of points.
- Select a Grade Scheme from the drop-down menu.
- Select OK when you are done.
- Select Save and Close when you are finished editing your settings. You have now created a grade item that is linked to this assignment.
Linking a Quiz to a grade item
You have the option to link an Quiz to an existing grade item, or to create a new grade item within the Quiz creation experience.
To link a Quiz to an existing grade item
- Log into Brightspace using your MyCarletonOne credentials.
- On your Brightspace homepage, locate your course in one of the following ways:
- Select your course under My Courses.
- Select the Course selector grid , then search for your course name or select your course from the drop-down menu.
- Select Tools in the course navbar.
- In the drop-down menu, select Quizzes.
- Locate an existing quiz or create a new quiz.
- To edit an existing quiz: Select the arrow next to the assignment you want to connect to a grade item, then select Edit.
- To create a new quiz: Select the New Quiz Button.
- To edit an existing quiz: Select the arrow
- Enter the number of points for the Quiz in the Grade Out Of field.
- Select the Grade Out Of drop-down menu.
- Select Edit or Link to Existing.
- Select Link to an existing grade item.
- Select the grade item from the drop down menu.
- Select OK when you are done.
- Select Save and Close when you are finished editing your settings.
To create a new grade item within a Quiz
- Log into Brightspace using your MyCarletonOne credentials.
- On your Brightspace homepage, locate your course in one of the following ways:
- Select your course under My Courses.
- Select the Course selector grid , then search for your course name or select your course from the drop-down menu.
- Select Tools in the course navbar.
- In the drop-down menu, select Quizzes.
- Locate an existing quiz or create a new quiz.
- To edit an existing quiz: Select the arrow next to the assignment you want to connect to a grade item, then select Edit Quiz.
- To create a new quiz: Select the New Quiz Button.
- To edit an existing quiz: Select the arrow
- Enter the number of points for the Quiz in the Grade Out Of field.
- Select the Grade Out Of drop-down menu.
- Select Edit or Link to Existing.
- Select Create and link to a new grade item.
NOTE: The name of the created grade item will be the same as the linked Assignment.
- Select Choose Grade Scheme.
- Select a Grade Scheme from the drop-down menu.
- Select OK when you are done.
- Select Save and Close when you are finished editing your settings. You have now created a grade item that is linked to this Quiz.
Create a grade item in the Gradebook
- Log into Brightspace using your MyCarletonOne credentials.
- On the Brightspace homepage, locate your course in one of the following ways:
- Select the course tile under the My Courses widget.
- Select the Course Selector Grid and select the course from the drop-down menu. If you are enrolled in more than 20 courses, you can search for the course name using the search bar.
- In the navbar, select Progress.
- In the drop-down menu, select Grades.
- Select the Manage Grades tab.
- Select the New button.
- In the drop-down menu, select Item
- Choose a grade item type from the list of options. Numeric is the most common
- Enter the name of the Discussion into the Name field.
- Include a Short Name (abbreviated item name) for the gradebook, if needed.
- If you have set up categories in your gradebook, select a grade category from the drop-down menu.
- Enter the maximum points (your grading range) for the grade item.
- Enter the weight (%) that you want the grade item to contribute to the category or final grade
- The default grading scheme (how student’s will view their grades) is Percentage. To adjust how grades will be displayed, select the Grade Scheme drop-down menu and select one of the options (e.g. Pass/Fail, Letter Grades)
- Select Save.
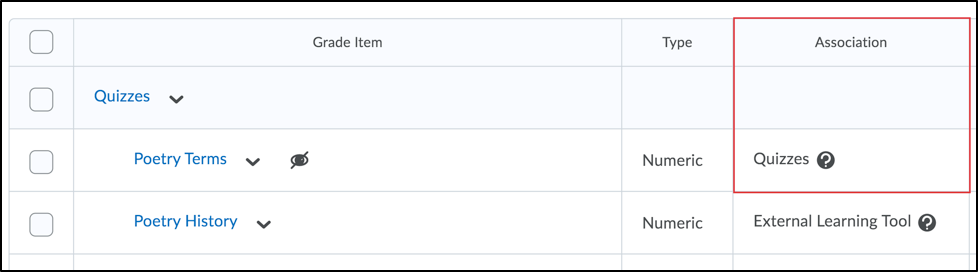
Verify your grade items are linked to your activity in Brightspace
- Log into Brightspace using your MyCarletonOne credentials.
- On the Brightspace homepage, locate your course in one of the following ways:
- Select the course tile under the My Courses widget.
- Select the Course Selector Grid and select the course from the drop-down menu. If you are enrolled in more than 20 courses, you can search for the course name using the search bar.
- In the navbar, select Progress.
- In the drop-down menu, select Grades.
- Select the Manage Grades tab.
- Verify the grade item is linked in the Association column of your grades table. You should see the name of the associated tool and a question mark. Select the question mark icon
 to view confirmation of the associated activity name.
Grade Category Settings Options
- Short Name: If your Category name is complex, you can choose to add a Short Name which will appear in the grade spreadsheet.
- Description: Adding a Description of the Category is optional.
- Manually assign weights to items in the category: The default is for you to manually assign the points and the weight to each item in the category.
- Distribute weights by points across all items in the category: If you choose this option, the gradebook will calculate the weight based on the number of points you assign to each item in the category.
- Distribute weights evenly across all items: This option will default to distributing the points evenly however, it also allows you to choose between dropping a specified number of non-bonus items for each user. You have the choice to drop the highest non-bonus items or the lowest non-bonus items. Note that this option displays in the learner view of grades from the first graded assignment as “Dropped item!”.
- Exclude from Final Grade Calculation: To exclude a Category from the final grade calculation, set the Category weight to zero.
- Student View: Select from the three options if you want to modify grade information in the student view. The default is that students will see the points, the weight and the grade scheme symbol.
NOTE: Options for setting up Items in the gradebook will vary depending on whether you add the Item to a Category and on the Grade Item Type you have selected. The most basic steps are listed and a table explaining options is provided.
Brightspace Video Resources
- Understanding the Grades Tool in Brightspace
- Create a Grade category
- Associate an activity with a grade item
- Create a Grade Scheme
- Enter grades
Brightspace Support
 Teaching and Learning Services Contact Information
- TLS Support – Visit the TLS Support Portal to create a support request.
- Drop-In Support – Tuesdays, Wednesdays, and Thursdays from 10AM to 12PM at the Future Learning Lab, 4th Floor of the MacOdrum Library.
- TLS Hours of Operation – Monday to Friday 8:30AM to 4:30PM.
 D2L Brightspace Technical Support Contact Information
- Available: 24 hours a day, 7 days a week, 365 days a year
- EMAIL: Fill out the Email Support Request Form
- PHONE: 1-877-325-7778
Was this page helpful?
6 people found this useful
Still need help? Contact us