You can enter grades into a spreadsheet and import them into D2L Brightspace using a .csv, .tsv or .txt file. You can also create new grade items through an import file by adding a column to the file. Any grades you import for discussion grade items and assignment grade items are also synchronized back to Discussions and Assignments. To view an example of a .csv file that is ready for importing, see the Sample Import File.
| NOTES: |
|
Export Grades
You can export grades from your Brightspace gradebook to an Excel or CSV file.
- Log into Brightspace using your MyCarletonOne credentials.
- On the Brightspace homepage, locate your course in one of the following ways:
- Select the course tile under the My Courses widget.
- Select the Course Selector Grid
 and select the course from the drop-down menu. If you are enrolled in more than 20 courses, you can search for the course name using the search bar.
- In the navbar, select Progress.

- In the drop-down menu, select Grades.
- Select the Enter grades tab.

- Select Export.
- Configure the following export options:
- Export Grade Items for: Select All Users or Groups from the drop-down menu.
- Key Field: Org Defined ID is selected by default, meaning that the export will identify students by their ID. You can select username, or both to customize the export.
NOTE: If you intend to import the file back into the same or another course page, select the Both option for the exported document. Brightspace requires both key fields to complete the import. - Grade Values: Points grade is selected by default.
- User Details: Select any additional identification options you want to include in the export.
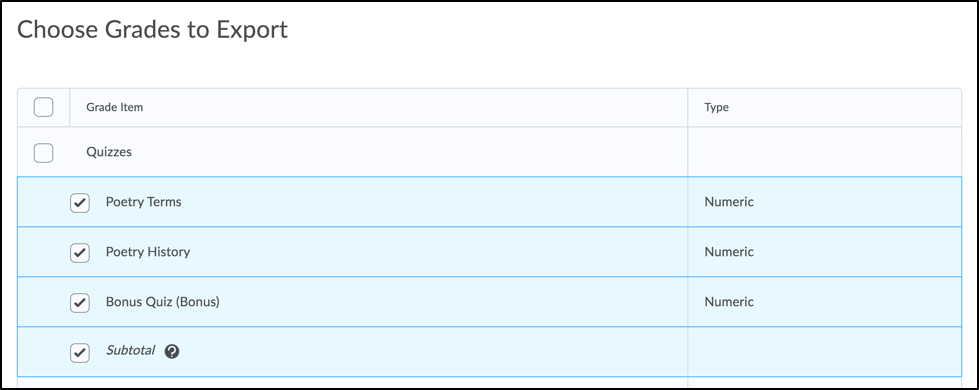
- Scroll down to Choose Grades to Export, then select or deselect the grade items you want to export.
- Select Export to CSV or Export to Excel.
- When the export is complete, select Download.
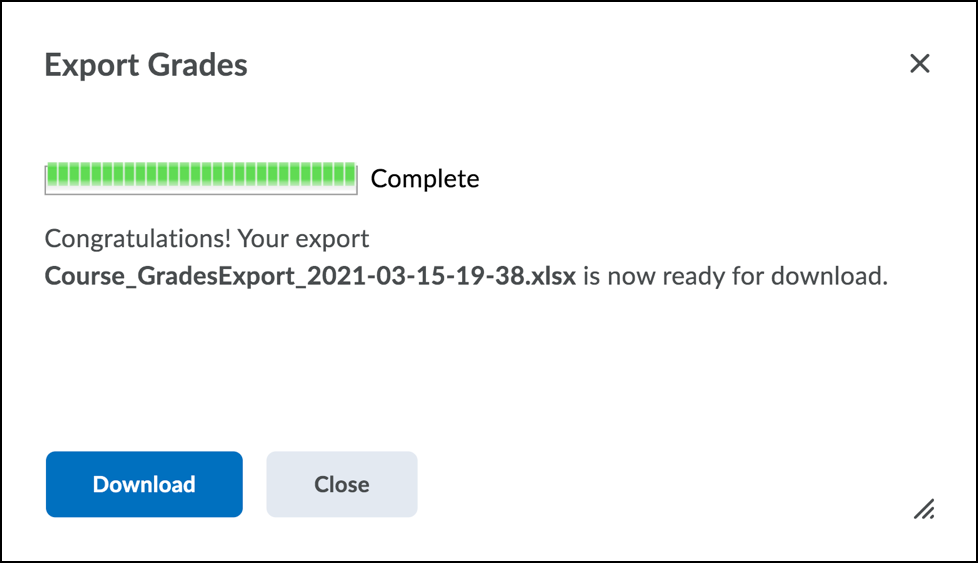
You will now be able to open the exported file on your computer. Where you access the downloaded file is dependent on your Operating System and browser.
Prepare Your File for Import
| WARNING: The import file must follow a standard format. See D2L’s File Format for Importing Grades for more information. |
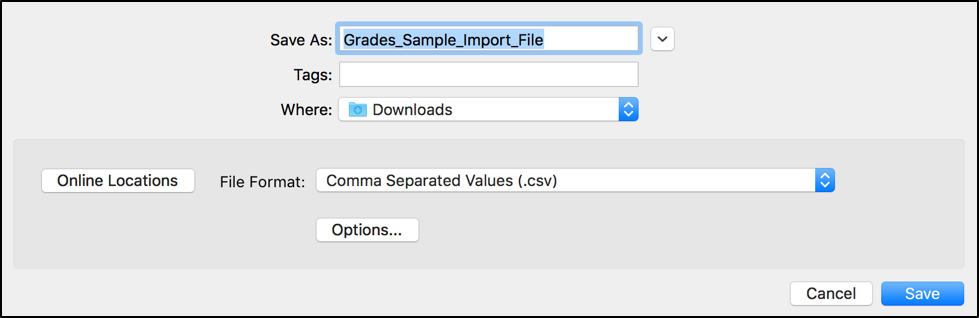
- Save your Excel workbook (e.g., your .xlsx file) as a .csv file by selecting File > Save As.
- Select the file format extension .csv, then select Save.
Import Grades
| NOTE: If you are exporting and importing grades across course pages for a full-credit course, there are various settings that may need to be adjusted depending on how your gradebooks are set up. Please contact TLS to request a consultation. |
- Log into Brightspace using your MyCarletonOne credentials.
- On the Brightspace homepage, locate your course in one of the following ways:
- Select the course tile under the My Courses widget.
- Select the Course Selector Grid and select the course from the drop-down menu. If you are enrolled in more than 20 courses, you can search for the course name using the search bar.
- In the navbar, select Progress.
- In the drop-down menu, select Grades.
- Select the Enter grades tab.
- Select Import.
- Select Choose file.
- Select the .csv file you want to import, then select Open.
TIP: You can opt to select the Item Creation checkbox if you would like to create a new grade item when an unrecognized item is found in your file. - Select Continue. You will see a Processing… message while your file is loading.
- You will see a page displaying any errors and warnings that were found. Select Continue.
- You will see a preview of the new grades for each student. Select Import.
You will see an “Imported Successfully” message and your imported grades will appear under the Enter Grades tab of your gradebook.
Was this page helpful?
10 people found this useful
Still need help? Contact us