- Accessing the Manage Dates Tool
- Overview of the Manage Dates Table
- Filter the Manage Dates Table
- Advanced Filter Options
- Bulk Edit Dates
- Bulk Offset Dates
- Edit Dates for a Single Item
- Offset Dates for a Single Item
- Change Course Start and End Dates
The Manage Dates tool provides a quick way to view and adjust dates in your course from one central place. You can edit the start, end, and due dates for quizzes, assignments, discussions, surveys, content items, etc. Dates can be changed individually or using the bulk edit and bulk offset features. The Manage Dates tool can be used to adjust the dates for course content that has been copied over from a previous term/year.
Accessing the Manage Dates Tool
- Log in to Brightspace with your MyCarletonOne credentials.
- On the Brightspace homepage, locate your course in one of the following ways:
-
- Click on the course tile under the My Courses widget.
- Click the Course Selector Grid
 and select the course from the drop-down menu. If you are enrolled in more than 20 courses, you can search for the course name using the search bar.
-
- In the navbar, click Course Admin.

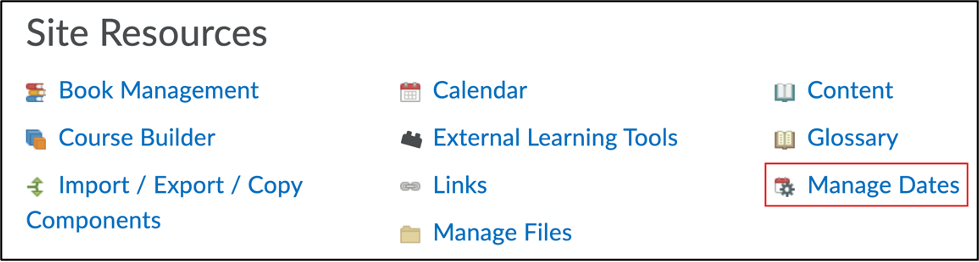
- Under Site Resources, click Manage Dates.
Overview of the Manage Dates Table
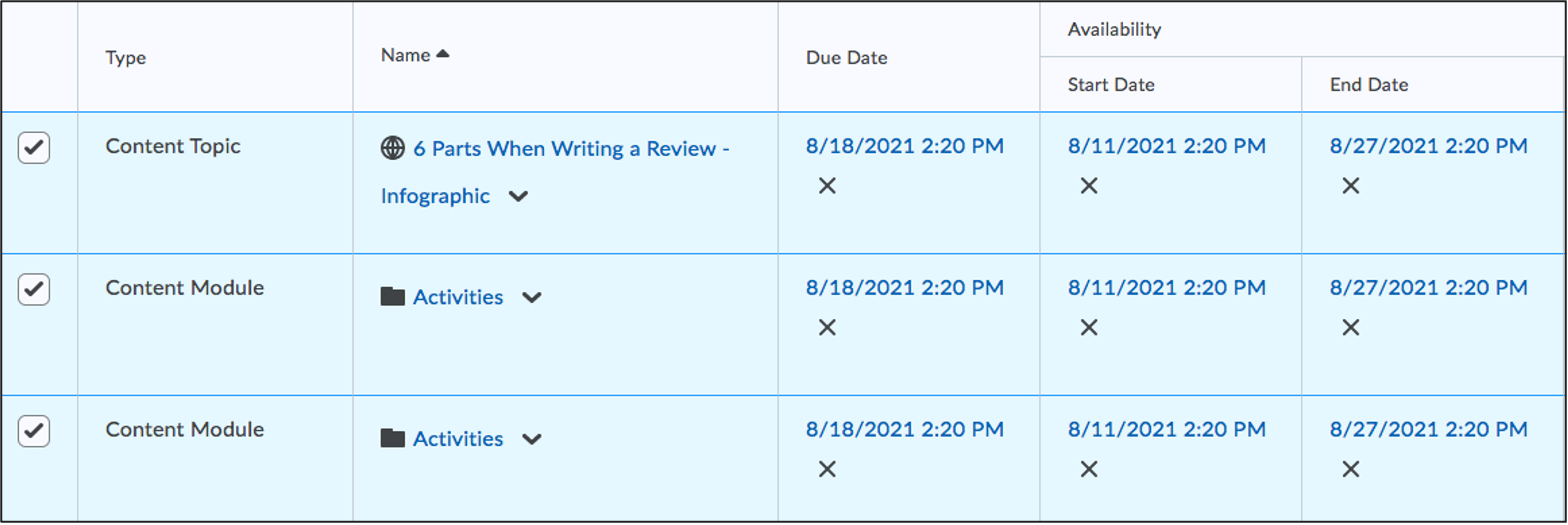
The Manage Dates table provides an overview of the dates, calendar status, and visibility of items in your course. The table is sortable by tool. Each column in the table contains information about the items in your course.
| TIP: By default, the Manage Dates table is sorted in alphabetical order by item name. To sort by a particular column, click on the title of the column. |
| Type | This column indicates the type (i.e., tool) of the course item (e.g., content topic, quiz, assignment). To sort the table by the type of tool, click Type (column title). This will sort the table alphabetically by tool.
TIP: The Filter by Tool option can be used to select which tool types are shown in the table. |
| Name | This column shows the name of the course item. By default, the table is sorted in alphabetical order by item name. |
| Due Date | This column shows the due date for the course item. If there is no due date set, a dash – will appear in this column.
NOTES:
|
| Start Date | This column shows the start date for the course item. If there is no start date set, a dash – will appear in this column.
NOTE: Start dates determine when students can access the item. Before the start date students can see that an item exists, but they cannot access it. If no start date is set, students will be able to access the item immediately (unless it is hidden). |
| End Date | This column shows the end date for the course item. If there is no end date set, a dash – will appear in this column.
NOTE: End dates determine when students will no longer be able to access an item. If no end date is set, students will be able to access the item at any point even if there is a due date set (unless it is hidden). |
| Days | This column indicates the number of days between the Start Date and the End Date. Both a Start and End date must be set to see the number of days. A dash – will appear if either of the two dates have not been set. |
| Calendar | This column indicates whether the course item is visible in the calendar. A check mark in this column indicates that the item is visible in the calendar. For most tools (e.g., quizzes and discussions), you can click on the check box in this column to add or remove the item from the calendar. Items must have a Start Date or End Date to be added to the Calendar. |
| Other Dates | This column shows additional dates that are set beyond the due date, start date and end date. For example, discussion locking or additional quiz submission settings. Other Dates cannot be edited directly within the Manage Dates tool. Clicking on the date in this column will open the editing menu for the tool in another window. |
| Visibility Status | This column shows whether an item is visible to students. There are four visibility states for course items:
|
Filter the Manage Dates Table
The Manage Dates table can be filtered by tool or other advanced filter options. This can be useful to select which course items to view and edit within the table.
To filter by tool:
- Log in to Brightspace with your MyCarletonOne credentials.
- On the Brightspace homepage, locate your course in one of the following ways:
-
- Click on the course tile under the My Courses widget.
- Click the Course Selector Grid and select the course from the drop-down menu. If you are enrolled in more than 20 courses, you can search for the course name using the search bar.
-
- In the navbar, click Course Admin.
- Under Site Resources, click Manage Dates.
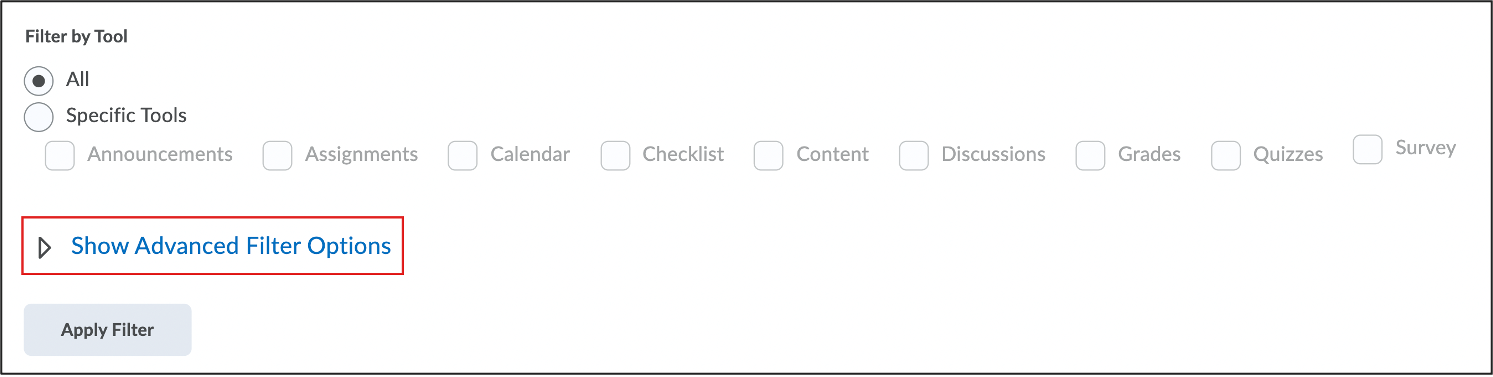
- Under Filter by Tool, select Specific Tools.
- Click the check box next to each of the tools you want to view/edit the dates for.

- Click Apply Filter. You will now see the dates associated with the tool(s) selected in the table.
Advanced Filter Options
The advanced filter options can be used to filter the dates in your course by name, due date, start date, end date, duration or calendar status.
- Follow steps 1-4 above to access the Manage Dates tool.
- Click Show Advanced Filter Options. A list of options will appear below.
- Click the checkboxes to select the filter options you want to use. Fill in the required information.
- Click Apply Filter. You will now see the dates associated with the items that meet the criteria you set in the table.
Bulk Edit Dates
Bulk edit dates is useful to set the same start, end, and/or due date(s) for multiple items simultaneously. This feature can also be used to bulk edit calendar visibility.
| WARNING: All dates set should be checked to ensure there are no issues with the dates set (e.g., during statutory holidays). Check out Carleton’s academic calendar to view the calendar for the academic year. |
To Bulk edit dates:
- Log in to Brightspace with your MyCarletonOne credentials.
- On the Brightspace homepage, locate your course in one of the following ways:
-
- Click on the course tile under the My Courses widget.
- Click the Course Selector Grid and select the course from the drop-down menu. If you are enrolled in more than 20 courses, you can search for the course name using the search bar.
-
- In the navbar, click Course Admin.
- Under Site Resources, click Manage Dates.
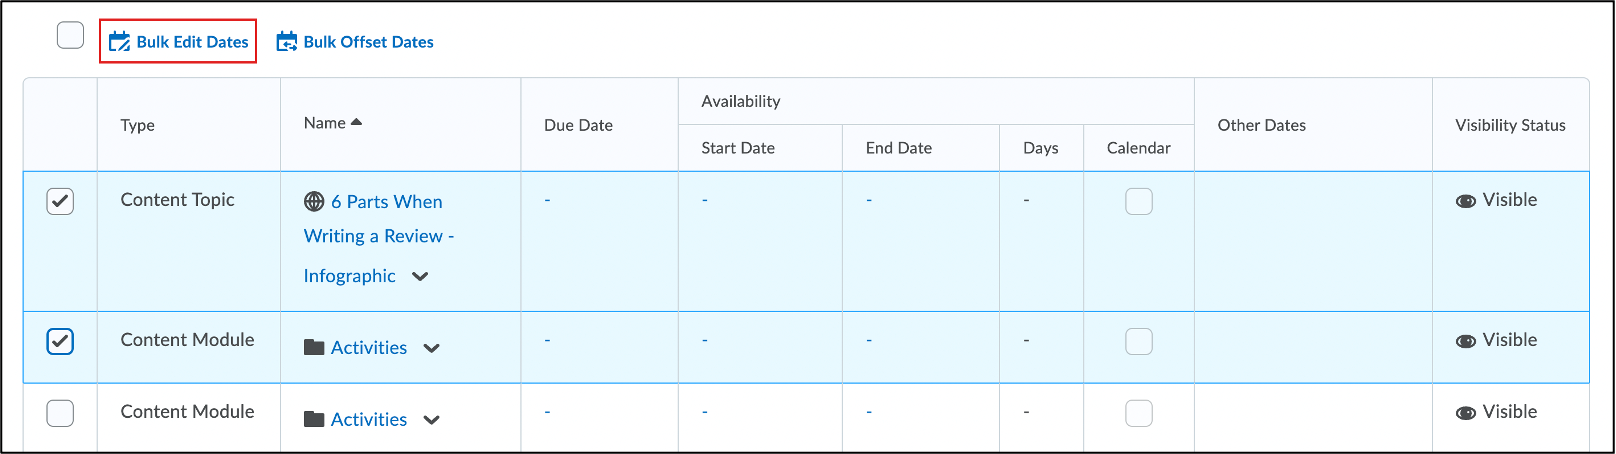
- Click the checkboxes next to the course items you want to bulk edit. If you want to edit the dates for all course items, select the top checkbox next to Bulk Edit Dates.
NOTE: If you have used any filter options, this option will bulk edit the dates for all the items that match the selected filter criteria (not all items in the course). - Click Bulk Edit Dates.
- In the Bulk Edit Dates pop-up window, edit the due dates and availability dates. To adjust the dates, click the check box next to each of the date types you want to add/adjust and set the date/time for each of the selected date types. To remove the date, click on Set and select Remove from the drop-down menu.
- To adjust the calendar visibility, click the check box under Display in Calendar.
TIP: To add the course items to the calendar, select Add to Calendar (default). To remove the course items from the calendar, select Remove from Calendar. - Click Save.
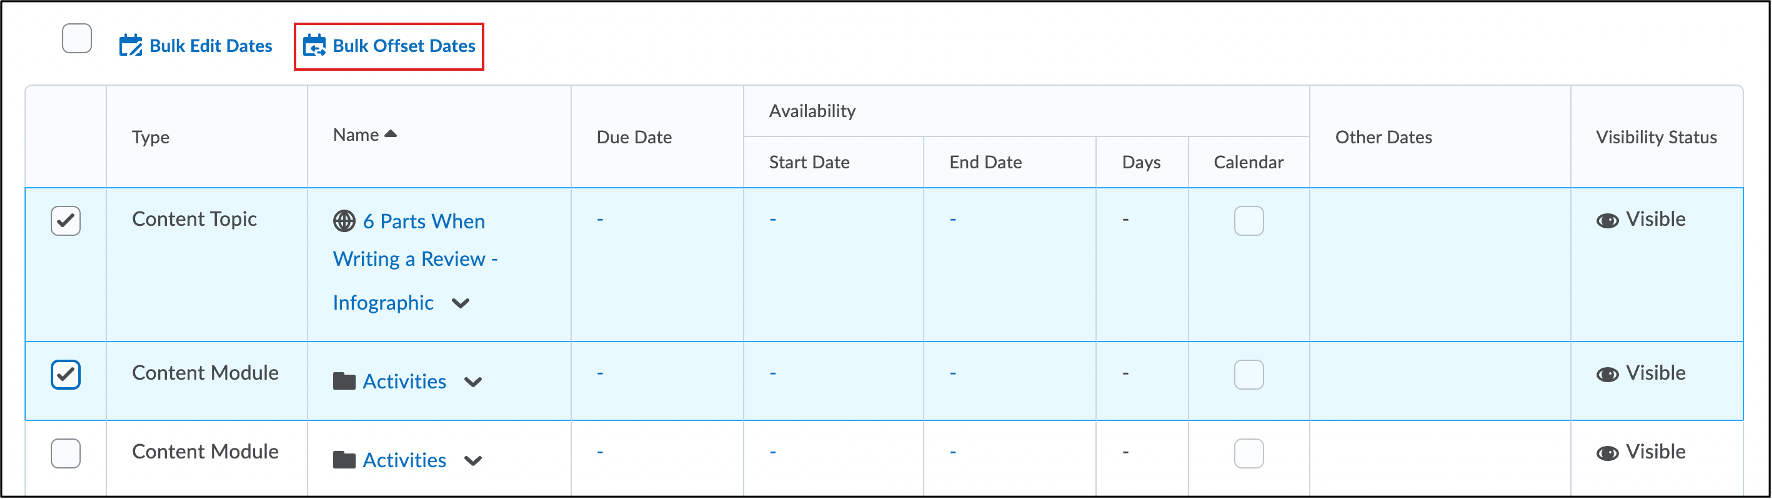
Bulk Offset Dates
Bulk offset dates allows you to move the start, and/or due dates for course items forwards or backwards by a specified number of days. Bulk offset dates is useful for bulk editing/shifting the dates for a course that was brought over from another term or year.
| WARNING: All dates set should be checked to ensure there are no issues with the dates set (e.g., during statutory holidays). Check out Carleton’s academic calendar to view the calendar for the academic year. |
- Log in to Brightspace with your MyCarletonOne credentials.
- On the Brightspace homepage, locate your course in one of the following ways:
-
- Click on the course tile under the My Courses widget.
- Click the Course Selector Grid and select the course from the drop-down menu. If you are enrolled in more than 20 courses, you can search for the course name using the search bar.
-
- In the navbar, click Course Admin.
- Under Site Resources, click Manage Dates.
- Click the checkboxes next to the course items you want to bulk offset.
- Click Bulk Offset Dates.
- In the Bulk Edit Dates pop-up window, select the following:
- Under Dates to Offset, select the date type(s) to offset.
- Select one of the following options:
- Offset by direction and range – This option can be used to move dates backwards or forwards by a specified number of days. Use this option if you know how many days you would like to offset the dates by. If this option is selected, the following settings will need to be configured:
- Days: The first set of options refers to the number of days you want to offset the dates by. Select a direction (forward or backwards). Under Range, enter the number of days you want to offset the dates by. If you do not wish to offset the dates by days leave this field empty.
- Hours: The second set of options refers to the number of hours you want to offset the dates by. Select a direction (forward or backwards). Under Range, enter the number of hours you want to offset the dates by. If you do not wish to offset the dates by a specified number of hours leave this field empty.
- Calculate range between two dates – This option can be used to move dates backwards or forwards based on a specified start and end date. The number of days will be auto calculated based on the dates indicated. This option is recommended for courses that were brought over from another semester or year. If this option is selected, you will need to enter the following dates:
- In the From field, put in a date. If you are bulk offsetting dates from a previous course, enter the Start Date from the previous course (i.e., course the content was copied from).
- In the To field, put in a date. If you are bulk offsetting dates from a previous course, enter the start date for the current course. The days and hours will be calculated automatically and can be seen at the bottom of the pop-up.
NOTE: Setting a different time for the “From” and “To” field will shift the times for the start, end, and/or due dates. To keep the same time, only adjust the date (not time). For example, if you want the due date to stay 11:59pm make sure the time for the “From and “To” field are the same (default).
- Offset by direction and range – This option can be used to move dates backwards or forwards by a specified number of days. Use this option if you know how many days you would like to offset the dates by. If this option is selected, the following settings will need to be configured:
- Click Save.
Edit Dates for a Single Item
Dates can be edited for an individual course item.
To edit dates for a course item:
- Log in to Brightspace with your MyCarletonOne credentials.
- On the Brightspace homepage, locate your course in one of the following ways:
-
- Click on the course tile under the My Courses widget.
- Click the Course Selector Grid and select the course from the drop-down menu. If you are enrolled in more than 20 courses, you can search for the course name using the search bar.
-
- In the navbar, click Course Admin.
- Under Site Resources, click Manage Dates.
- Click the arrow
 next to the item you wish to edit.
 - Select Edit Dates from the drop-down menu.
- In the Edit Dates pop-up window, select or deselect the checkboxes to adjust the Due Date or Availability Dates.
- Click Save.
Offset Dates for a Single Item
- Log in to Brightspace with your MyCarletonOne credentials.
- On the Brightspace homepage, locate your course in one of the following ways:
-
- Click on the course tile under the My Courses widget.
- Click the Course Selector Grid and select the course from the drop-down menu. If you are enrolled in more than 20 courses, you can search for the course name using the search bar.
-
- In the navbar, click Course Admin.
- Under Site Resources, click Manage Dates.
- Click the arrow next to the item you wish to edit.
- Select Edit Dates from the drop-down menu.
- In the Edit Dates pop-up window, select the following:
- Under Dates to Offset, select the date type(s) to offset.
- Select one of the following options:
- Offset by direction and range – This option can be used to move dates backwards or forwards by a specified number of days. Use this option if you know how many days you would like to offset the dates by. If this option is selected, the following settings will need to be configured:
- Days: The first set of options refers to the number of days you want to offset the dates by. Select a direction (forward or backwards). Under Range, enter the number of days you want to offset the dates by. If you do not wish to offset the dates by days leave this field empty.
- Hours: The second set of options refers to the number of hours you want to offset the dates by. Select a direction (forward or backwards). Under Range, enter the number of hours you want to offset the dates by. If you do not wish to offset the dates by a specified number of hours leave this field empty.
- Calculate range between two dates – This option can be used to move dates backwards or forwards based on a specified start and end date. The number of days will be auto calculated based on the dates indicated. This option is recommended for courses that were brought over from another semester or year. If this option is selected, you will need to enter the following dates:
- In the From field, put in a date. If you are offsetting dates from a previous course, enter the Start Date from the previous course (i.e., course the content was copied from).
- In the To field, put in a date. If you are offsetting dates from a previous course, enter the start date for the current course. The days and hours will be calculated automatically and can be seen at the bottom of the pop-up.
NOTE: Setting a different time for the “From” and “To” field will shift the times for the start, end, and/or due dates. To keep the same time, only adjust the date (not time). For example, if you want the due date to stay 11:59pm make sure the time for the “From and “To” field are the same (default).
- Offset by direction and range – This option can be used to move dates backwards or forwards by a specified number of days. Use this option if you know how many days you would like to offset the dates by. If this option is selected, the following settings will need to be configured:
- Click Save.
Change Course Start and End Dates
See the Changing Course Start and End Dates page for instructions.
Was this page helpful?
no one has found this useful yet.
Still need help? Contact us